How to Use the Pen Tool in Adobe Illustrator
This page may contain links from our sponsors. Here’s how we make money.
It would not be wrong to say that the Pen Tool in Adobe Illustrator is the most helpful and widely used tool with some amazing features. Whether you're a beginner or an expert, you'll always use the Pen Tool in almost every design within Illustrator. For simple graphics, logos, illustrations, poster design, or a complete brand identity design, the Pen Tool is incredibly useful.
When it comes to handling the basic tasks in Illustrator, such as tracing an image or creating a clipping mask, or creating vector graphics, you'll find the Pen Tool as your best friend.
If you're a beginner, you might have heard of using the Pen Tool by graphic designers, and when you try it yourself, you might think of it as a complicated tool. Obviously, it's not as simple as it seems. But after this tutorial and a bit of practice, you'll become a master at using this tool. Then you'll be amazed to realize what you can do with the Pen Tool.
Learning and mastering the Pen Tool is the first step to becoming a great designer. So, without any further ado, let's get into the tutorial.
Overview of the Pen Tool in Adobe Illustrator
You may be familiar with the fact that Adobe Photoshop and Adobe Illustrator both have a Pen Tool. To some extent, the Pen Tool works in the same way in both programs. But the Pen Tool of Illustrator is considered to be more illustration-oriented or vector oriented as Illustrator is vector-based software.
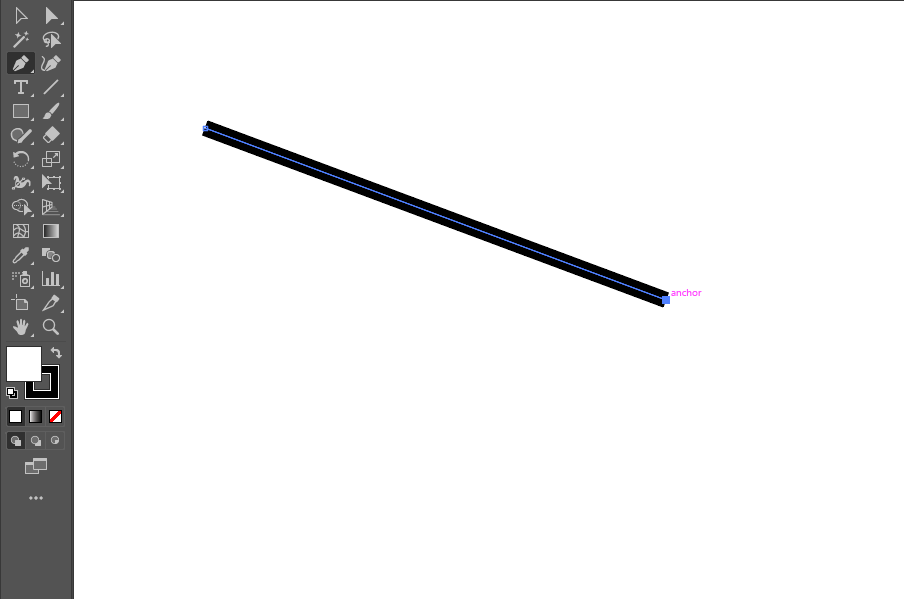
In Illustrator, the Pen Tool is used to draw any type of line, whether it's straight, curved, or zig-zag, etc. Moreover, this powerful tool creates complex shapes, forms, and illustrations in just a few clicks. Furthermore, everything we create or draw using the Pen Tool consists of the Anchor Points.
We can understand the concept of an Anchor Point by stating that whenever a straight line changes its properties (sharp turns, break, or curves), there comes a point that is known as an Anchor Point
Also, everything you create with the Pen Tool, is vector-based, which means you can create anything with the ability to be scaled to infinity without losing sharpness.
Let us dive into the process and features of using the Pen Tool in Adobe Illustrator.
Using the Pen Tool
After you open an image or a new artboard in Adobe Illustrator, you can select the Pen Tool from the Tool Bar/Tool Panel. The icon of the Pen Tool consists of the shape of a simple pen, as shown in the image below.

You can select the Pen Tool by clicking on its icon on the Tool Bar, or you can also use the keyboard shortcut, ‘P.'
Whether you're tracing an image or creating a new illustration, you get to tackle drawing different lines. These can be straight, curved, or any other type of lines. As said earlier, the Pen Tool helps you to draw any line within a few clicks. How it helps us to create different lines is explained below.
Drawing Straight Lines
As we have learned the concept of Anchor Points above, we can say that the simplestthing that we can create with the Pen Tool is a straight line that consists of at two Anchor Points.
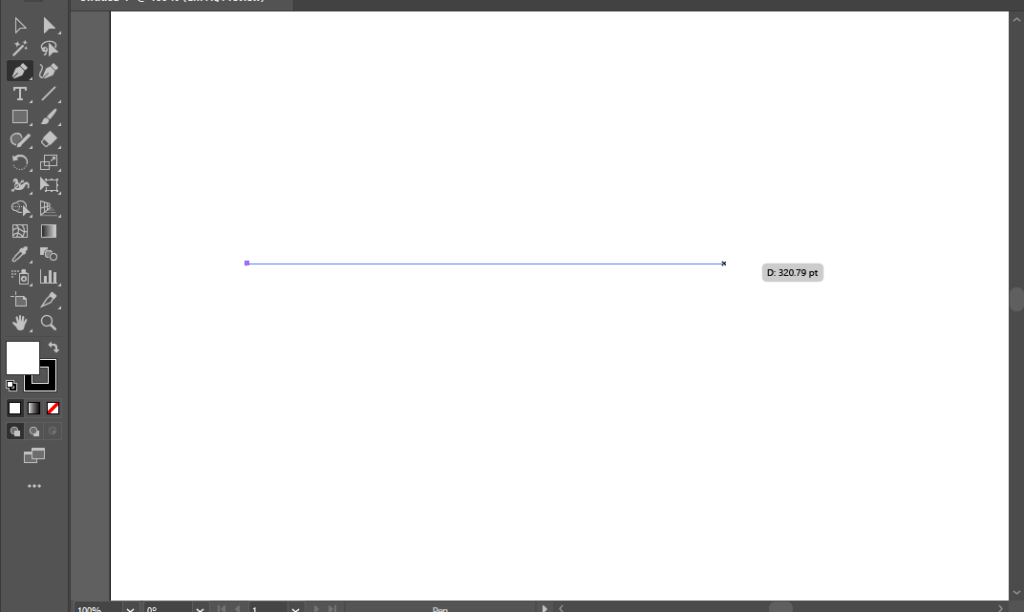
To draw a straight line using the Pen Tool, first, create a new artboard and select the Pen Tool from the Tool Bar or use the shortcut key, ‘P.' After that, bring your cursor to the point where you want your line to start on your artboard. And then, click once on that point. You'll see that an Anchor point will be created.

Wherever you move your cursor, a straight line will keep following the cursor starting from the Anchor Point you've just created;

Now, you can click once anywhere you want to create a straight line connecting both of the points. As you click, you'll notice that another Anchor Point will be added to the artboard and a straight line will be created connecting the Original Anchor Point and the newly created Anchor Point;
You'll notice that wherever you move your cursor, a new path will be there following your cursor connected to the newly created Anchor point. It means you can continue to draw more and more straight lines connected to one another.

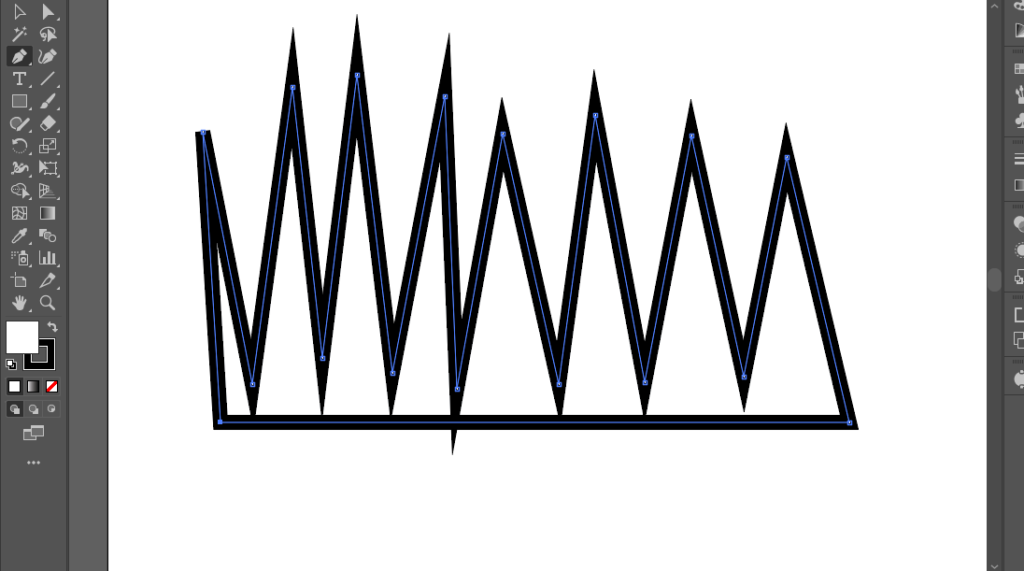
You can create any particular or complex shape by drawing straight lines and connecting the last Anchor Point with the Original Anchor Point. As you connect the last and first Anchor points, you will see that the path will cease to follow your cursor as a shape is created. In the image below, I have created random straight lines, and to make a shape, I connected the last Anchor Pint with the first one;
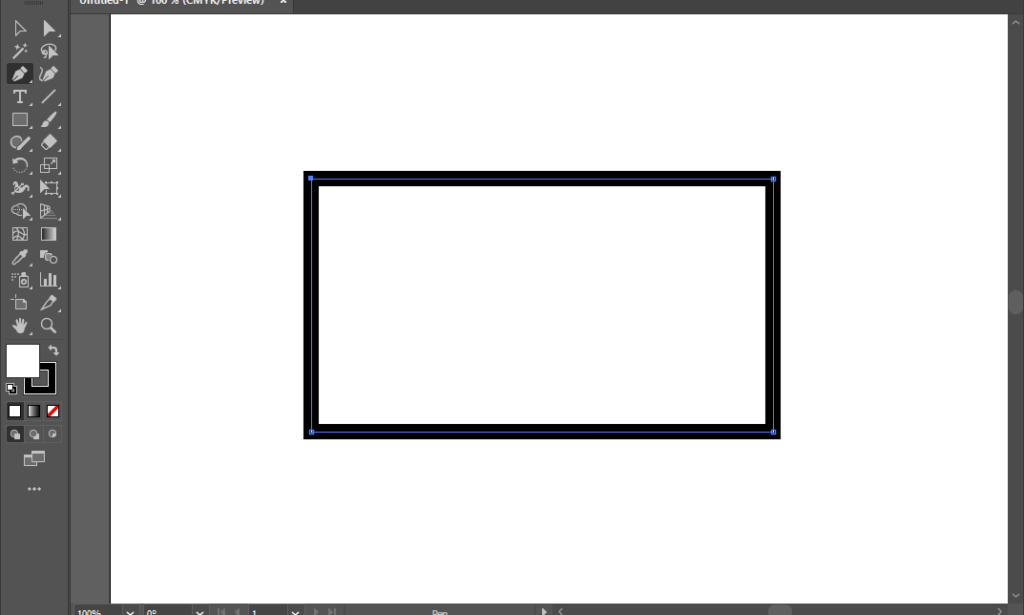
If you want to create the perfect horizontal or vertical lines using the Pen Tool, you can press the ‘Shift' key as you come to add the new Anchor Point on your artboard. For instance, I have created the following rectangle using this method.
Drawing a Curved Path
Creating a curved path using the Pen Tool can be a little tricky at first as it is totally different from drawing straight lines. The curved lines are beneficial while creating any complex illustration or tracing any image to create a clipping mask in Illustrator. You will become familiar with drawing the perfect curved lines for your work in the following steps.
After you've opened an image or Artboard in Illustrator, select the Pen Tool from your Tool Bar/Tool Panel. Create the first Anchor Point or Original Anchor Point as we did in the previous process;
Now, while drawing a straight line, we click once on the second point, and it creates a straight line. In the case of the curve line, place your cursor on the point where you want your curve to end and then click and hold the left button on your mouse. As you do this, you'll notice that your cursor will change into an arrowhead.
Now, drag the mouse in either direction while holding the button. You will see that a new Anchor Point will be created, and the path between both anchor points will be in the form of a curve. As you move or drag your mouse, that curve path will keep on changing its curve properties.
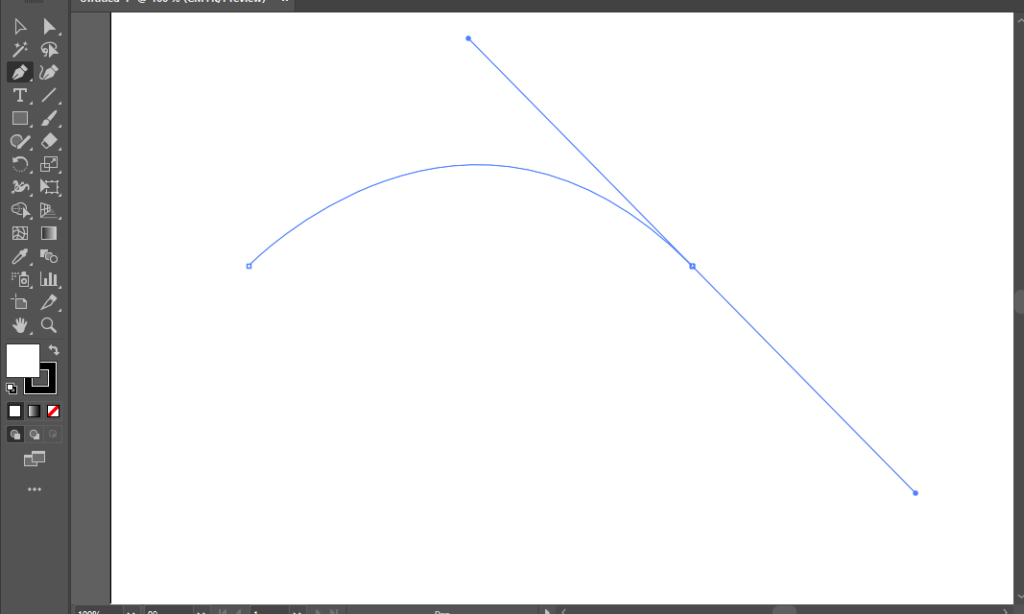
As you release the mouse button, you'll notice that a line will be created on the curved path between both Anchor Points. And on the second Anchor point, you will see the two extended lines. These lines are not actual lines but are controls of the curve line that we have just created, and we call them ‘Handles.'

As in the previous method, the curved line will follow our cursor to continue the drawing until we press the ‘Escape' or select another tool.
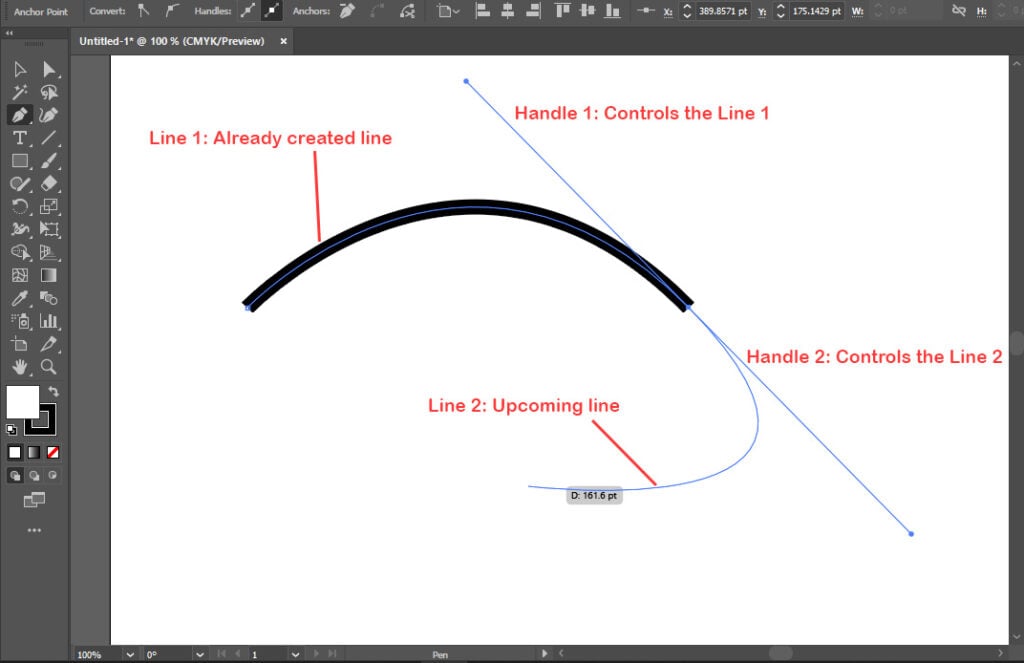
Handkes play a crucial role in the curvature of the line drawn with the Pen Tool. To understand them better, let's take an example of the above curve line.
There are two handles on the line, one that is above and another that is at the bottom. The one at the top handles the created curve, and the one at the bottom handles the curve of the upcoming curved line. The following picture explains this.
And the drawing of these curved lines continues until you complete the shape or get rid of the new path.
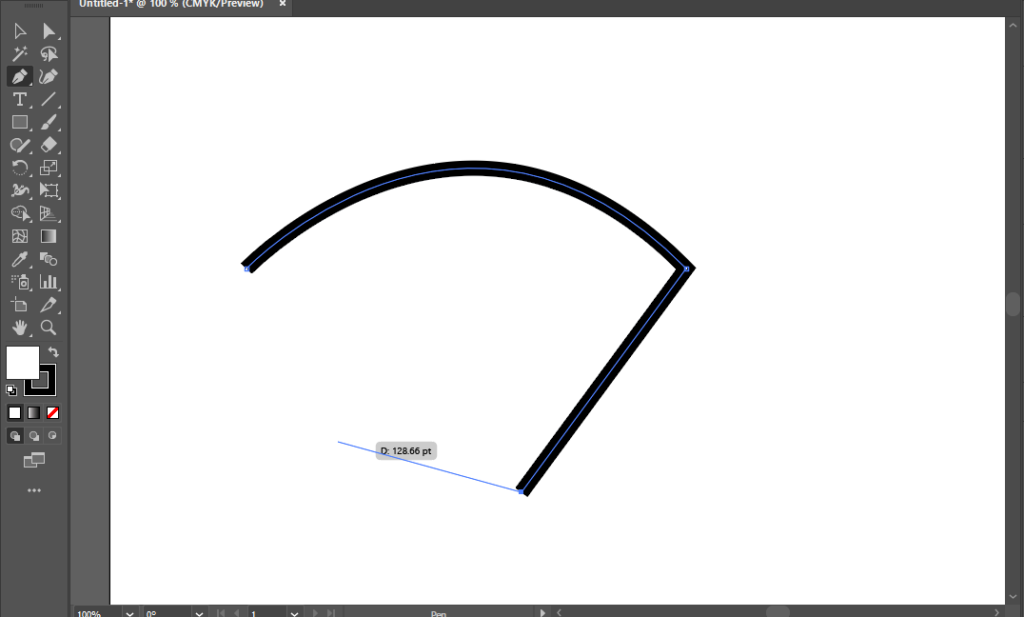
If you don't want to add a curve and want to add a straight line after adding a curved line on the canvas, then you can click on the ending point of the previously made curved line. This will allow you to create the sharp end at that anchor point, and the upcoming path will be straightened, not curved.
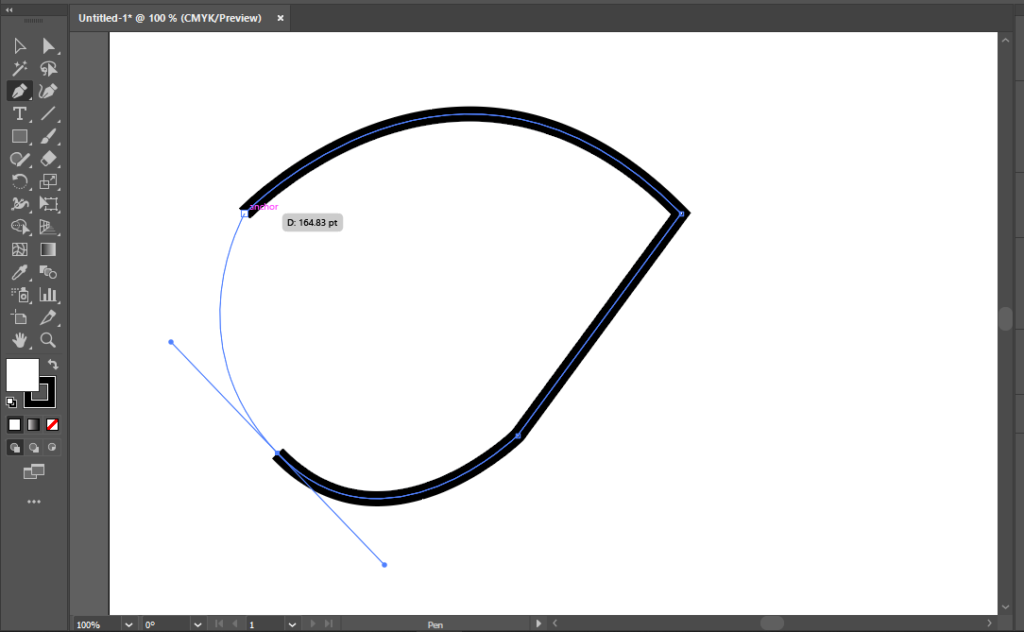
And, if you want to create the curved lines after creating the straight one, you can simply follow the steps you had followed at the time of the creation of the curved line.
Editing the Lines Using the Pen Tool
The Pen Tool is not only used for drawing lines of any type but also for editing the already created lines in illustrations and drawings. Let's look at how we can use the Pen Tool to edit the lines on the artboard.
Adding the Anchor Points
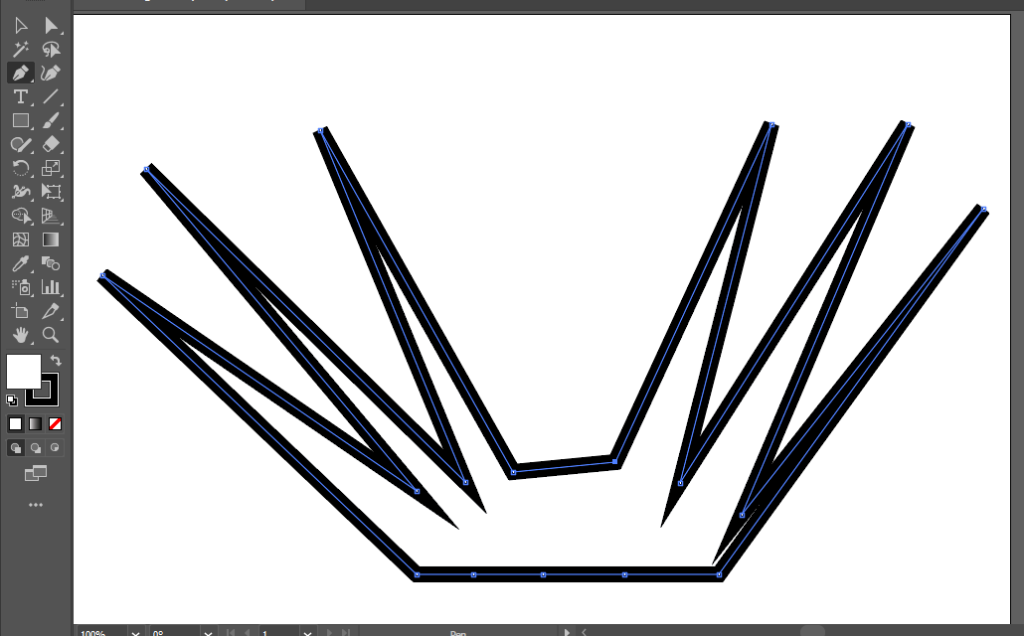
If you want to add more anchor points to a line, you can do it simply using the Pen Tool. To understand it better, let's take an example of the following shape.

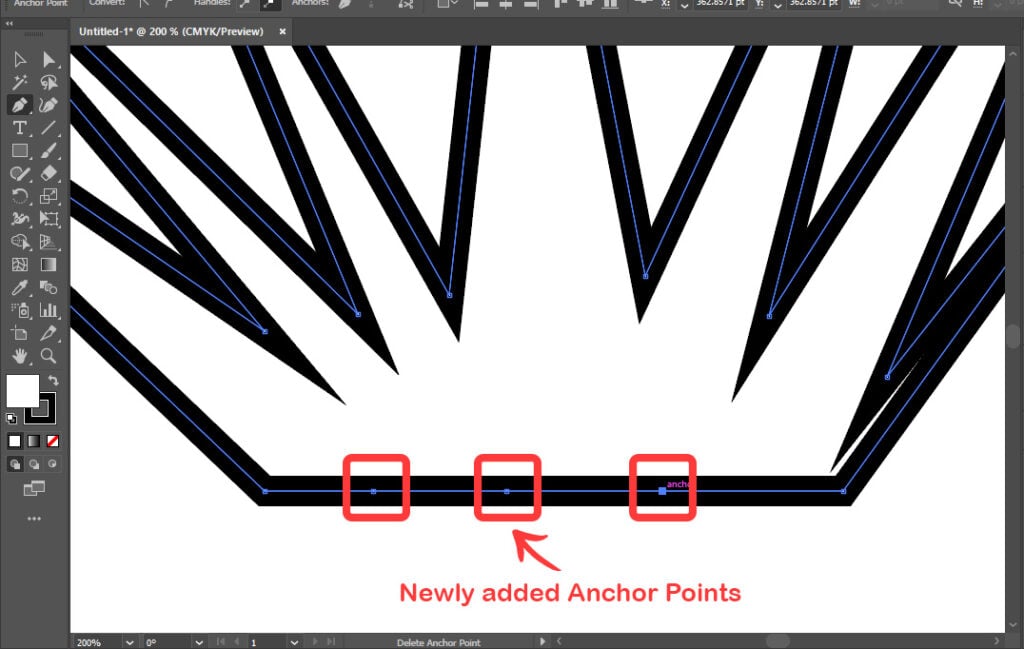
Suppose we want to add some anchor points at the bottom of this shape. We will select the whole shape or just the bottom line. And after activating the Pen Tool, we bring our cursor to the line until it the icon of the pen tool on the cursor appears with the positive or plus sign (+). Then simply click on the path where you want to add an Anchor Point.
Removing the Anchor Points
Like the above process, you can remove the Anchor Points from the already-created shape or line, after selecting the shape or line and using the Pen Tool. Bring your cursor over to the Anchor Point until the Pen Tool Icon appears with a minus sign (-). Then simply click once and the anchor point will be removed.
For instance, I have taken the above shape and removed the anchor point from the middle sharp spike.
Adding, Removing, or Editing Curves in the Line
You can also add the curve to a straight line or remove the curve from an already-made curved segment in no time. Let's understand it better with the following line segment.
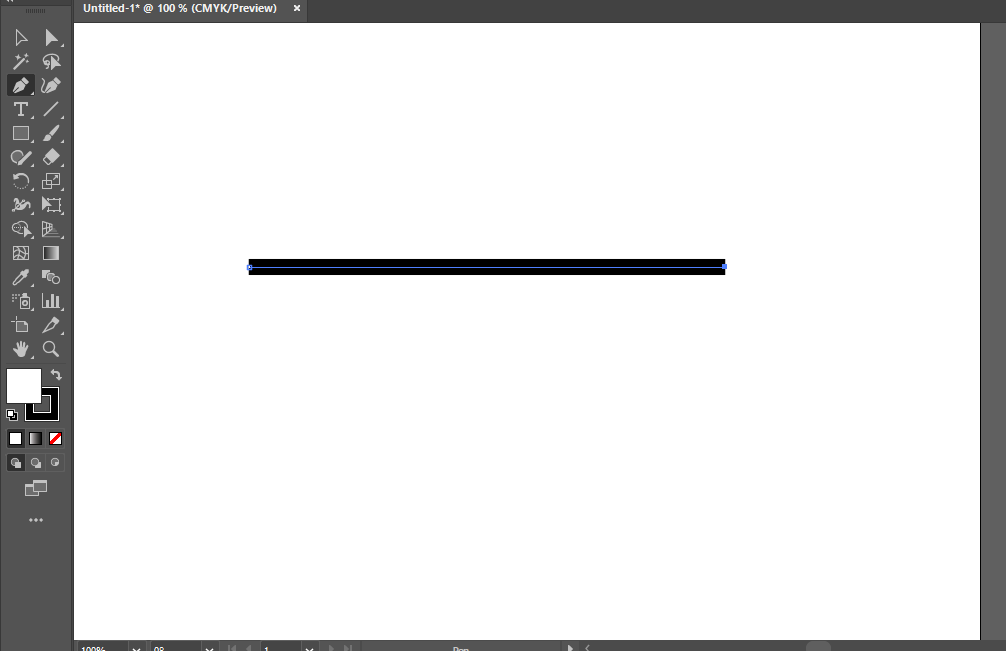
Let's add a curve on the upside of this line segment. For this, we first select the Anchor Point Tool from the Toolbar/Tool Panel. This tool lies at the bottom of the Pen Tool, Add Anchor Point Tool, and Delete Anchor Point Tool.

Now, simply bring your cursor to the point on the segment where you want it to be curved. Then click, hold, and drag in the direction of the expected curve. You'll get a curved segment.

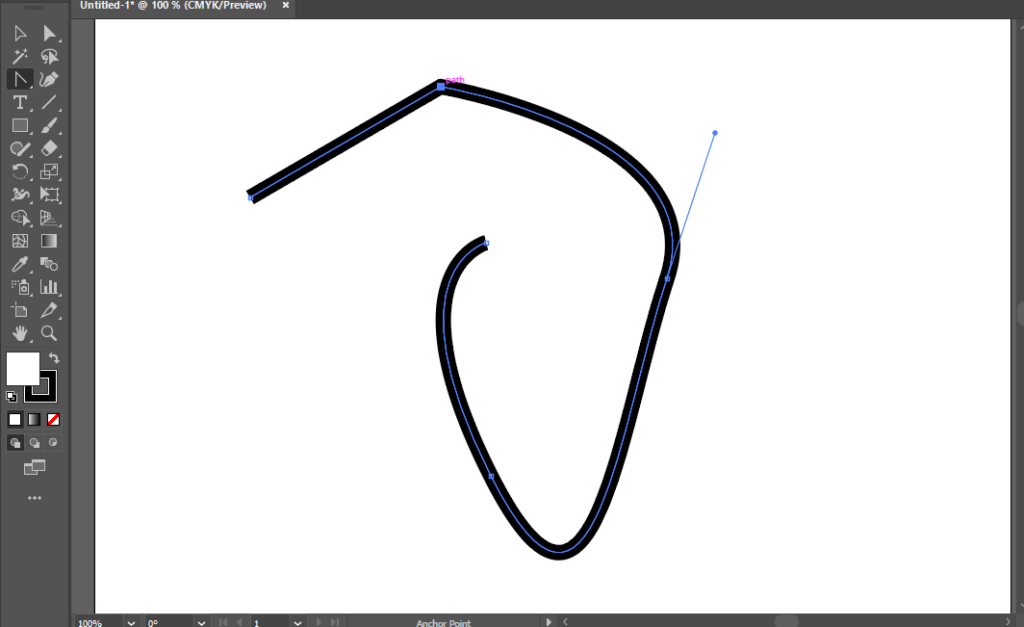
Using the same tool, you can remove the curve from an Anchor point just by clicking on the Anchor Point connected to the curve. Let's take an example of the following lines

Suppose we want to remove the top curve from this path and make it a sharp edge. Simply, select the Anchor Point Tool and click once on the top Anchor Point. The curve will be removed.
With the Anchor Point Tool, you can also edit the curves by playing with the Handles. This means we can edit the created shapes whenever we want to change them.
Final Thoughts on the Pen Tool
You have just come to the end of this tutorial, and you've just gone through one of the most powerful tools in Adobe Illustrator, the Pen Tool. To master the Pen Tool, all you need now is practice. Because this is the only way to master it.