How to Trace an Image in Adobe Illustrator (Vectorize an Image)
This page may contain links from our sponsors. Here’s how we make money.

One of the primary purposes of a graphic designer is to convey an idea or thought through visual representation by playing with them in many different ways. These visuals can be inspired by any idea or a starting point, including color, light, shape, form, space, etc.
In this advanced world, there are many means to record or capture the things seen by humans and experienced by living things. And one of those means is the camera.
A camera captures images as they appear behind the lens. But to elaborate these pictures to convey any meaning is where the role of a graphic designer comes in. He or she needs to convert these pictures to something that's said to be unseen or witnessed by the human eye or perception and that's one thing where the creative circles of lives are seen.
Why Would You Need to Vectorize an Image?
Adobe Illustrator is an essential tool for any graphic designer. It plays a crucial role in designing any type of presentation, whether it is a simple logo or a huge billboard design. When it comes to designing on such a massive scale as a billboard, one has to use high-quality visuals as graphics. As we know, raster images consist of many tiny boxes of colors called pixels, and every image we capture consists of these pixels.
There always comes a point where when we zoom in on the bitmap image (raster image), it gets pixelated, and the quality of the image doesn't equal the result that we would expect.
The solution to this problem is the vectorization of the image. Vectors consist of computerized mathematical formulas, which means that these can be zoomed in infinitely without losing the quality of the main image. So in this way, vectors provide easy solutions for visual representations.
Methods to Trace an Image in Adobe Illustrator
Depending on the nature of the image we want to trace, there are different methods to do it in Illustrator. So, without any further delay, let's get into this.
Method 1: Using the Image Trace Tool or Panel
The Image Trace method to trace any image is the most commonly used, and it's used to trace any photo image or even logos. It only takes a few steps to get our desired result immediately. Let us take an example of the following image opened in Adobe Illustrator. (If you want to follow along, you can download this image from Pexels.)
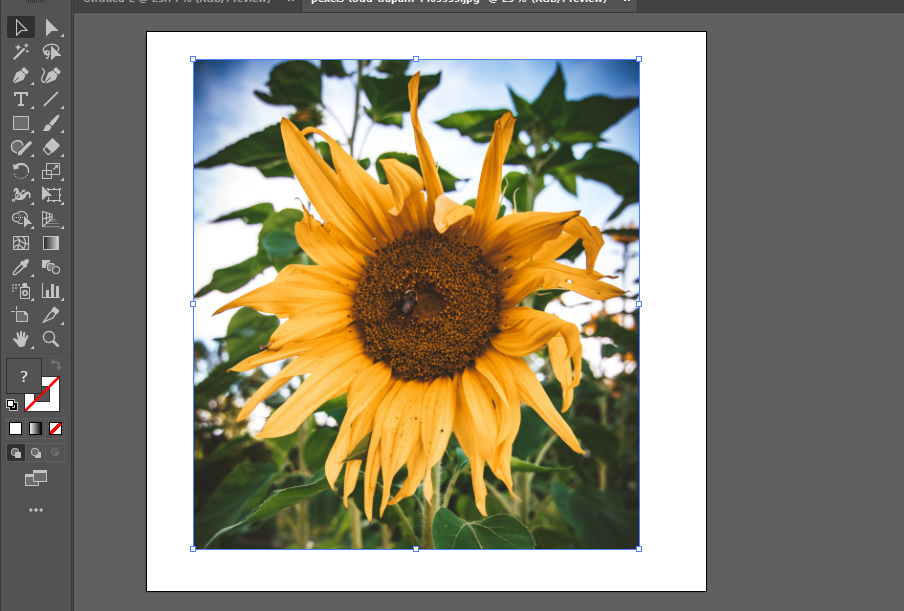
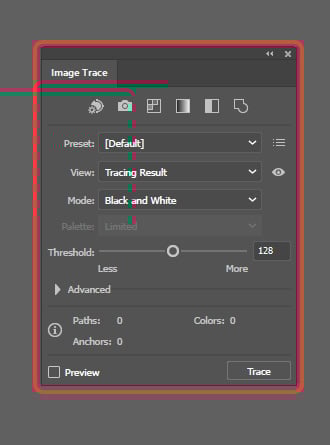
After you have opened the image, open the Image Trace Panel by simply going to “Window > Image Trace” in the Menu Bar;

A small panel will appear that includes all Tools and options for tracing an image.
Now, you need to ensure that your image is selected before proceeding. To select your photo, You need to activate the Selection Tool in the Toolbar and then simply click on the photo.
Note: Selecting the photo is necessary because the Image Trace Panel's options will be greyed out if the image is not selected. If these are faded already, you'll notice that these will become available as you select an image.
Next, in the preset options, select any one that suits your desired result. As in this case, I have selected 6 Colors.
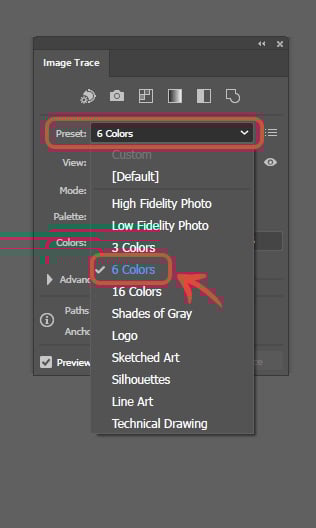
Your image will automatically get traced. Depending upon your option and your PC, it will take a few seconds to process before it shows the final result. In the following, all the preset results have been shown. You can choose anyone that you like.

From all of the above presets, you can choose the one according to the result that you require. Seeing above, we get the overall idea about all the effects as High Fidelity Photo will tend to make the image as it looks originally, Low Fidelity Photo does the same work but with fewer details.
3 Colors, 6 Colors, and 16 Colors will make the traced image consist of the range of colors we want to implement. Logo is also a colored trace with a few flat surfaces.
Shades of Grey, Silhouette, and Sketched Art are black and white and will show the results as their names represent.
And lastly, Technical Drawing and Line Art are some artistic effects that make the traced image look more like a sketch.
Customizing the Presets in the Image Trace Panel
If you're not happy with any of these premade presets, then you can also customize the presets according to your image.
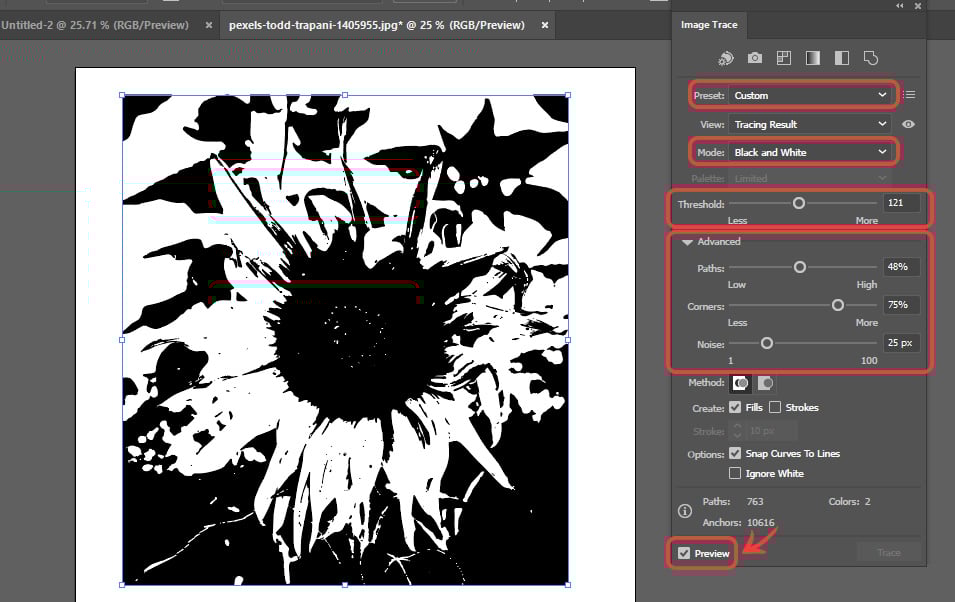
For instance, in this case, the presets Technical Drawing and Line Art don't give satisfactory results as these don't change the image in a well-traced drawing. For this. in the Image Trace Panel, you will select Black and White in the Mode option.
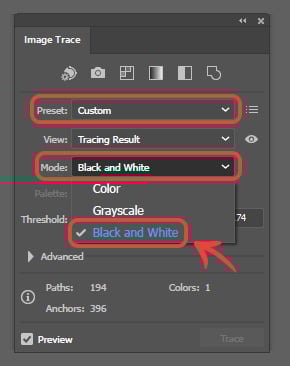
And then, you can change the values of different options behind to get the wanted results. As in this case, I have changed the value of the Threshold and Paths (in the advanced options) to get the shown result.
NOTE: Tick the Preview in the lower left corner to see the changing results as you change the settings in the Image Trace Panel.
So you have seen how I got a good drawing effect just by changing some values in the panel. In the same way, if you want to get something in color, you can also change the number of colors you want your traced image to consist of.
NOTE: For this, first, you need to select either 3 colors, 6 Colors, or 16 Colors in the preset option on Image Trace Panel. Also, make sure that Color is selected in the Mode option.
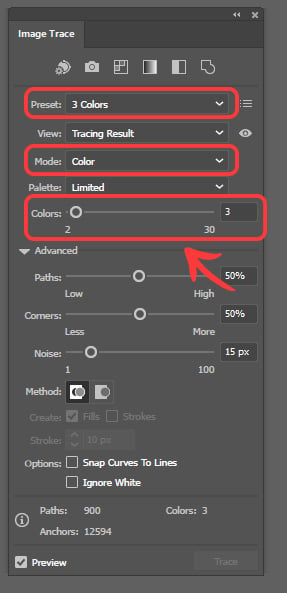
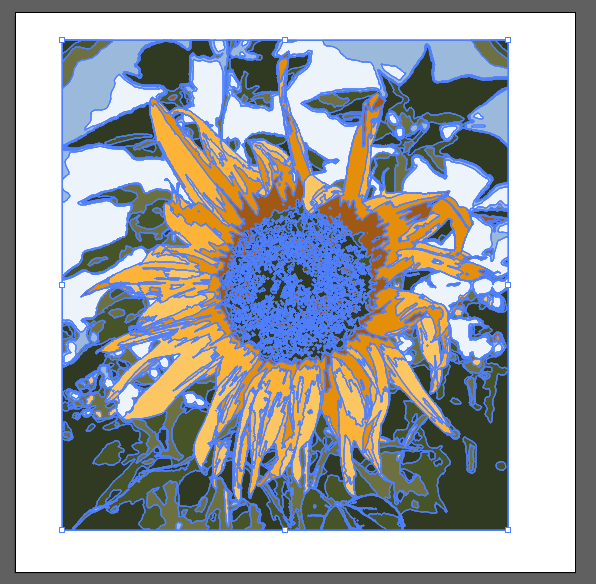
You can see here that you can put in the number of colors value that ranges from 2 to 30. In this case, I made it consist of 9 colors to get a nice painting effect;

You can also change the values of other options to get any effect in tracing the image. And there you go, you have vectorized your image successfully!
To Edit the Traced Image
If you want to edit the traced image, first, you'll need to Expand to trace, and finally, you'll need to Ungroup the traced image.
To expand it, you will need the Properties Panel, which you can get from the Menu Bar by going to ‘Window > Properties.' You will see the Expand button at the bottom of the Properties Panel. Click it after selecting the Image By using the Selection Tool.
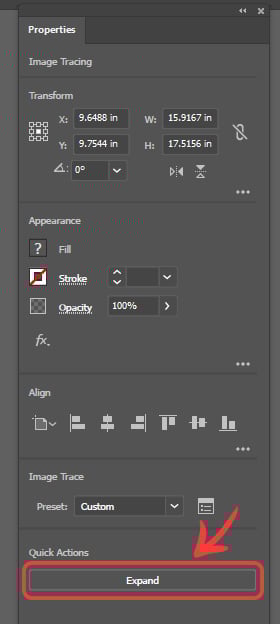
If you don't see any Expand button on the panel, it means that your traced image is deselected and you need to select it by using the Selection Tool from the Tool Bar. As you select the image, you will see that button will appear in the Panel. As you click on Expand, the outlines will appear around the traced elements of the image.
Next, keep selecting the image and ungroup the image by clicking the Ungroup button in the Quick Actions that has just appeared after you clicked the Expand button.

With that, now your traced image has become editable. Thus, you can edit it any way you like using different tools such as Selection Tool or Direct Selection Tool to change its shape.

And yes, You have successfully traced your image and made it an editable file.
Method 2: Using the Manual Tracing / Direct Trace Method
We normally use different tools to trace the object's boundary on our canvas for more precise tracing of an object. The Pen Tool and Shape Tool is the most commonly used tool for this purpose if you use the mouse to trace the image.
On the other hand, you can also use a Pen Tablet to use the Pencil Tool and Brush Tool, to get a hand-traced image. A Pen Tablet proves to be a handy gadget when working on illustrations.
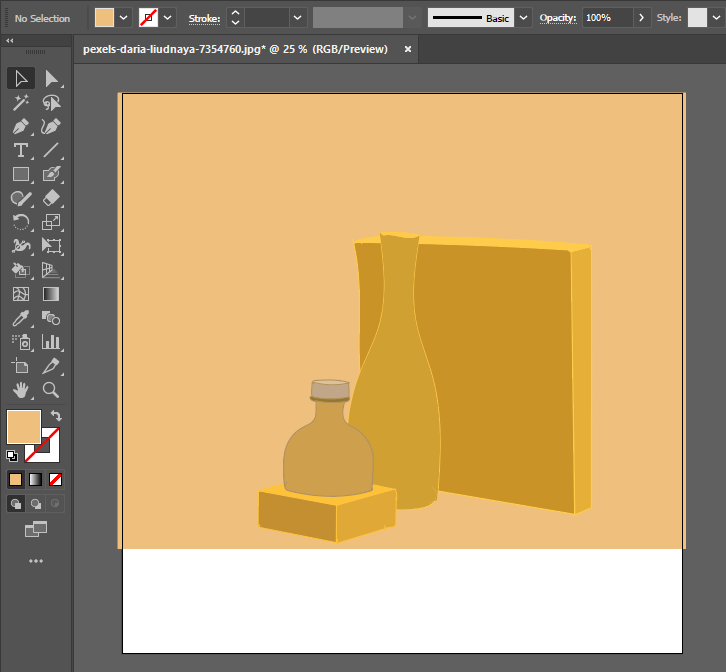
To understand it better, let's take an example of the following image (download the image from Pexels if you want to follow along).

After you've opened and embedded the image in Adobe Illustrator, you can use any tool to trace the objects. As I have used the Blob Brush Tool with a Pen Tablet here. You can select it from the Tool Bar, below the Brush Tool.

Using the Pen Tablet with Blob Brush Tool selected, I created the outlines of objects in the image.
NOTE: Make sure that you have locked the original image and started to trace the objects on a newly made layer.

Now, you can change the colors of the shapes or objects or even add gradients to them to look as close as you like them to be.
Final Thoughts on How to Vectorize an Image in Illustrator
Congratulations! You've just learned an essential skill in Adobe Illustrator. For a photo-realistic effect, you can use the Image Trace Panel. But, for more detailed and fundamental work, such as logo designs and flat illustrations, you must follow the manual tracing method. So, here it is. You can now design your infographics and illustrations with more ease.