How to Draw a Line in Adobe Illustrator
This page may contain links from our sponsors. Here’s how we make money.
You're not alone if you're new to Illustrator and struggling with drawing lines. It can be overwhelming to figure out where to start and which tool to use. But don't worry. With a little practice and guidance, you'll create smooth and precise lines in no time.
In Adobe Illustrator, creating lines is a breeze with the variety of tools available. Whether you need a straight line, a curved line, or even a spiral, Illustrator's got you covered.
With pre-made line tools and the versatile pen tool, you can easily create any line you need for your design project.
This tutorial will guide you through the process of drawing lines in Illustrator using four different drawing tools. You'll also learn when to use each tool for optimal results.
How to Draw Lines in Adobe Illustrator
When it comes to drawing lines in Illustrator, the Line Segment Tool is great for straight lines. However, if you need to draw curves, you'll want to use the Pen Tool or Pencil for freehand lines.
And if you're drawing a spiral line or shape, the Spiral Tool is a game-changer, making it much easier to create perfect spirals.
How to Draw a Straight Line with the Line Segment Tool
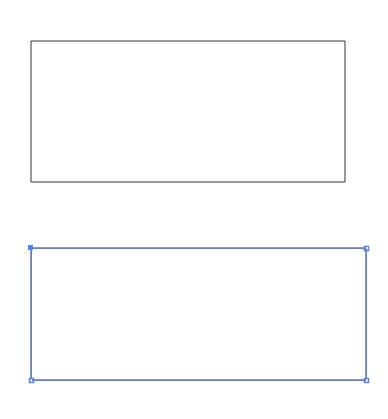
To start, click on the artboard to choose where you want your line to begin, and then drag your cursor to the ending point.
The Line Segment Tool (keyboard shortcut “\”) is your best bet if you need to draw a straight line.
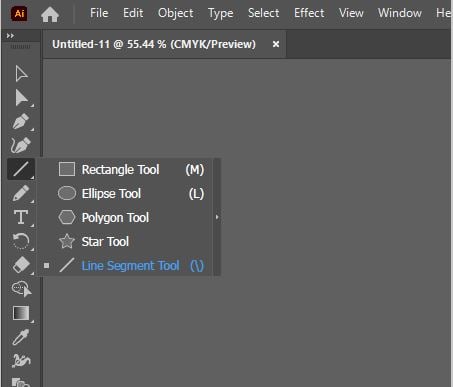
Select the tool from the toolbar, hold down the Shift key, and click and drag on the artboard to create a straight line. It's that easy! Holding the Shift key ensures that your line is straight.

How to Draw a Line with the Pen Tool
The Pen Tool (keyboard shortcut P) in Adobe Illustrator is powerful for creating precise lines and curves.

You can create anchor points that connect to form your desired shape by clicking on the artboard.
Whether you need a straight or curved line, the Pen Tool allows you to create it easily. Start at your desired beginning point and click to make your first anchor point.
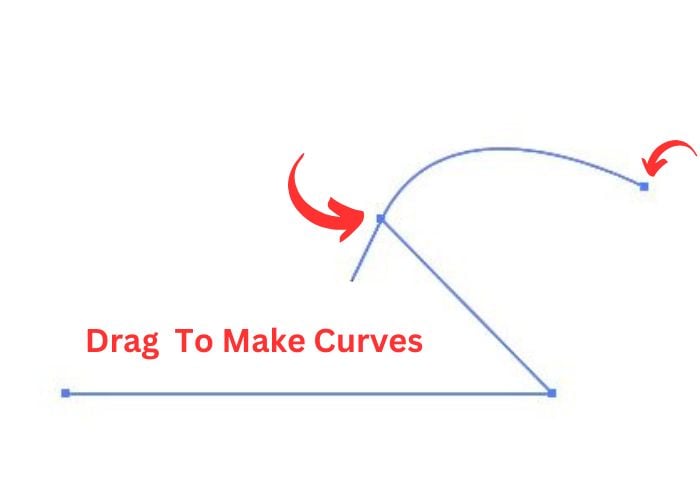
The Pen Tool also allows you to create curves by clicking and dragging to create anchor points and adjust the handles.
With practice, the Pen Tool can become essential for creating professional-quality illustrations and designs.
How to Draw Lines with the Spiral Tool
Creating spiral lines in Illustrator may seem like a daunting task, but fear not!
Illustrator has a Spiral Tool that makes it easy. While it may not be visible on the basic toolbar, you can easily access it by going to the Edit Toolbar option. With this tool, you can create beautiful and intricate spiral designs with ease.

To access the Spiral Tool in your editing toolbar, simply click on the Edit Toolbar menu and locate the Spiral Tool. Once you've found it, drag it to your toolbar wherever you prefer. For example, you may want to place it next to the Arc Tool for easy access.
Simply access the Spiral Tool and use your mouse to click and drag on the artboard to make a spiral.

How to Draw Freehand Lines with the Pencil Tool
In Adobe Illustrator, the Pencil Tool (keyboard shortcut N) is versatile and allows you to draw freehand lines and create illustrations.
The Pencil Tool is even more precise and responsive if you have a drawing tablet. To use the Pencil Tool, simply select it from the toolbar and start drawing as you would with a traditional pen and paper.

Whether you're sketching out ideas or creating detailed illustrations, the Pencil Tool is valuable for any digital artist.

Final Thoughts
Adobe Illustrator is a powerful tool for creating digital art and designs. One of the most important skills to master is using the various drawing tools available. Whether you need to create straight lines, complex shapes, or freehand drawings, Illustrator has a tool for every task.
Some of the most commonly used tools include the line segment, pen, and pencil tools. With practice, you can become a master of these tools and create stunning works of art with ease.