How to Invert a Selection in Adobe Photoshop
This page may contain links from our sponsors. Here’s how we make money.
For designers and photographers, it's common to edit and manipulate images to showcase their creativity. Thus, knowing all about photo editing and photo manipulation techniques becomes a must-know skill.
Knowing the shortcuts to best increase editing speed also becomes mandatory. If you're working with a large number of photos, editing becomes a significant task.
It would not be wrong if I say that shortcuts and tricks help a lot in the process to reach the desired results. And one awesome Photoshop hack is inverting the selection made on an image. To understand it better, first, we need to understand what a selection really is in Photoshop.
Making a Selection in Photoshop
To make a selection in Photoshop means that we select or choose a specific area on an image and that very area becomes our working area. Everything we change or manipulate remains within that selected area. There are certain tools in Photoshop that are used to make selections, such as the Lasso Tool, Quick Selection Tool, Rectangular Marque Tool, Elliptical Marque Tool, and Pen Tool.
When something is selected in Photoshop, that area becomes surrounded by the “marching ants”. “Marching ants” refers to a moving black-and-white dashed line that surrounds the selected area.

Inverting a Selection in Adobe Photoshop
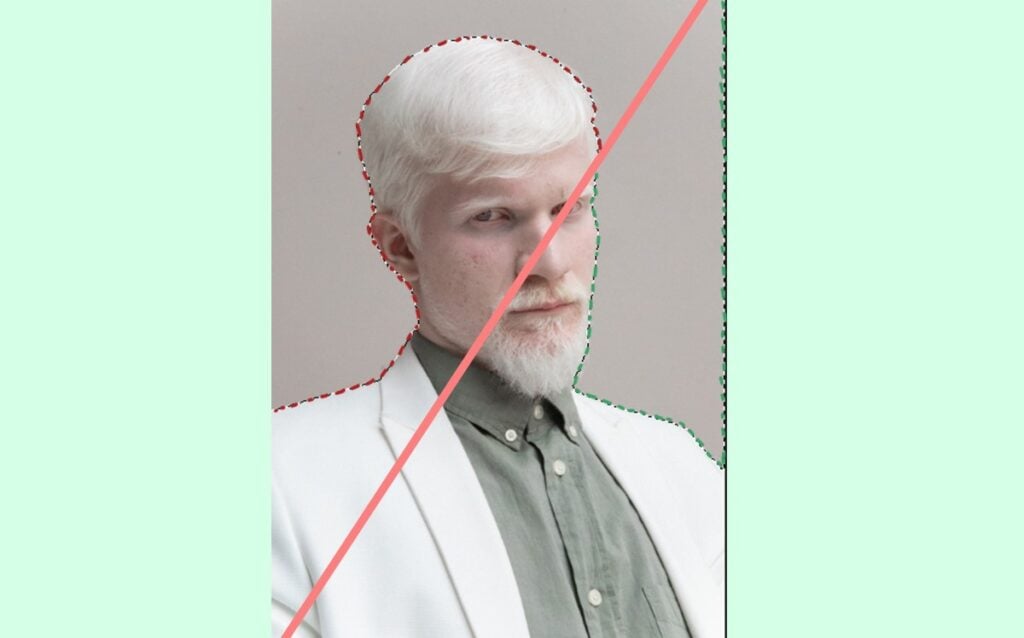
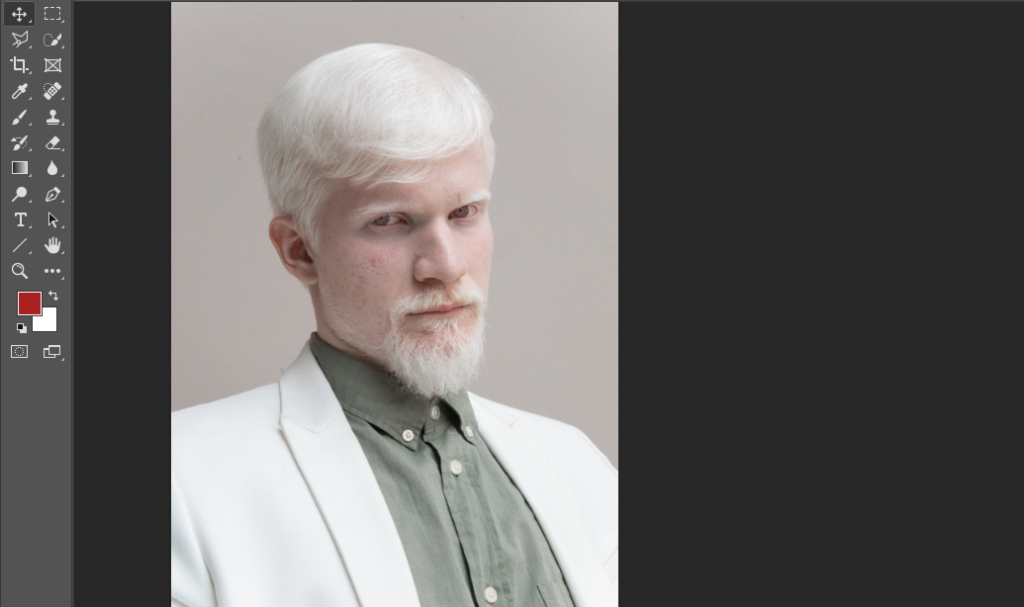
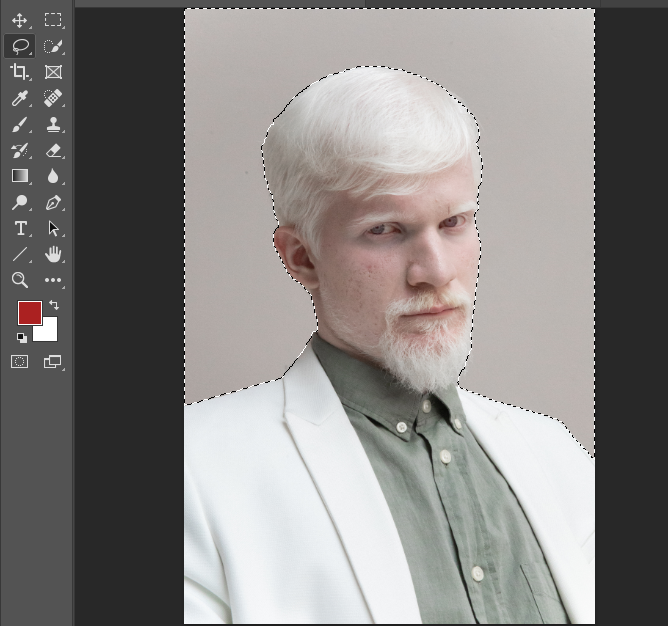
To understand how we can use the selection invert feature to make our task easier, let's look at an example of the following image that has been opened in Photoshop. (If you want to follow along, you can download the photo from Pexels.)
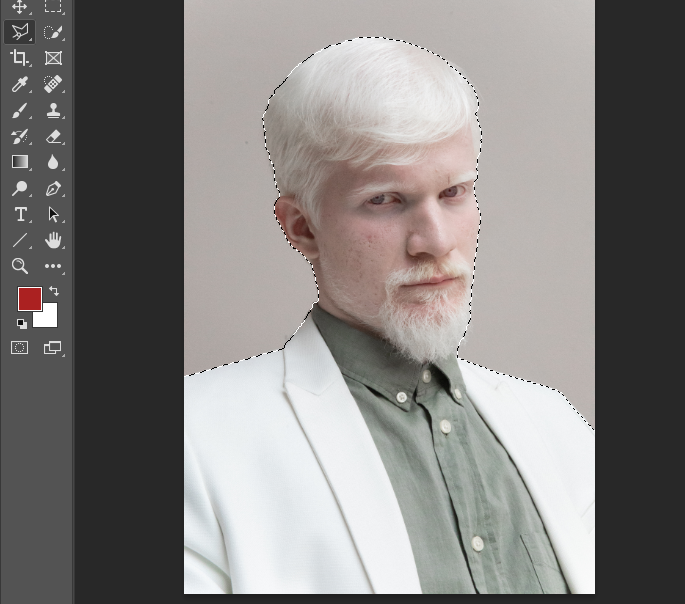
Now, we will select the man in the image, then we'll inverse that selection to select the background and make changes to it. Let's assume that I have selected the man using some selection tools. You can choose any of the selection tools that suit you the best as I have used the Quick Selection Tool and Lasso Tool to do it.
Now, we'll look at different methods to inverse this selection to select the background of the image. The methods have been discussed in the following.
Method 1: Using any Selection Tool and Mouse
To invert the selection with this method, first, you need to use any selection tool from the Tool Bar or Tool Panel. The selection tool can be a Lasso Tool, Rectangular Marquee Tool, Elliptical Marquee Tool, Quick Selection Tool, or any other selection tool that works the best for you or that is fast and easy for you to select.
In this case, I have selected the Lasso Tool using the keyboard shortcut, “L”.
Next, with your tool selected, bring your cursor into the selection area. Right Click there using your mouse. An options window will appear. Click on Select Inverse.
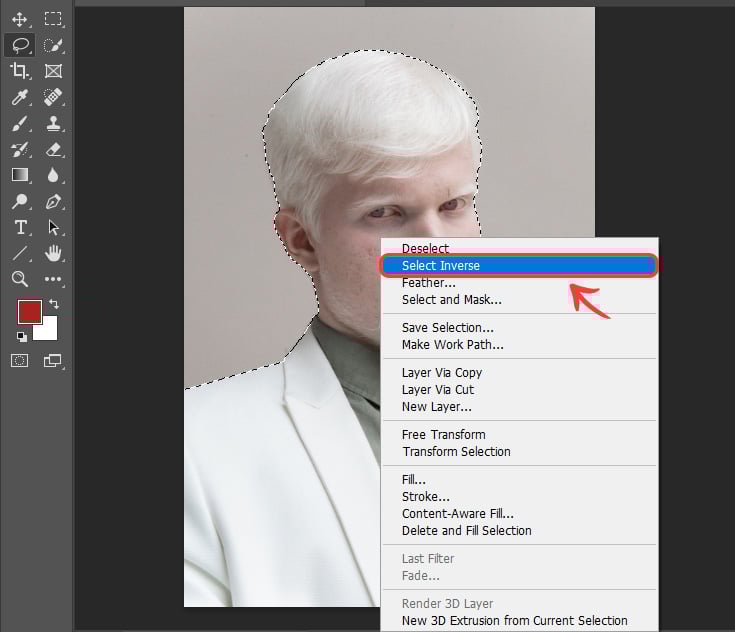
And there you go. You have just inverted the selection on the image. You can observe that only the background is selected now and marchig ants have surrounded the background.
Method 2: Using the Shortcut
Another easy and quick method to invert a selection is through the shortcut using your keyboard only. Let's take an example from the above photo. As you have selected the man in the image, now use the keyboard shortcut Control + Shift + I (For Windows) or Command + Shift + I (For Mac). And that's it, you've done it in no time!
Method 3: Using the Menu Bar
This method looks the same as method one, but it's slightly different. Let's suppose you have selected the man in the image by any means, and the marching ants surround the man only, depicting that you've selected the man.
Now simply, go up to Select > Inverse in the menu bar.

You'll see that your selection will be inverted as you click on “inverse.”
As you've selected the background of the image by inverting in the selection, now you can complete your editing easily. You might like to add a mask to the selection, or you would like to change the background of your original image. For example, I've changed the background of the sample photo.

(If you want to use the same background that I've used, you can download the image from Pexels.)
Final Thoughts
The invert selection feature can be used to precisely edit your photo where you would like to edit the subject and background without affecting each other. This means you can turn to either side of the selection just by inversing the selection repeatedly using either of the methods discussed above. Not only this, you can use this feature in many different scenarios, and you should keep experimenting to save a lot of your time in editing.