How to Use the Lasso Tool in Adobe Photoshop
This page may contain links from our sponsors. Here’s how we make money.
Adobe Photoshop is used for a vast variety of work, ranging from photo manipulation and photo editing to designing. When it comes to photo editing and manipulation, no other software can compete with Photoshop.
If you're a creator or photographer, then you might have come to a point where you'd like to make some changes to your image or want to select just a small portion of the image. When it comes to selection tools, Photoshop provides a wide range of tools and options you can use to make any selection easily.
Making the perfect selection in Photoshop is a skill worth mastering. Using the right tool to select a particular area is also considered an art. One should learn and master the selection tools of all kinds to be a good designer or editor.
The selection tools that have been integrated into Adobe Photoshop include, Rectangular Marquee Tool, Elliptical Marque Tool, Lasso Tool, Magic Wand Tool, and Quick Selection Tool. And if you're a professional and make the selections precisely, then you may also use the Pen Tool for selections.
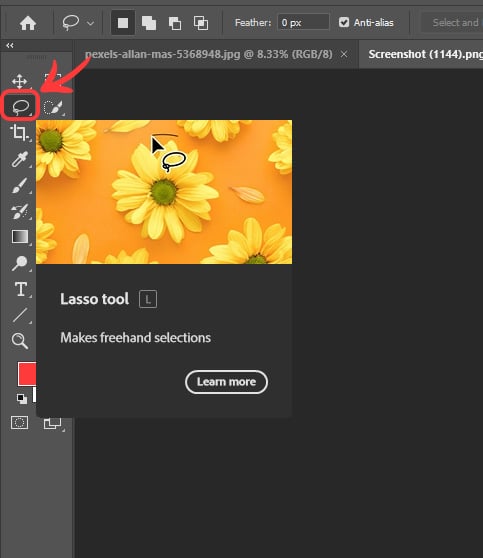
The Lasso Tool in Photoshop
Quick freehand selections while dealing with a photo in Photoshop are required in some cases where small selections perfect the photo's editing. And this is where the Lasso Tool brings the magic. Photoshop provides different variations of the Lasso Tool for making unique selections while using them.
These variations include Standard Lasso Tool, Polygon Lasso Tool, and Magnetic Lasso Tool. You can find these tools in the same place in the Tool Panel or ToolBar of Photoshop.

We will be covering the Standard Lasso Tool in this tutorial, which is the most common while making freehand selections. You can select the tool simply by clicking on its icon in the toolbar.
Understanding your tool and its function before you use it is very crucial. To give a proper explanation of the tool, let's discuss the following features that come with the Lasso Tool.
Freeform Selections
Sometimes, while editing or making changes in an image, you would probably think about making a selection that follows the cursor or that moves along the cursor. Well, the Lasso Tool provides exactly this type of selection-making.
The Lasso Tool works best when you're much more comfortable with your mouse. Or if you have a drawing tablet, then you'll find it very easy to make natural and more organic-shaped selections.
Let's see how it works.
Using the Lasso Tool with Your Mouse
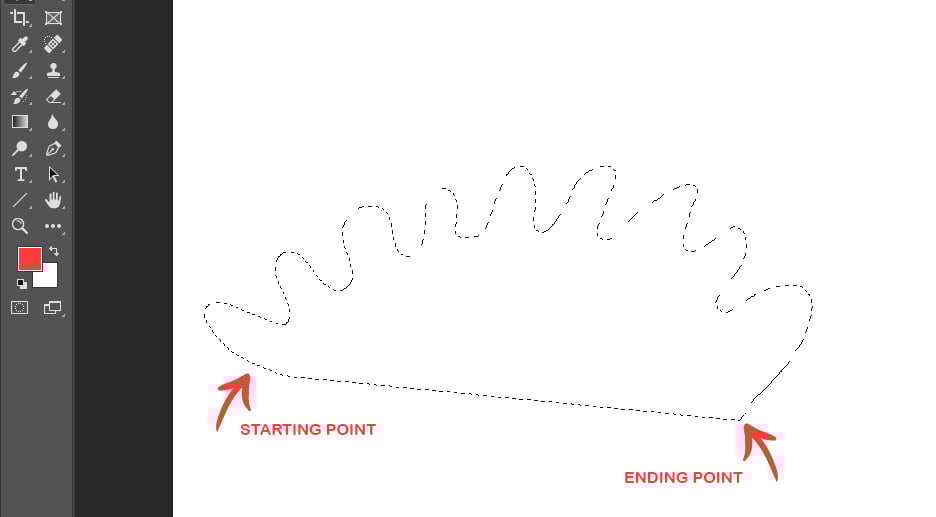
After selecting the Lasso Tool from your Toolbar, bring your cursor to your canvas. Then, using your mouse, Click at the point where you want to start the selection and Hold. While holding the button, drag the mouse in the direction you want to make the selection.
Using the Lasso Tool with a Drawing Tablet
Using the stylus pen of your drawing tablet, bring the cursor where you want to start your selection on the canvas. Then draw the selection as you write on normal paper while you do the freehand drawing.
How to Use the Lasso Tool
In both cases, bring your ending point near the starting point. That will be the point where you would like to release the mouse button or lift the stylus pen from the tablet surface. You'll see a selection made like a freehand drawing on paper;

You'll notice that as you release the mouse button anywhere away from the starting point, a straight line is automatically drawn, connecting the starting point and ending point. And that completes the selection.
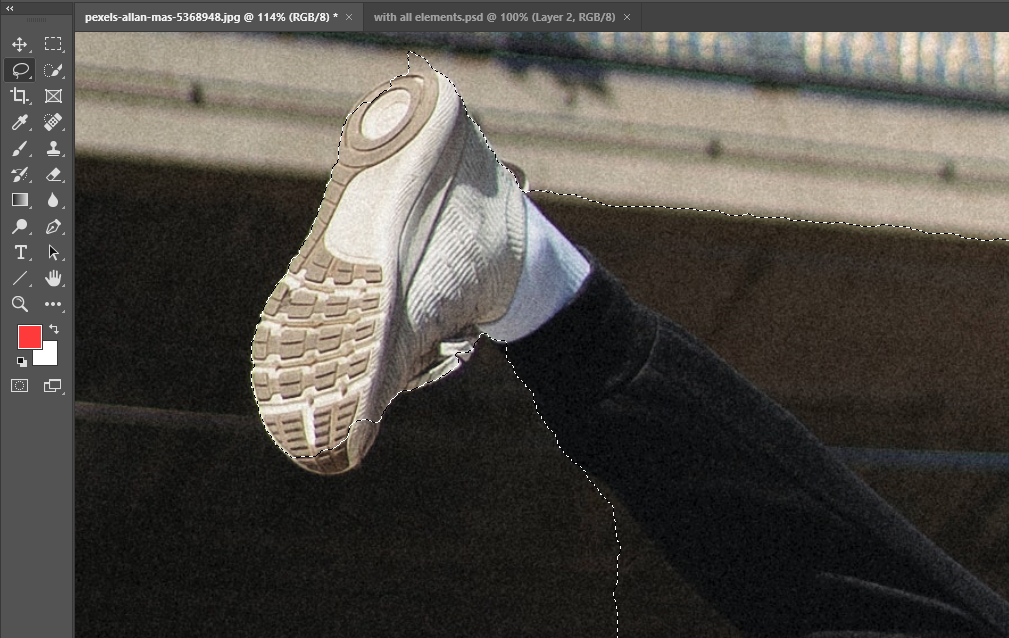
This is how the Lasso Tool functions, and through it, we can make as large selections as we want. To understand how we can use it effectively, let's take an example of the following image that I have opened in Photoshop. (If you want to follow along, you can download the photo from Pexels.)

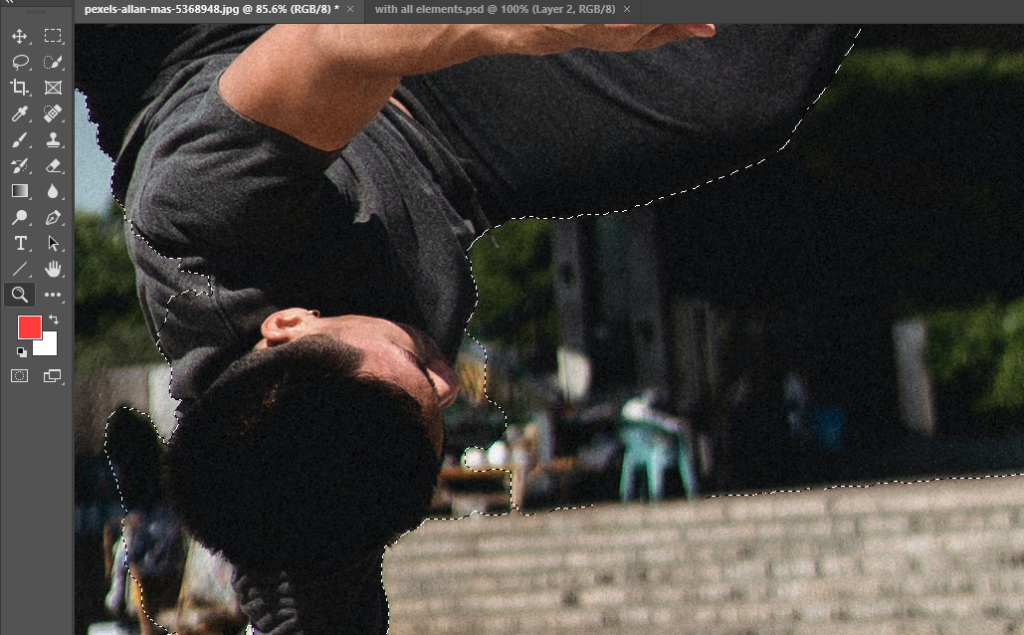
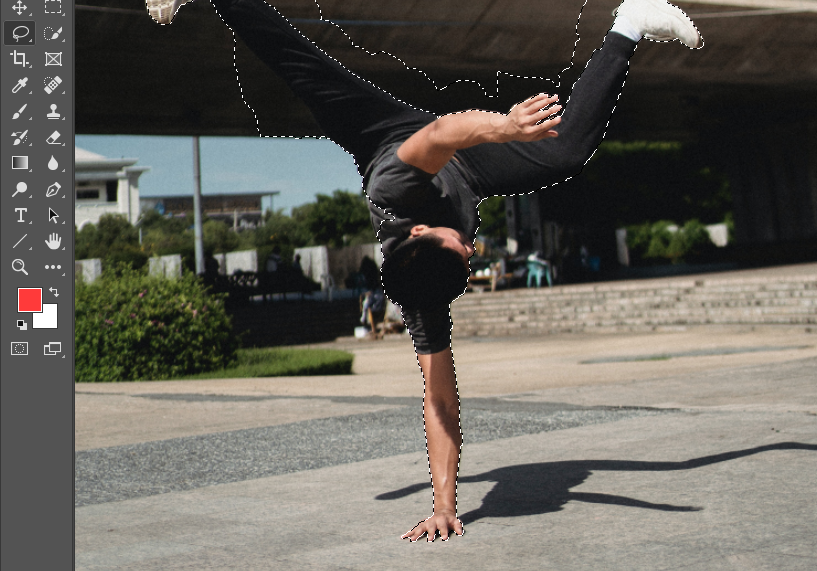
Suppose we want to select the dancer and isolate him by pasting the selection on another page or canvas. To do it, first, I'll select the dancer by using the Quick Selection Tool. The selection will look like this.

As you can see, the selection is not good in this case. To perfect the selection, I will move over to the Lasso Tool and start correcting the selection by adding the small areas and removing the unwanted areas.
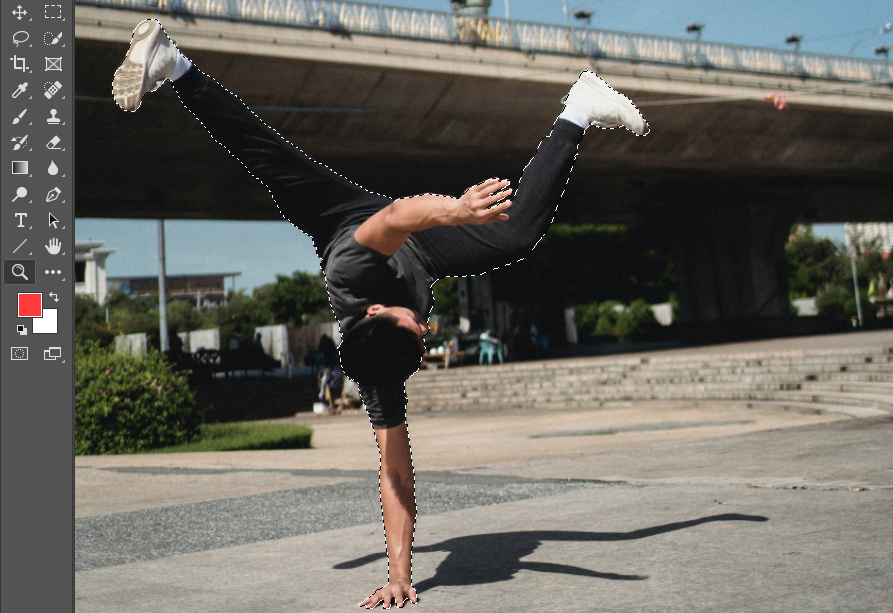
To do it, I'll use my Pen Tablet. You can also do it with your mouse, although it may be slightly more difficult for precise selections like this one.
To add to the selection, I will press and hold the Shift key before adding the area. You'll notice that, with the Lasso Tool selected, when you press and hold the shift key, a plus sign will appear under the Tool's icon, which indicates that you're adding to the selection.
Similarly, to remove the selection, I will press and hold the Alt key before I start to select the unwanted area using the Lasso Tool.

Now that you know how to add or remove the area in the selection, you can go ahead and make the required changes.
If you're zoomed in to work on the image, you might want to move around your canvas to see different parts of the image. For that, you can press the Spacebar whenever you like. It will allow you to turn your cursor into a hand that you can use to move anywhere on the canvas. As you release the Spacebar, you'll see that it returns to the Lasso Tool to continue your selection.
Or, you might want to zoom in or out to see if the overall correction is going okay. You can press the “Z” key to zoom in or out. It will allow you to select the Zoom Tool. Now, you can zoom in or out on the window to adjust the view of the canvas.
Or, while using the Lasso Tool with your mouse, you can press and hold the Alt key any time, and then you can zoom in or out with the Mouse Wheel by moving it upwards or downwards. As you release the Alt key, you'll return to the Lasso Tool to continue your selection.
After correcting the areas of our selection, the final selection looks like the following.
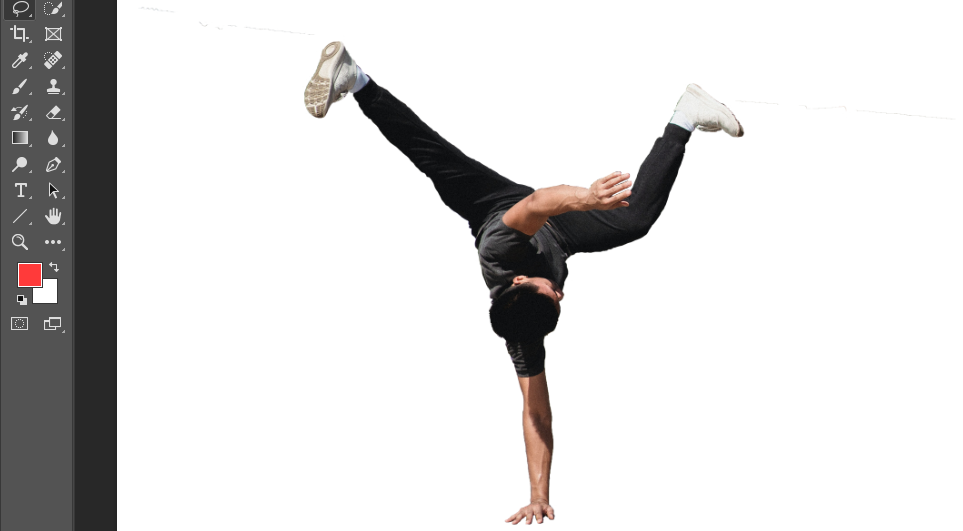
Now, you can copy this selection with the keyboard shortcut Control + C (PC) or Command + C (Mac) and paste it on any other page or canvas by using the shortcut Control + V (PC) or Command + V (Mac)
Congratulations! You've just learned to use the Lasso Tool to make and correct freeform selections.
Final Thoughts on the Lasso Tool
When we understand any tool, we understand there are many different ways to use that tool for unique purposes. We can use the Lasso Tool to make simple selections. We can use it to add the layer mask to complicated selections and draw different complicated shapes onto the canvas. The more you use it, the more you discover different perspectives. Just keep using and practicing with it, and you will surely be able to create interesting designs.