How to Cut Out an Image in Adobe Photoshop
This page may contain links from our sponsors. Here’s how we make money.

Have you ever seen those giant billboards with something popping out of them? Of course you have. Those are designed to grab attention. Graphic designers should master the same principles to produce a captivating design.
Well, coming back to the billboard idea, an editor or graphic designer should be familiar with cutting the objects out of an image with precision. The picture used in the design will be the primary object in the visual.
That said, cutting any object out of a photo becomes a must-know skill for a graphic designer. Whether it's a small scale or a big project to be designed on, this skill as it is one of the most used skills for any graphic designer. So, let's get into the mastery of this.
Methods to Cut Out an Image
Depending upon the nature of the photo you're working on, there are some different methods to cut an object out of an image. So, let's look at the options.
Method 1: Using the Elliptical/Rectangular Marquee Tool
Cutting out an object in frames of different shapes can be helpful in many cases. The shape can be an ellipse, oval, rectangle, pentagon, hexagon, etc. This type of isolating the object can be used while making an avatar for any profile picture or dropping your picture in some resume that requires only a small part of your image with a portrait.
For this basic cutting of an image, we use the Marquee Tool, which can be found in the Tool Bar. Depending on the shape of the selection, the Marque Tool further consists of many types. It can be rectangular, elliptical, single row, or single column.
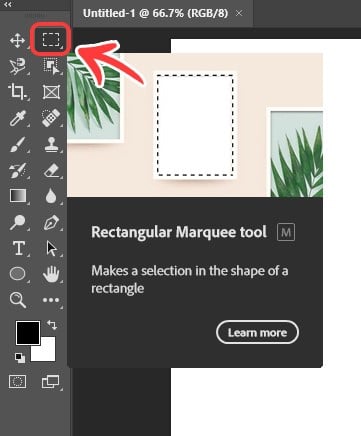
If you right-click on this icon, you'll see many types of Marquee Tools. You can select any shape of those marque tools based on the type of selection you want. Let's take the following image as an example to understand it better. (If you want to follow along, you can download the image from Pexels.)
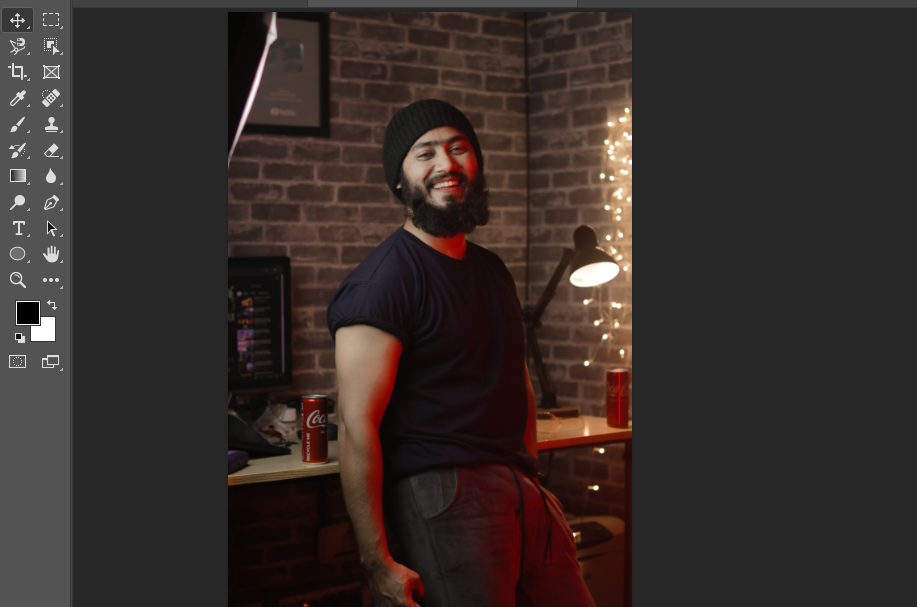
Now, let's consider I want to cut the portrait out of this image in a square form. For this, I would select the Rectangular Marquee Tool and make the selection by left-clicking, holding, and dragging while pressing and holding the Shift Key. This will allow the selection to be a perfect square.
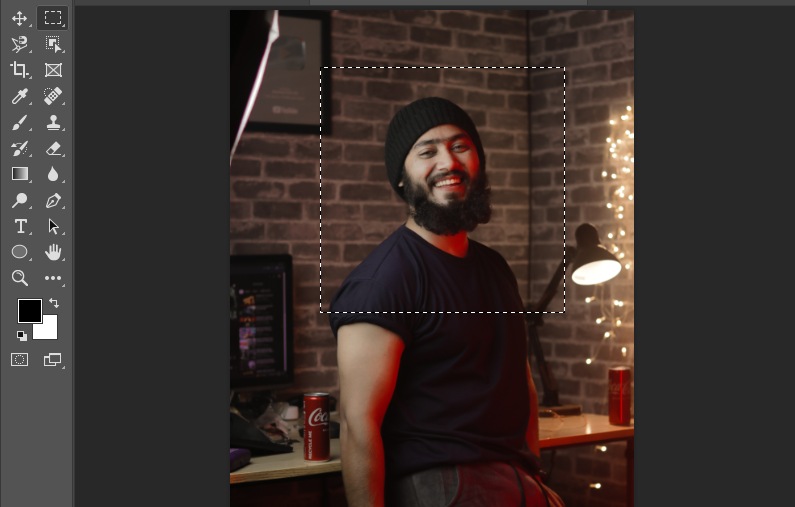
Now, simply right-click on the selected area and select the Layer via Copy or Layer via Cut from the pop-up panel.

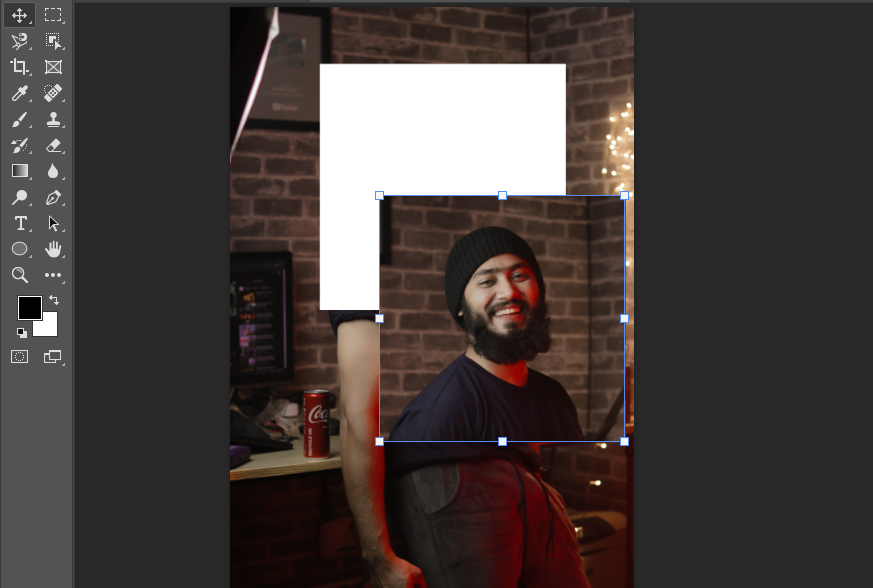
As I have selected, Layer via Cut here, and, the selected area is isolated in a square shape.
You can cut out the object in a circle with the same method. But you will need to use the Elliptical Marquee Tool for this.

You can copy and paste the isolated part anywhere on the other images, or you can save them for future use.

Method 2: Using the Lasso Tool
As we move further to make more advanced and precise selections, the Lasso Tool is the one that should never be ignored. You can find the Lasso Tool in the Tool Panel.
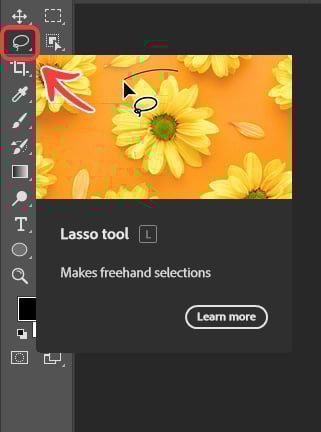
The Lasso Tool is mainly used for adding or subtracting any part of the selection quickly. This tool is more for a freehand selection, so, you might need a Pen Tablet if you cannot make good use of a mouse for this.
For example, let's take the following part of an image with ‘not that good of a selection.' You can see the ‘marching ants' aren't on the edges of the man, like they should be.
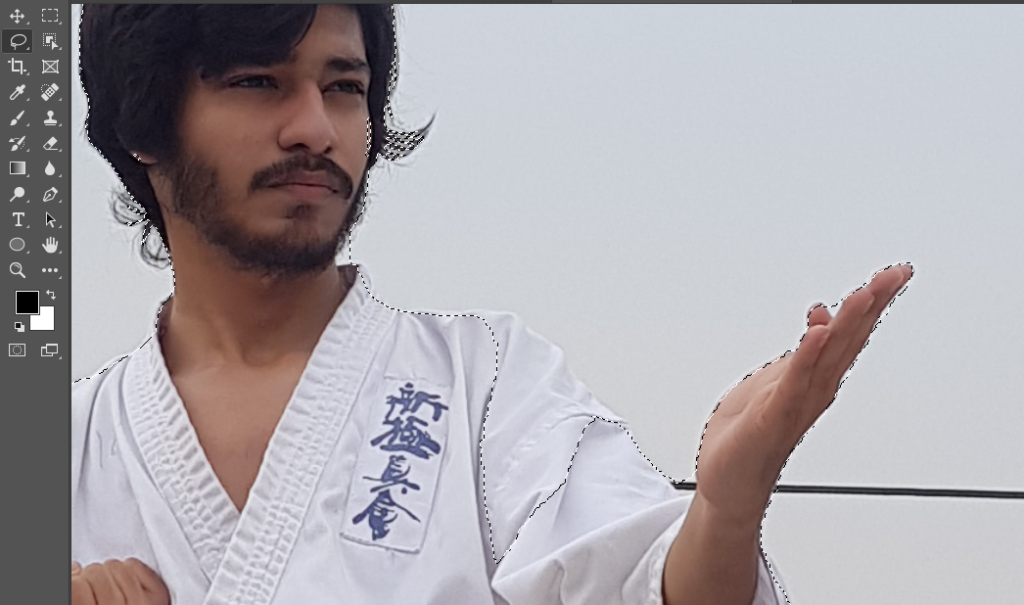
To correct the selection, I will use the Lasso Tool. In this case, I'll press the Shift Key or Alt Key while I select the area that's deselected. This will allow the selection being made to be added or subtracted from the previous selection.
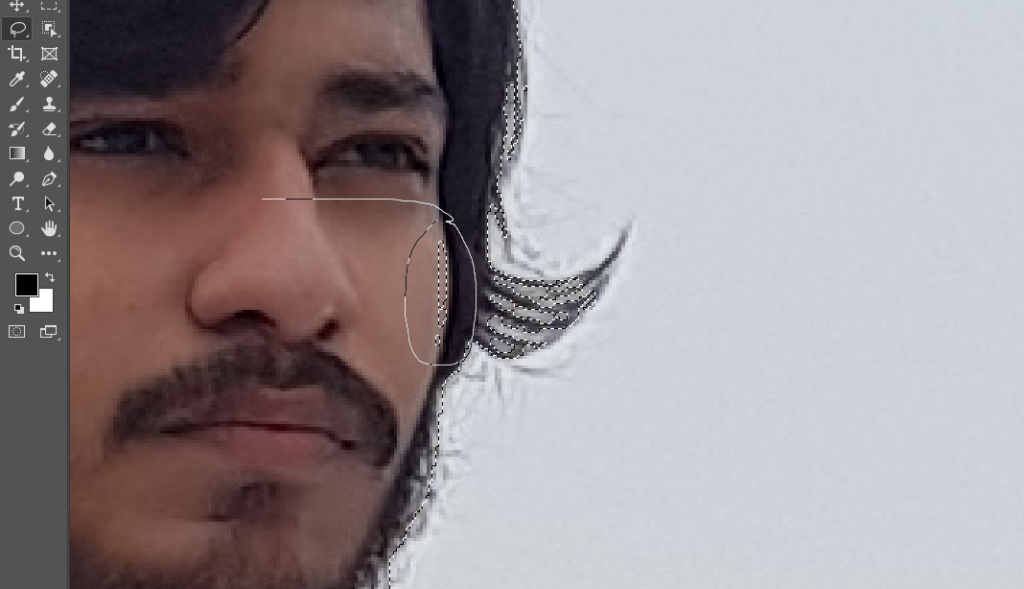
In this way, I have corrected the selection using the Lasso Tool.

You can isolate the selected part of the image with the same method used previously.
Method 3: Using the Subject Selection Tool
With the newer versions of Adobe Photoshop, the Subject Selection Tool has been introduced. It is one of the most effective and quick tools to select an object in an image. Let's learn how to make a selection with this taking an example. (If you want to follow along, you can download the image from Pexels.)
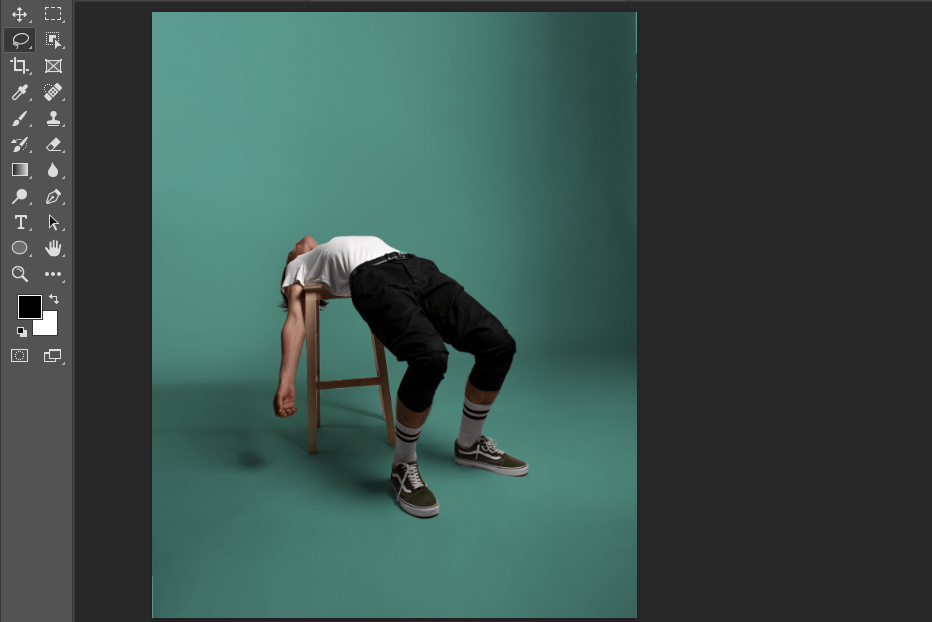
We want to isolate the whole human figure from this image. For this, after the image has been opened in Photoshop, we first select the Object Selection Tool from the tools panel.
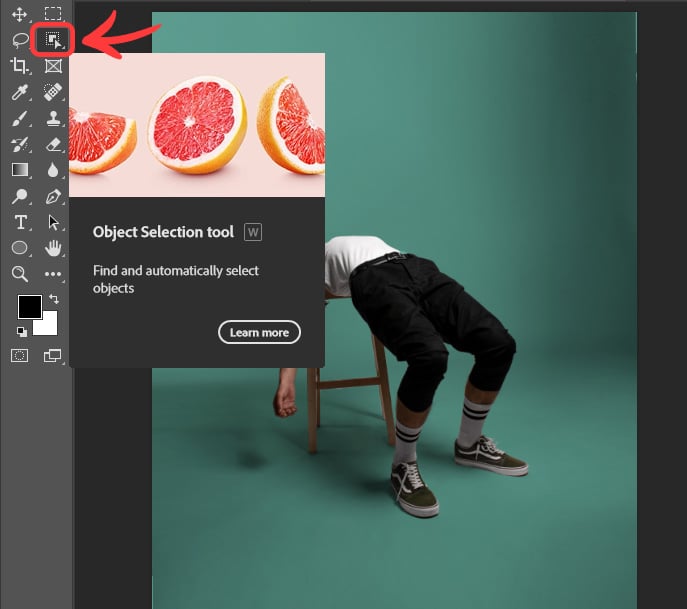
The Object Selection Tool here will act like a Rectangular Marquee Tool. For the selection, we'll simply cover the object with the area of selection.

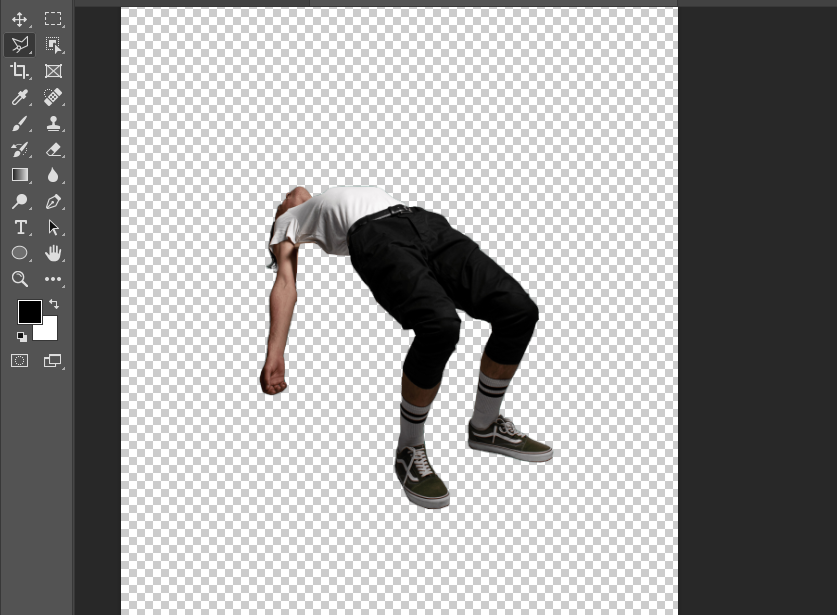
As we release the button of our mouse, some loading starts to take place, and then after a few moments, the selection will be made automatically around the object that was put inside the rectangle.

As we notice closely, we come to know that the selection made by the Object Selection Tool will not be perfect, there will be some areas where it will need to be fixed. To correct these areas, we can use any tool to select. It can be any tool that works best for us.
For instance, I have used the Polygon Lasso Tool in this example. The Polygon Lasso Tool works like the normal Lasso Tool, but it makes the selection in straight lines that makes the planar objects to be selected more easily. You can also use the Magnetic Lasso Tool. It works as a magnet and sticks to the corners as you move your cursor along the ends of an object.
NOTE: Like any other selection-making tool, you can use the Polygon Lasso Tool and Magnetic Lasso Tool to make the overall selection of the object.

After the correction of selection, our image will look like this (notice, the still has been removed from the selection).

Using the previously used method, we can isolate the selected object from the image. We can paste it on another image or page, or we can simply remove the background of the original one.
To remove the background, make a new layer with a selection by clicking Layer via Copy as was shown previously. And then hide the background layer.
In this quick way, we can cut any object out of an image with precision.
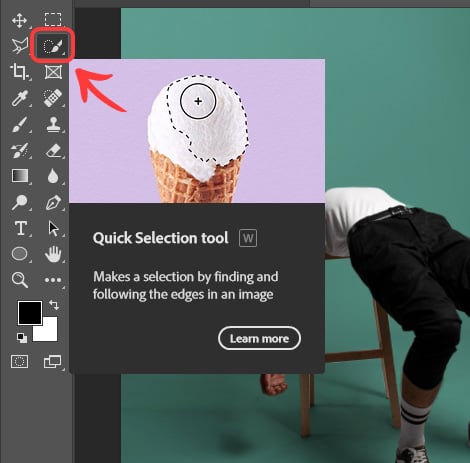
Method 4: Using the Quick Selection Tool and Magic Wand Tool
The Quick Selection Tool and the Magic Wand Tool are also used to make a selection while dealing with images in Adobe Photoshop. The Quick Selection Tool allows the selection of objects by filling up the object area with the click-and-drag method of the mouse. And Magic Wand Tool works best for images with flat backgrounds or backgrounds with the same colors or hues.
To understand these tools, let's take the above image. First, I used the Quick Selection Tool to select the figure and then refined the selection using the Lasso Tool.
Selection with the Quick Selection Tool is done as follows.

Below the Quick Selection Tool, there is Magic Wand Tool.

To use the Magic Wand Tool, I have selected the background as it is flatter than the object being selected.

After correcting the selections with both, Magic Wand Tool and Quick Selection Tool, we can isolate them with any method, we have gone through previously.

Method 5: Using the Color Range Selection
The Color Selection Method is also considered when it comes to making a selection of objects with flat backgrounds or backgrounds with similar colors and hues. To understand it much better, let's take an example of the following image opened in Photoshop. (If you want to follow along, you can download the image from Pexels.)

Next, we simply go to Select > Color Range from the Menu Bar.

Now, we select the color of the background with the Eyedropper Tool from the newly opened panel of the Color Range and adjust the Fuzziness until you get a nice, crisp selection.

Finally, we click OK. We will get a nice selection based on the color range we have selected.

After correcting our selection, we can isolate the object using any of the previously told methods.
And that's it. We have successfully isolated the objects from our background using the Color Range Method.
Non-Destructive Editing: Using a Layer Mask
One of the main benefits of using a Layer Mask is that it allows us to do Non-Destructive Editing. In dealing with the image, it becomes easy to edit it even after the final changes. It allows us to edit our selection even after completely isolating the object from the background, as it keeps the original image intact.
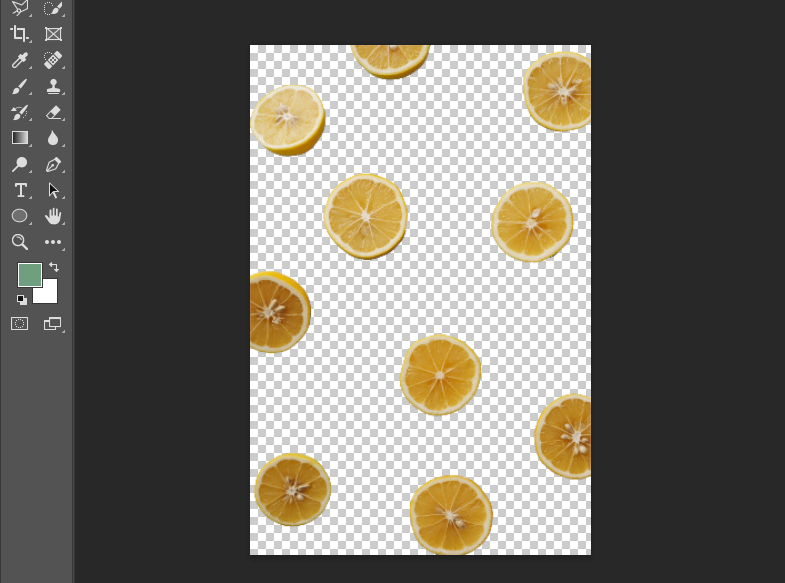
To understand it better, we can take examples from any of the previous images. In the image of oranges, we've made the selection of these oranges using the Quick Selection Tool.
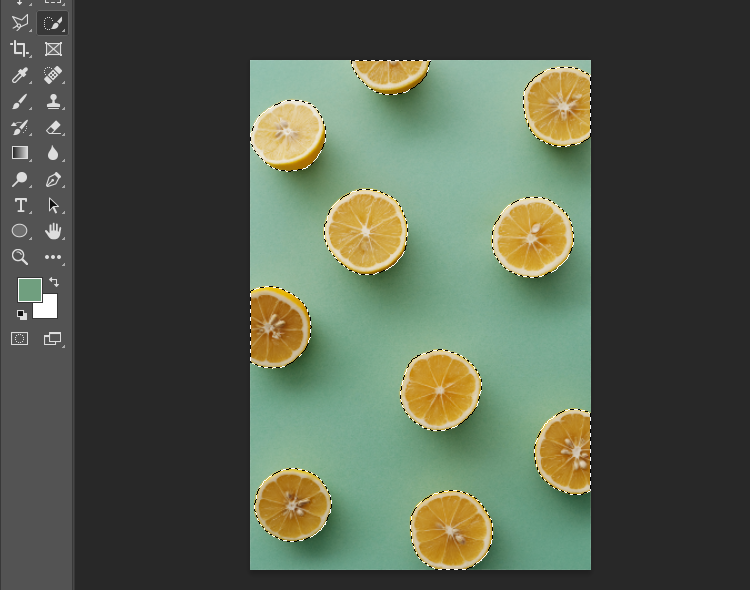
Now, we simply go to the Layer Panel and click on the Add Layer Mask Icon on the bottom side of the Panel. We'll see that the selected oranges will be isolated from the background, and a Layer Mask will be added to the layer that hides the background behind itself.

After the background has been removed from the image, we can still edit our image selection as it consists of the layer mask hiding the background. To edit the selection, we simply need to paint white or black on the layer mask to reveal or hide the pixels respectively. We can change the selection anytime, anyway we like.
I will be hiding two of the oranges in the image by painting black on them using the Brush Tool.

With the same method, I can paint white on the Layer Mask to bring the hidden image out of the Layer Mask.
And here we go. We have successfully learned one of the most demanded Adobe Photoshop skills, which is how to cut out an Image.
Final Thoughts
Photoshop provides a vast range of tools and options to carry out any task when it comes to designing graphics in the industry. A designer should be versatile and creative to carry out any task in several different ways.
In this case, there are many more tools or options to cut out an image in Photoshop. You can choose any of those methods that suit you the best to get the results you will be looking for. Get the best out of your learning process as you go along with this. That's how great designs are made.