Illustrator: Rid Yourself of Pesky "Expand Appearance" Woes
This page may contain links from our sponsors. Here’s how we make money.
In the spirit of April Fools day, I wrote a tutorial on something I once considered “tricky.” If you've ever run into problems while trying to “Expand Appearance” on your brushes in Illustrator, you're not alone. Expanding the appearance of your brush work has many helpful uses because you can get paths that outline your shapes, instead of just the brush stroke itself. This helps preserve the shape of your brush work when scaling and allows you to send files to print with outlined paths that prevents problems when the printers open your files, among other things. Let's get started.

1. Open a new Illustrator document, and create some overlapping shapes using a brush or two.
(For those of you wondering, I haven't released the brushes you see here yet, but I will very soon. If you would like to use some similar brushes to follow along you can download a similar brush set here and here.)
You should now have something like this:

2. Go to Object > Expand Appearance to create your outlines.
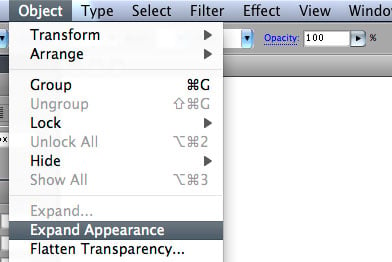
You should see your outlines, as well as the left over brush strokes that we don't need anymore.

Now, if the reason for the next few steps isn't clear, let me tell you why we don't stop here. By the end of this tutorial, we will have a single path that outlines what was originally 3 brush strokes. In order to do that, we need to use the Pathfinder palette to combine the 3 shapes into 1. If you try it at this point, you'll see something similar to this:

That's obviously not what we want. The key to getting it to work is to either select only the outlines (deselect the brush strokes), or just get rid of them all together. I like to just get rid of them, especially if you have a complex piece of work and deselecting them one by one would take forever.
3. With everything selected, right click and “Ungroup” them.
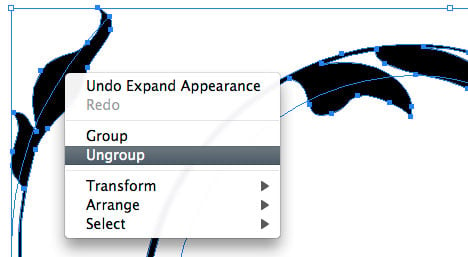
4. Now with the Select tool (black arrow), select one of the outlines.

5. Go to Select > Same > Fill Color.
This is a simple example, but in complex documents, this would be much faster than selecting them all by hand. Since the brush strokes don't have a fill, you'll be able to select everything else all at once. (assuming they're all the same color)

So you should now have everything except the left over brush strokes selected:
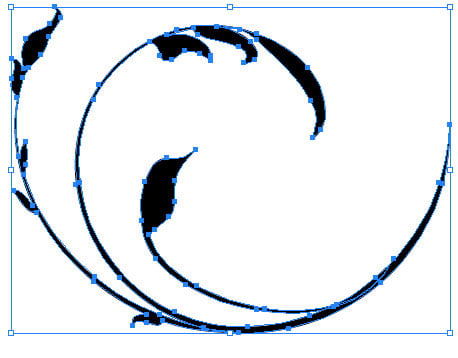
6. With all of your fills selected, go to Select > Inverse.
This will select all of the left over brush strokes, making it easy to delete them.

7. Delete the left over brush strokes.
Note: there are other ways to select the strokes, but this is just what I consider the easiest. Also note that this selection method only works when you “Ungroup everything after “Expanding Appearance.”
8. Select all (Command/Control + A) and you should see only your fills remain. Now we can combine the shapes without all the mess.

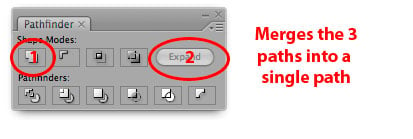
9. Open the Pathfinder palette (Window > Pathfinder) and with all your fills still selected, hit the “Add to Shape” button, then “Expand, ” in that order. (see below)
Done! You should now have a single path created from 3 Illustrator brush strokes, as you see below.
I like combining my paths because it not only simplifies the mess, but it cuts down on file size and makes scaling a breeze. If you've ever scaled brush strokes in Illustrator it can get frustrating fast, depending on what kind of brush it is, whether or not the brush is set to “proportional, ” and wether or not you have “Scale Strokes and Effects” on or off. However, if you do start outlining your artwork, it's probably a good idea to keep a copy of the original brush strokes somewhere, incase you want to go back in and adjust a stroke size before you outline it.


