How to Curve Text in Adobe Illustrator
This page may contain links from our sponsors. Here’s how we make money.
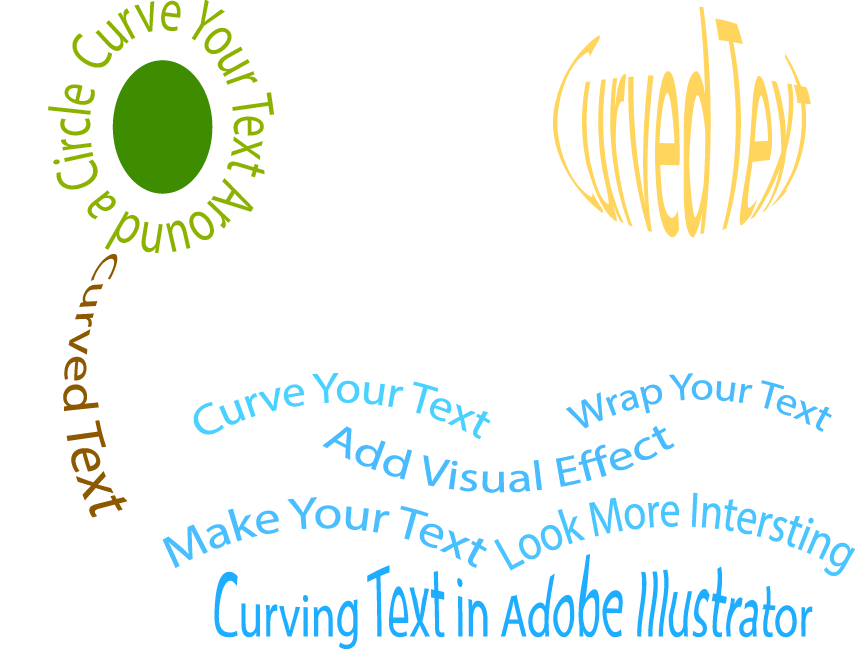
Curving text in Adobe Illustrator is a useful technique. It can add a visual effect to your text by incorporating shapes into your typography.
In fact, there are many situations and scenarios when you'll want to create curved text. It's a fun and creative way to create unique designs for your text and fonts.
In this article, we'll explore various ways to curve text in Illustrator.
How to Curve Text in Illustrator
Like most tasks that you'll perform in Illustrator, there are a few different ways to curve or bend text.
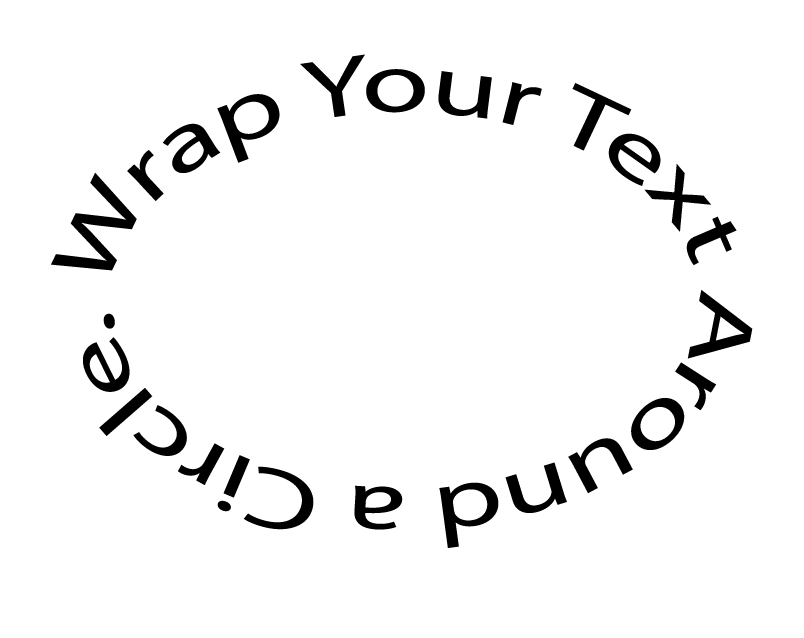
Method 1: Use the Ellipse Tool
Step 1:
Open a New Document with any size artboard you want to work with.
Step 2:
First, we need to make a circle for this method. To make a circle, you need to Select the Ellipse Tool from the left-hand side toolbar, or you can simply use the keyboard shortcut key (L)
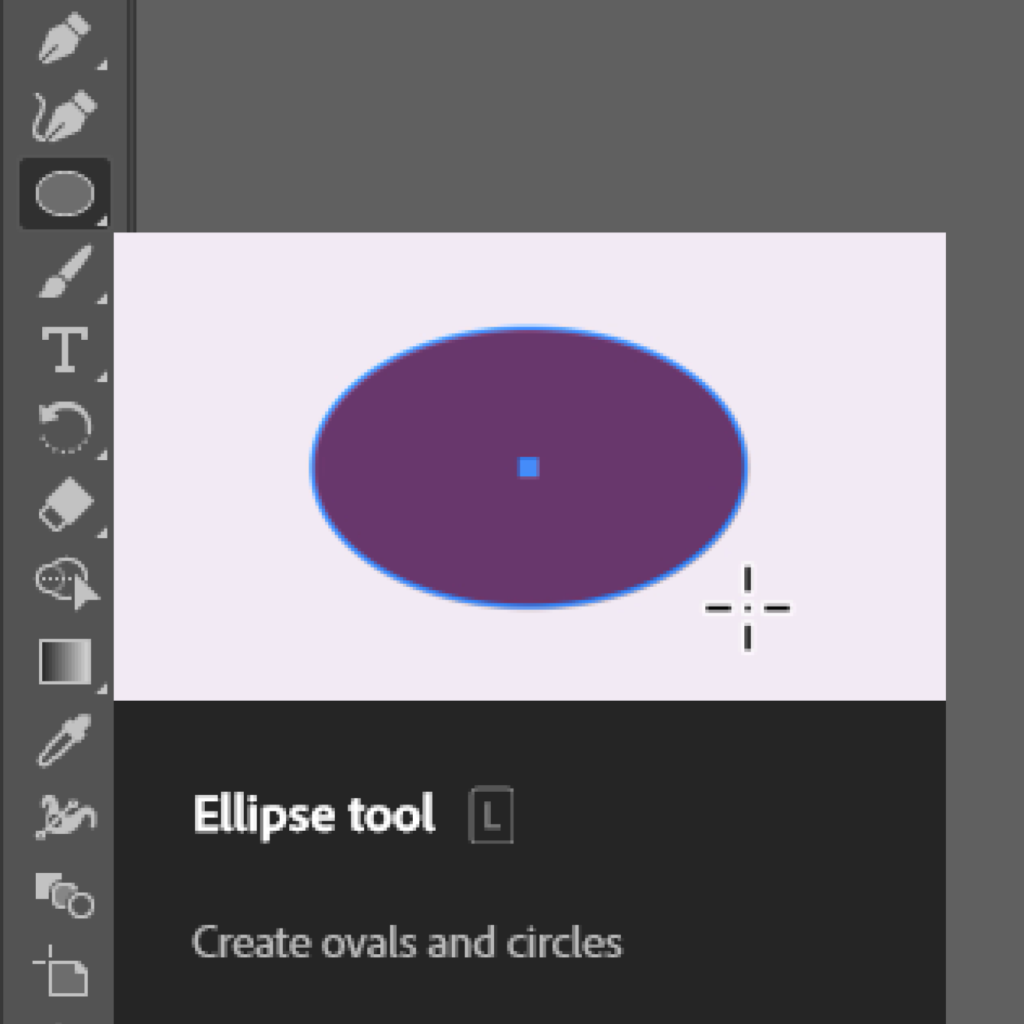
Step 3:
Now click, hold and drag while holding down the Shift key to make a perfect circle. once you're done making a circle of your choice, let's move on to our next step.
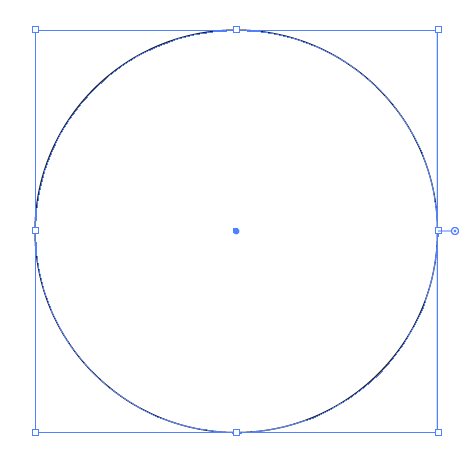
Step 4:
When your circle is ready, go to the text option in the left-side toolbar—select Type on a Path Tool from the text menu.

Step 5:
Once you have the Type on a Path Tool active, click on the circle. You will see a path for your text is created around the circle.
Tip: You can also press (T), hold ALT, and click on the circle to get the text path.
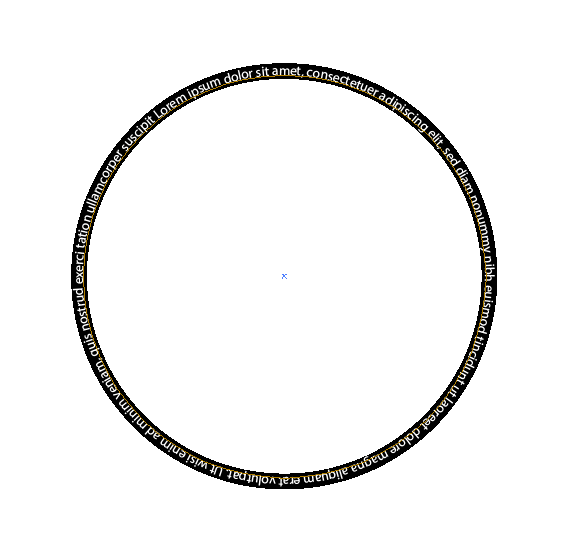
Step 6:
Now that you have your path, you can write the text you want to curve around this circle. You can change the font, color, and size of the text as you wanted. you can also align your text if needed from the align option in the window. You can also resize or reshape your circle as needed.
Method 2: Make with Top Object
Step 1:
First, we need a piece of text on our artboard. Select Type Tool (T). Type the text you want to curve.
Step 2:
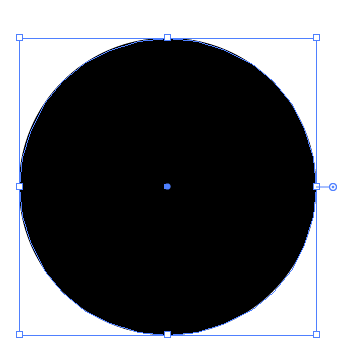
When your text is ready, select the Ellipse Tool (L). Make a circle using the ellipse tool by clicking, holding, and dragging. Again, hold the shift key to make it a perfect circle.
Step 3:
Now that you have your text and shape ready, select both the text and the circle using the Direct Selection Tool.

Step 4:
Once you have selected both the text and the circle, align them using Horizontal Align Center and Vertical Align Center from the align menu. You will find this align menu in the window option (Window> Align). You can also bring up the align menu using the keyboard shortcut Shift + F7.

Tip: It's best to bring the align menu on the right toolbar so it will be handy to use.
Step 5:
Now that the text and the circle are aligned, make sure the circle is in front of the text. Select both the text and the circle again.
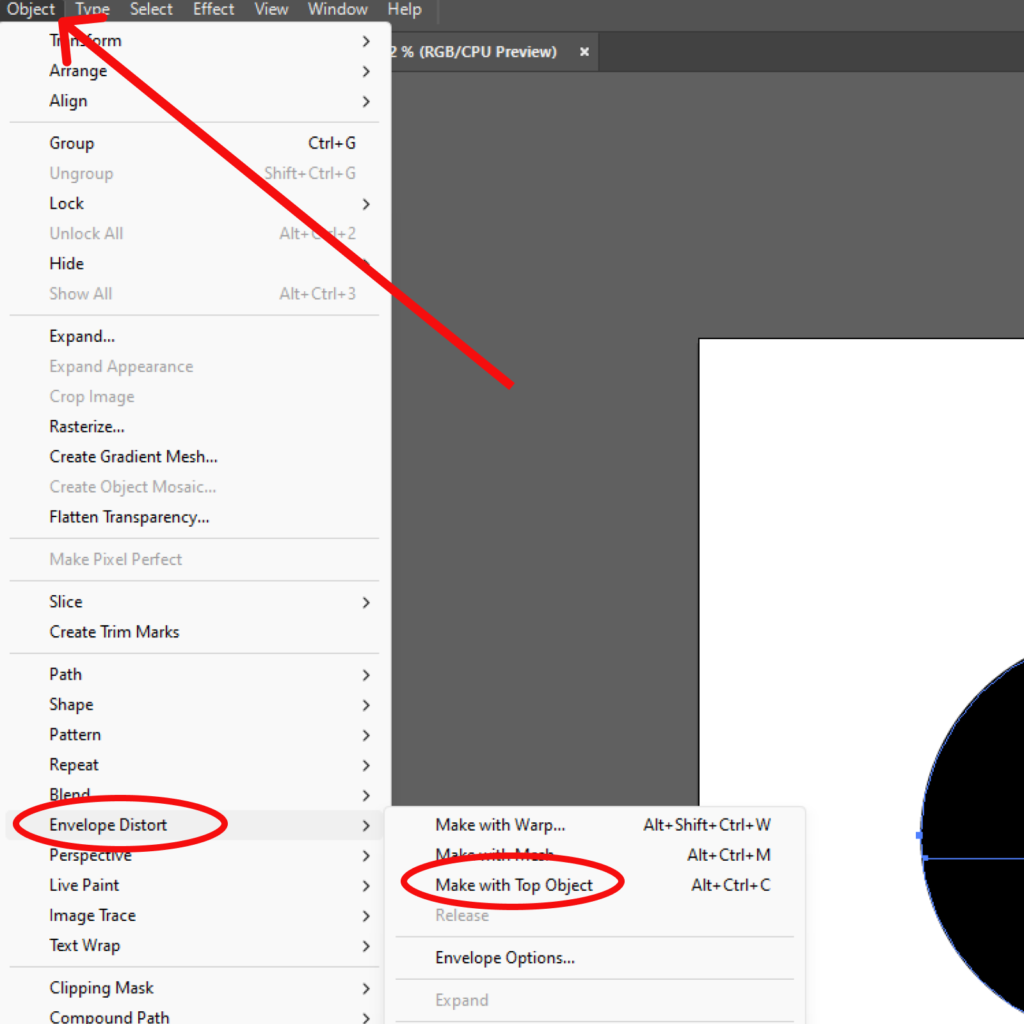
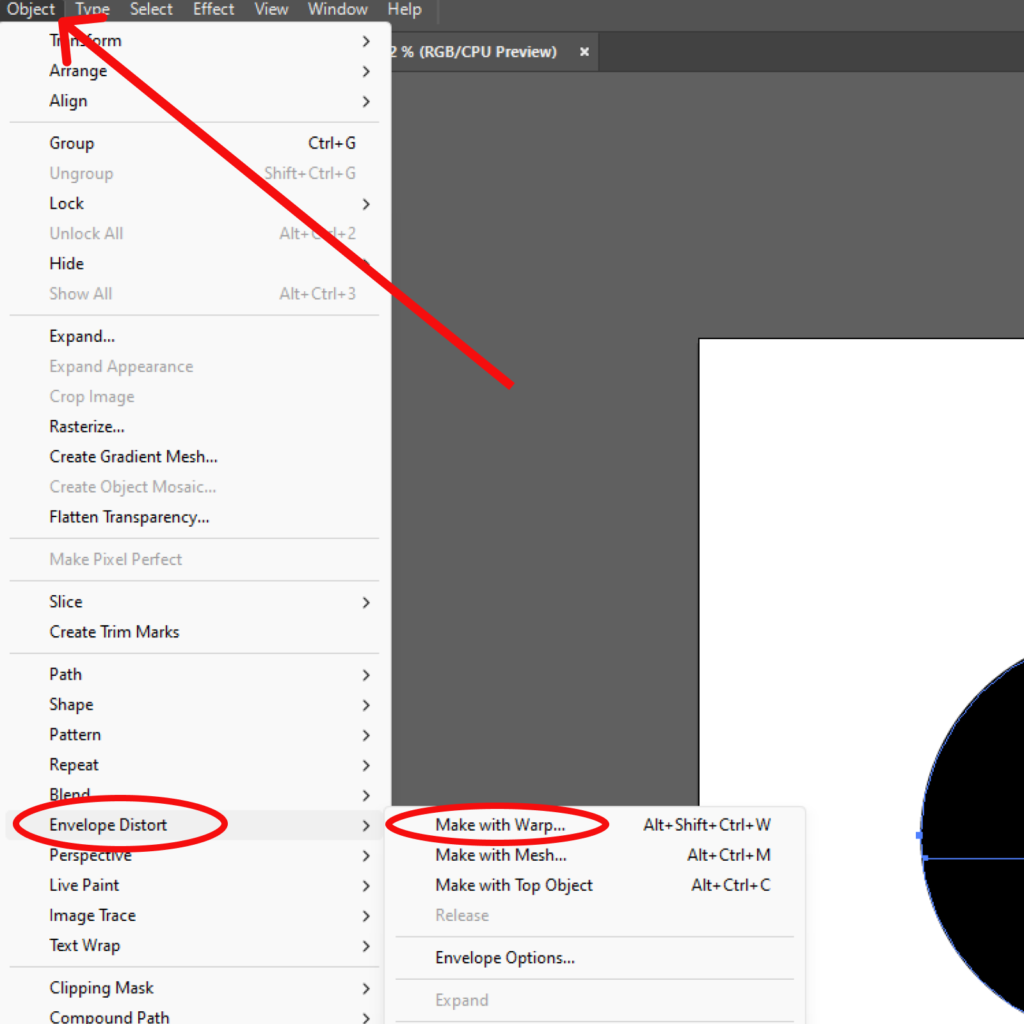
Step 6:
Go to the Object option. From the drop-down menu, select Envelope Distort. Then Select Make with Top Object.
Step 7:
Once you are ok with the text, it's time to finalize the text. To finalize the text, select the text, then go to Object and select Expand. There you go. Your text is curved inside the circle.
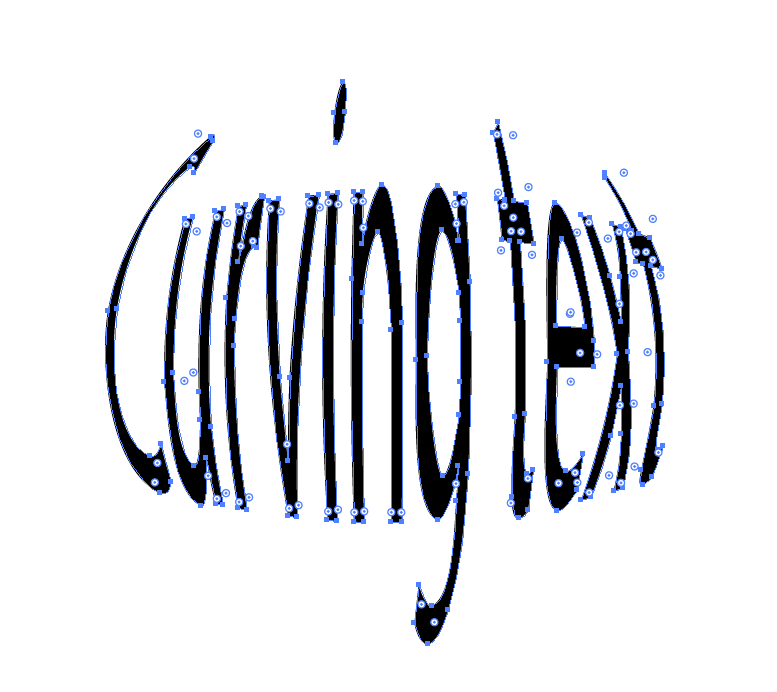
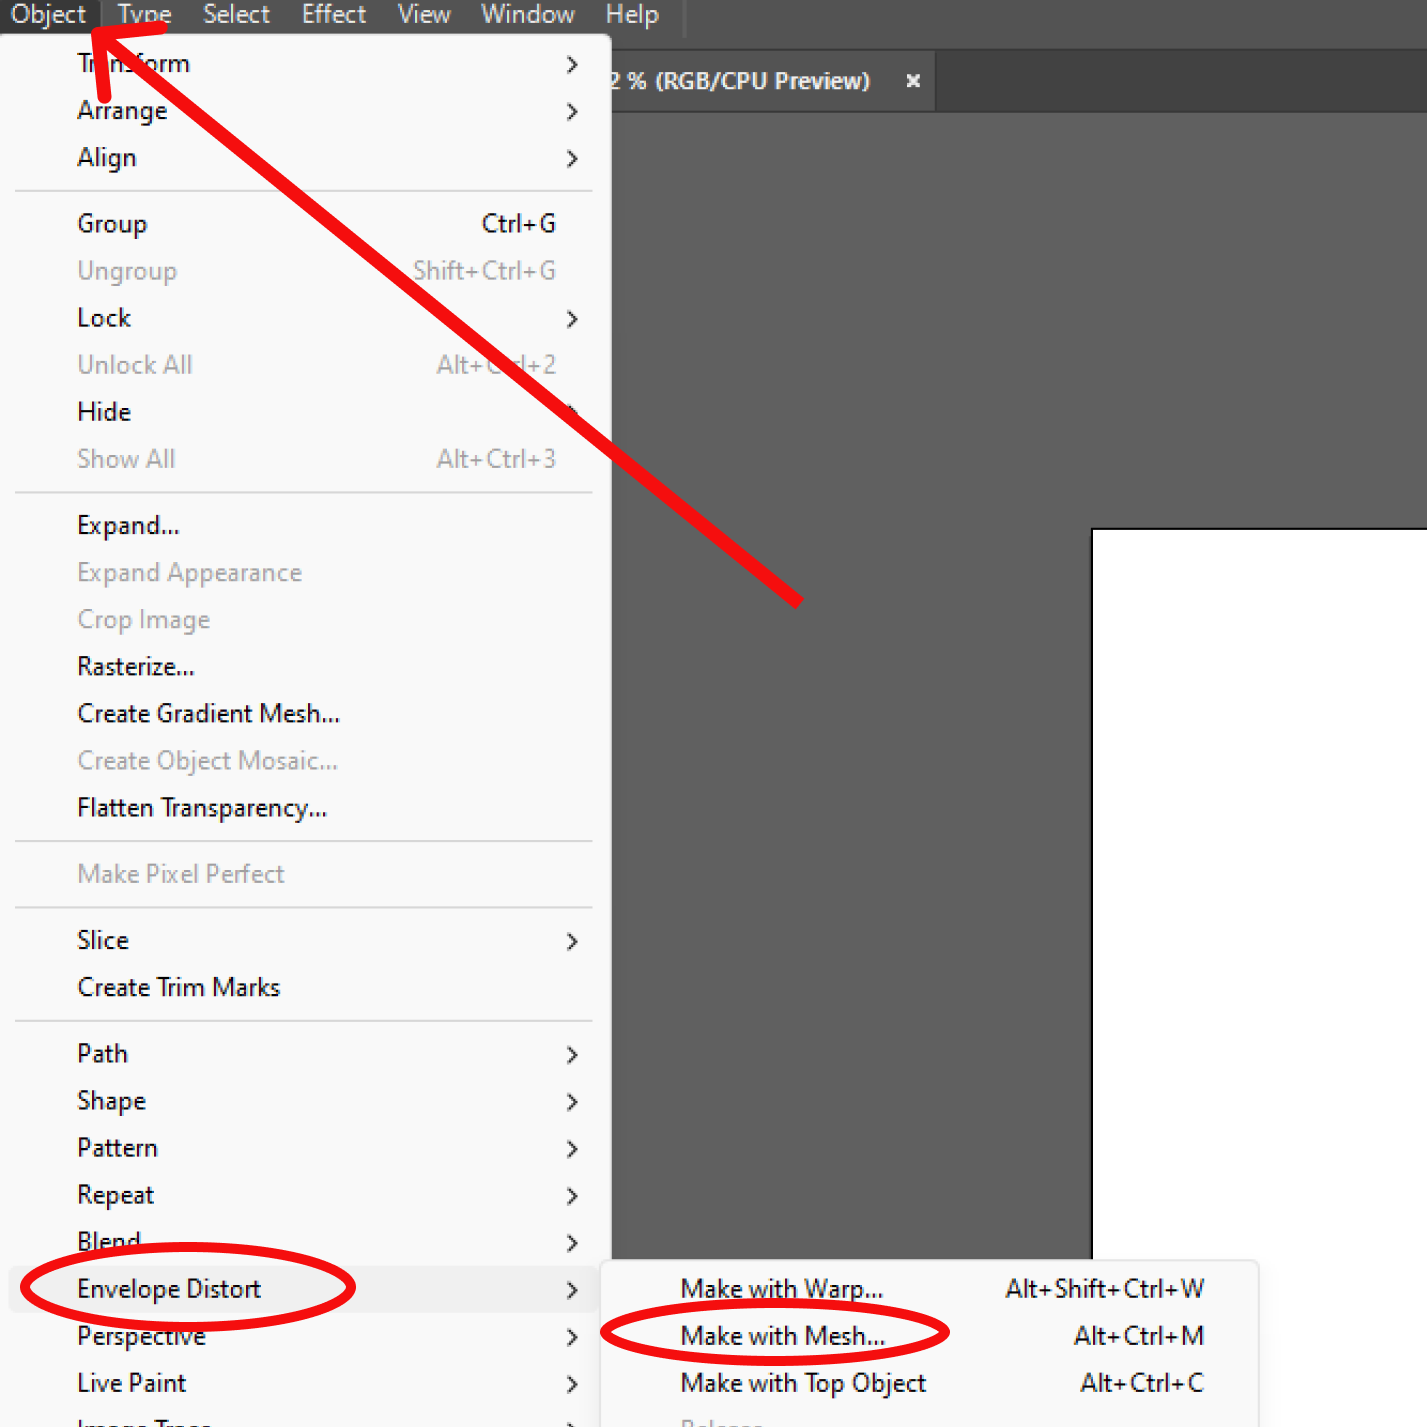
Method 3: Make with Mesh
Using Mesh for curving text will allow you to create a unique design and give you more control over the text. So, you can go ahead and give different curvy textures to individual text.
Step 1:
First, select the Type Tool. Type the text you want to curve.
Step 2:
Select the text. Go to Object>Envelope Distort>Make with Mesh.
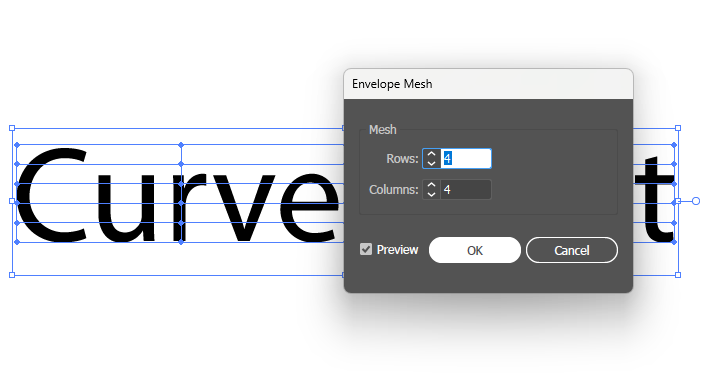
Step 3:
There will be a new window where you can select the number of Columns and Rows you want for your text. Choose your column and row number and select Ok.
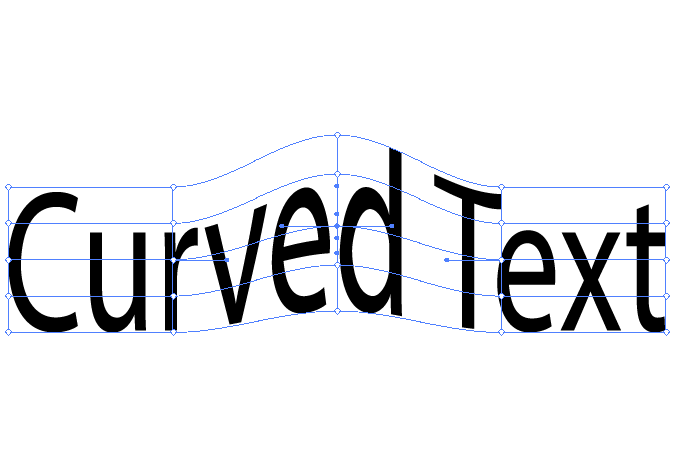
Step 4:
You'll get a mesh over your text. There you will get some anchor points all over the mesh. Clicking on those anchor points with Direct Selection Tool will provide you with handles. Click and drag those handles to curve your text. You can make unique curvy text with this method by dragging different handles of different letters.
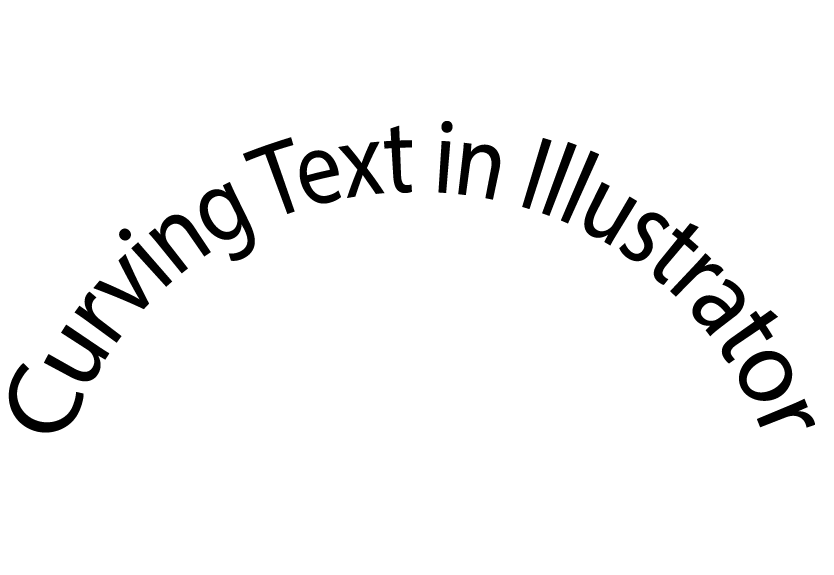
Method 4: Using the Warp Option
The Warp option gives you several style options to select from. Let's look at how you can use the Warp option to curve your text.
Step 1:
First, you need a piece of text ready to style. Type your text using the Type Tool.
Step 2:
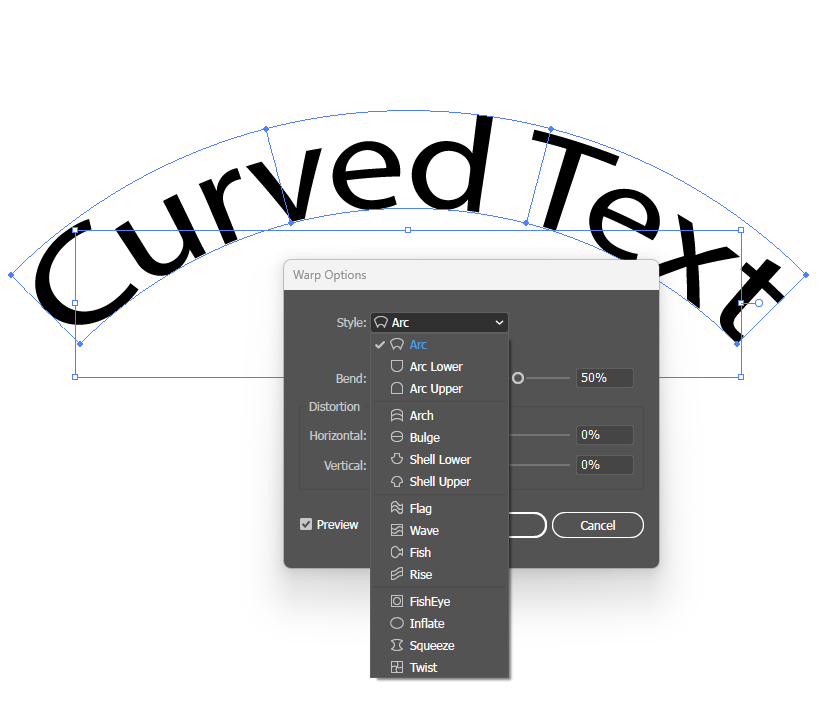
Select the text using Selection Tool. And go to Object>Envelope Distort>Make with Warp.
Step 3:
When you select Make with Warp, you'll get a window for “Warp Options.” Here you can select which way to curve your text from the Style menu.
You can always change the text by double-clicking on the text with Selection Tool.
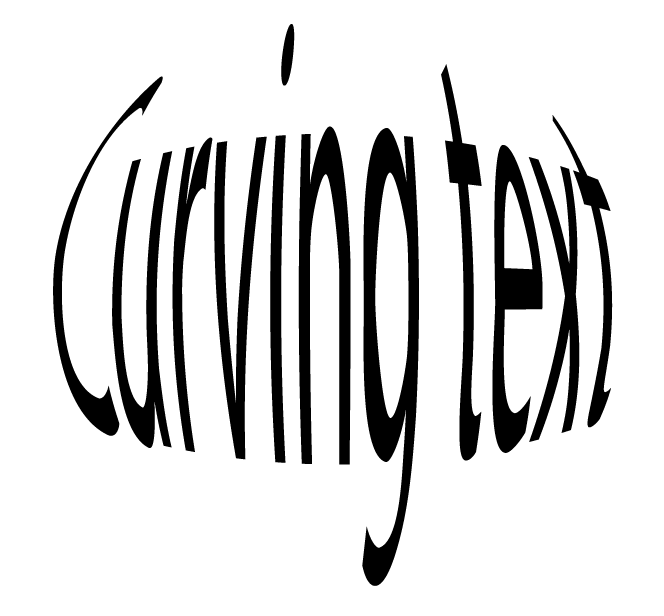
Curvy texts are great for drawing attention. Curving Text is an easy and simple yet very effective way to make your text more eye-catchy for the readers. And fortunately, there are several ways to curve text in Illustrator.