Design a Textured Button in Photoshop
This page may contain links from our sponsors. Here’s how we make money.
Today I'll be showing you how to design a neat little textured button in Photoshop. This is a basic level tutorial that will help you learn more about layer styles, texture and pattern overlays, and gradients. If you find this walkthrough useful and would like to see more like this please leave me a comment. Enjoy!
Resources Used:
- Paper texture from Lost & Taken
- Pixel pattern from Premium Pixels
- Seamless wood texture from Graphic River
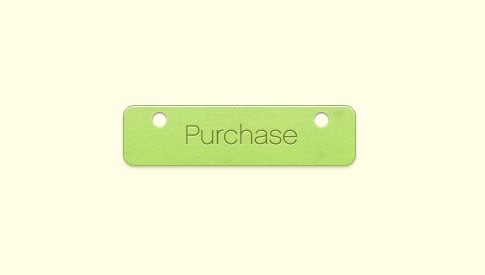
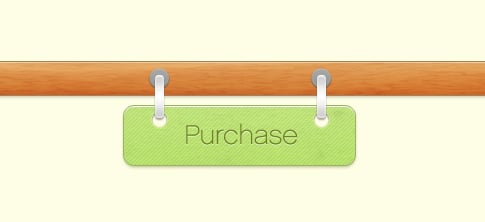
Preview of what we're making:

Step 1
Create a new 500px by 500px Photoshop document with a background will color of #fefeea

Step 2
Using the Rounded Rectangle Tool with a radius of 10px, create the base of the button. The color I've used is #c9e886.

Step 3
Double click on the layer in the layers window to bring up the Layer Style pane. First check the Drop Shadow button, set the angle to 90 degrees, the color to #c3c49b, the distance to 2px and the size to 4px.

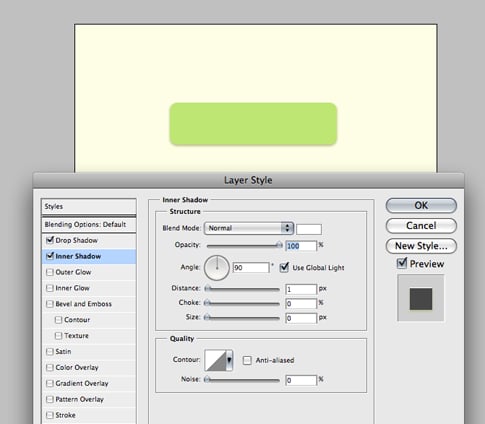
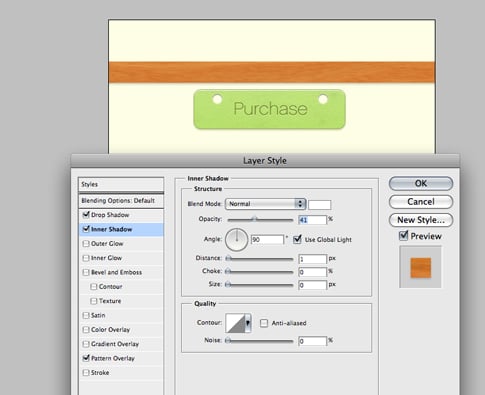
Step 4
Then we'll add an inner shadow. Set the color to white, blend mode to normal and distance to 1px.
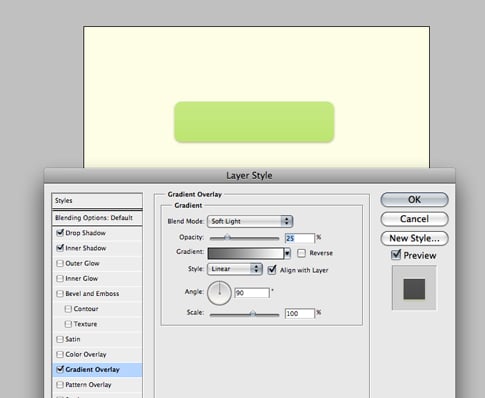
Step 5
Next we'll add a subtle gradient to help give the button a hint of depth. I used a grey to white gradient with an opacity of 25%, and set the blend mode to soft light.
Step 6
Now it's time do add a little bit of texture to the button. Download this set of pixel patterns from Premium Pixels and import them into PS. Once that's done, go back to the Layer Style pane and select one of the diagonal patterns, set the blend mode to overlay and the opacity to 13%

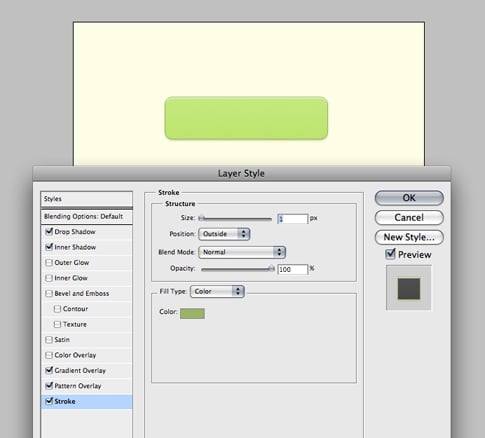
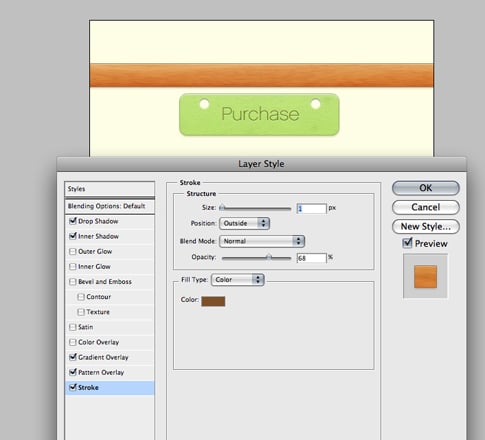
Step 7
Lastly in the Layer Style window add a 1px stroke with a color of #a9bf79.
Step 8
To finish of the base of the button we'll add a little bit more texture to it. Open one of these seamless paper textures from Lost & Taken in PS and resize it to 500px. Paste it into your document, create a layer mask for the button and delete the rest of the texture so you're left with this:
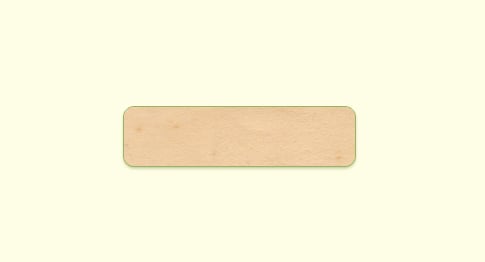
Step 9
Desaturate the texture and in the layer window set the layer to Multiply with an opacity of 57%. You may have to adjust the Levels of the texture depending on which one you use.

Step 10
Next add your text for the button, here I've used the font Chalet with a color of #7d7915.

Step 11
Open the Layer Style pane and add a white drop shadow with a distance of 1px and an opacity of 85%. This helps give the text just a hint of depth.

Step 12
Next we'll make the holes for the hooks. Using the Elipse tool draw a small circle the same color as the background.

Step 13
Add a drop shadow with the color of #d5f590, set the opacity to 53% and the distance to 2px.

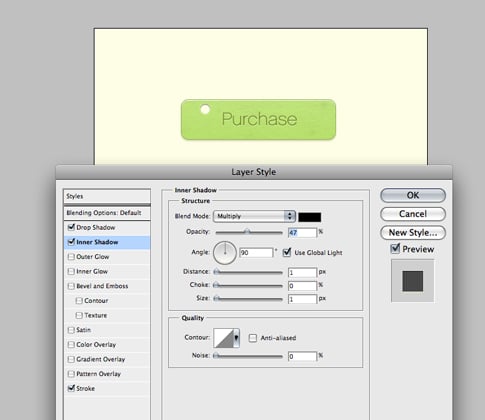
Step 14
Add a black inner shadow with a distance of 1px and a size of 1px. Set the opacity to 47%.

Step 15
Add a 1px, white stroke with an opacity of 27%.
Step 16
That wraps up the first hole, duplicate the layer and position it on the opposite side of the button. Right now you have a perfectly good button in it's own right, but I wanted to take it just a little further.
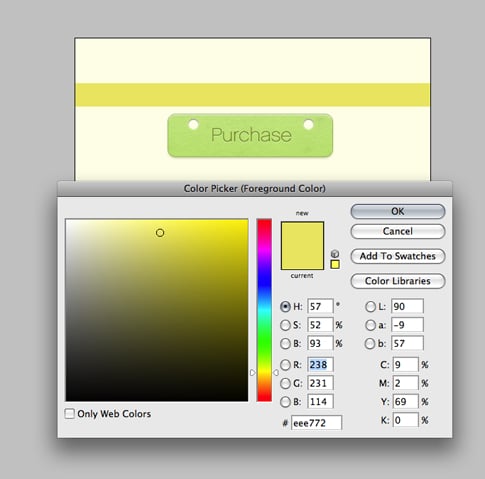
Step 17
Using the Rectangle Tool create a stripe above the button.
Step 18
Download this premium set of seamless wood textures (there are also free ones out there if you look), and open the .PAT file into Photoshop. In the Layer Styles overlay the pattern on top of the shape.

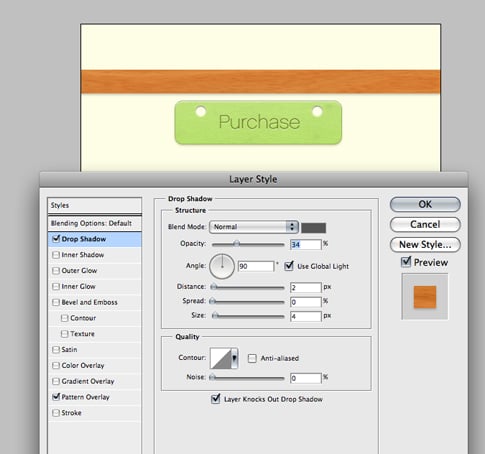
Step 19
Next we'll add a grey drop shadow with an opacity of 34%, a distance of 2px, and a size of 4px.
Step 20
Also add a white, 1px inner shadow with an opacity of 41%.
Step 21
Next we'll add a gradient to once again help with depth. Create a gradient similar to below in the gradient editor.

Step 22
Set it to soft light with an opacity of 67%.

Step 23
Lastly we'll add a 1px, #926334 stroke with an opacity of 68% and that wraps up our wood bar.
Step 24
Now it's time to create the hooks that the button hangs on. Using the Elipse tool create a small circle colored #979797 on top of the wood bar.

Step 25
Add a grey drop shadow with a distance of 1px, size of 1px, and opacity of 73%.

Step 26
Next add a white inner shadow with an opacity of 26%. (on step 26 nonetheless).

Step 27
And lastly add a grey to white gradient overlay. Set the blend mode to soft light and the opacity to 35%.

Step 28
Duplicate the shape and position it on the other side.
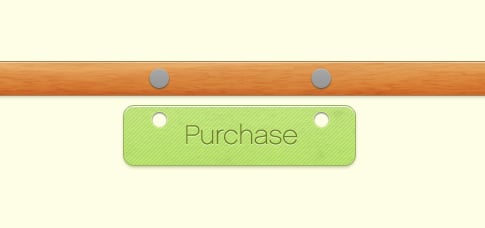
Step 29
For the next part of the hook, use the rounded rectangle tool with a diameter of 5px to create a long pill form shape.

Step 30
Next, under the layer styles pane, open the gradient editor and create a gradient similar to below.

Step 31
Set the style to radial, check the reverse box, and set the scale to 150%.

Step 32
Next we'll add a black drop shadow with a distance and size of 2px and an opacity of 32% (on step 32 for what it's worth, I swear I don't plan this stuff).

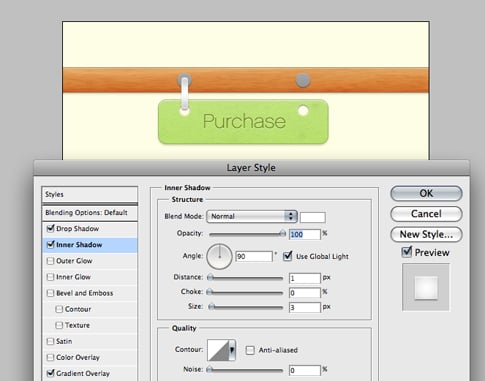
Step 33
Lastly add a white inner shadow with a distance of 1px and size of 3px.
Step 34
Duplicate the shape and position it above the other hole in the button.
Step 35
The last detail we'll add is a tiny pin that helps complete the hook assembly. Using the elipse tool draw a small circle with a color of #c3c3c3 in the center of the larger grey circle.

Step 36
Next add a #99b467, 1px stroke.

Step 37
Add a grey to white gradient set to soft light with an opacity of 25%.

Step 38
Then add a white inner shadow with a distance of 1px.

Step 39
Lastly add a drop shadow with a color of #b5b889, set the distance to 2px and the size to 4px. Then duplicate the shape and position it on the opposite side.

Complete!
And that wraps up this tutorial, I hope you guys were able to learn little something new. Thanks for reading!