How to Use the Vanishing Point Filter in Adobe Photoshop
This page may contain links from our sponsors. Here’s how we make money.
Have you ever seen the realistic concept art of games with many buildings and tall towers? Or the pictures of busy markets with giant billboards and advertisements? Or the images with street perspectives, including Photoshopped texts and digitally painted graffiti? These images grab our attention and appeal to our eyes.
For a designer, artist, or digital illustrator who uses Adobe Photoshop, it becomes crucial to know how these images can be made within seconds. At some point, Photoshop users will need to manipulate the images this way to get the desired result for editing. And in this tutorial, you'll learn to manipulate your images in the way you've always seen in those eye-catching graphics.
Before we go further, first, let's understand what the vanishing points are.
Vanishing Point
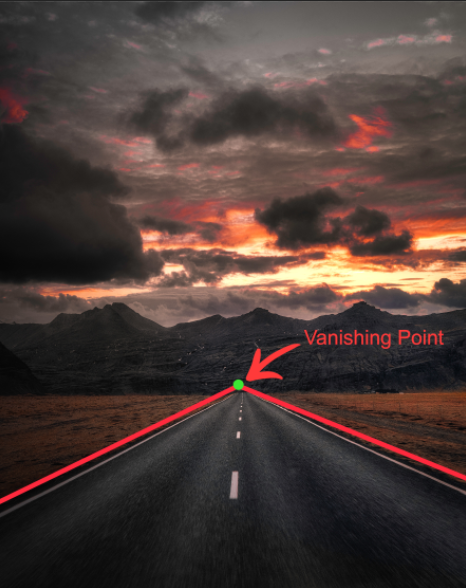
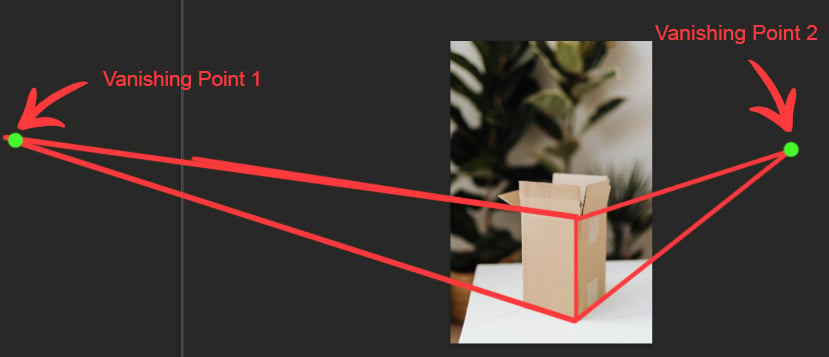
As a designer, you're familiar with perspectives. There are a few types of perspectives. The most commonly known are one-point perspective and two-point perspective. Every image we see or everything our eye sees contains perspective, whether one-point or two-point perspective. When we notice an image with perspective, we come to know that the sides of objects in that image seem to merge or meet at a common point. That point is known as the Vanishing Point. One-point perspective contains a single vanishing point, and two-point perspective contains two vanishing points.
Let's look at the following images to understand these types of perspectives. (The following images will be used in this tutorial. If you want to follow along, you can download them from Pexels: Image of the road and Image of the box ).
Vanishing Point Filter in Adobe Photoshop
To edit an image from its applied perspective, Photoshop has introduced a filter called the Vanishing Point Filter. Applying this filter, we can add text in perspective and simply edit anything in the applied perspective.
Let's see how we can use this filter to edit our images.
Using the Vanishing Point Filter in Adobe Photoshop
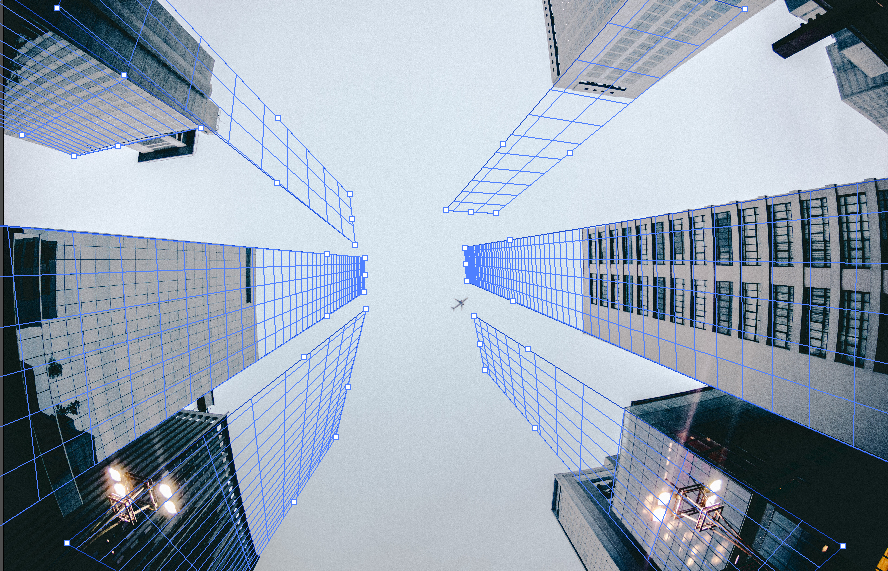
To understand it better, let's take the following image of buildings in perspective. We'll add perspective text on these buildings. (If you want to follow along, download the image from Pexels.)
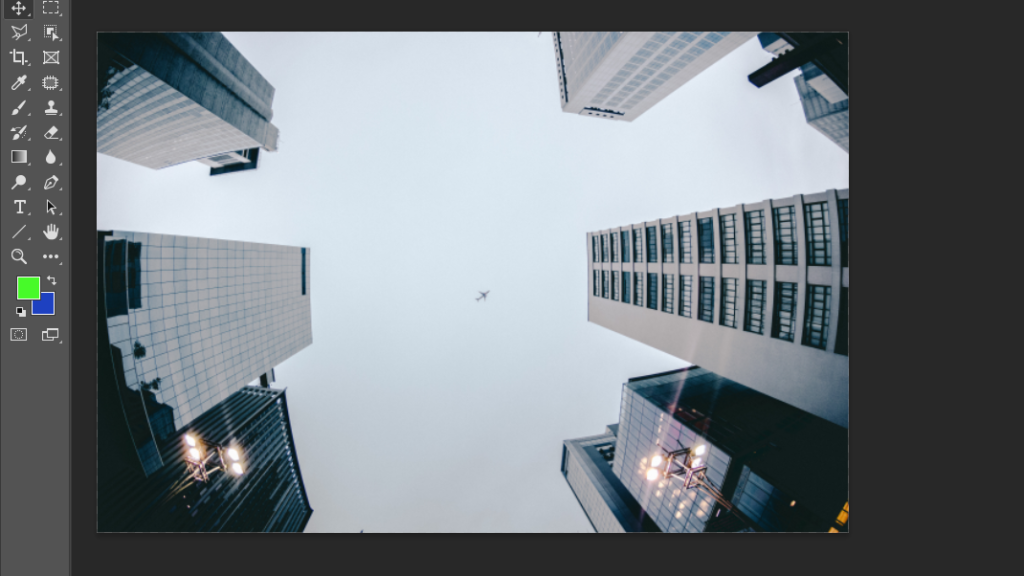
After you've opened the image in Photoshop, create a new layer above the original layer by going to the Layer Panel. Everything we apply or add to this image will be added to the new layer.
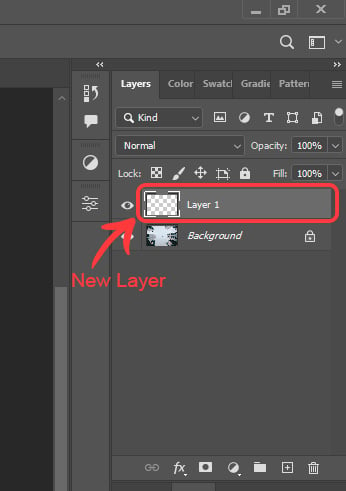
Now apply the Vanishing Point Filter by simply going to the “Filter > Vanishing Point” from the above Menu Bar.

A new window of the Vanishing Point Filter will open. The filter dialog box contains several tools on the left.
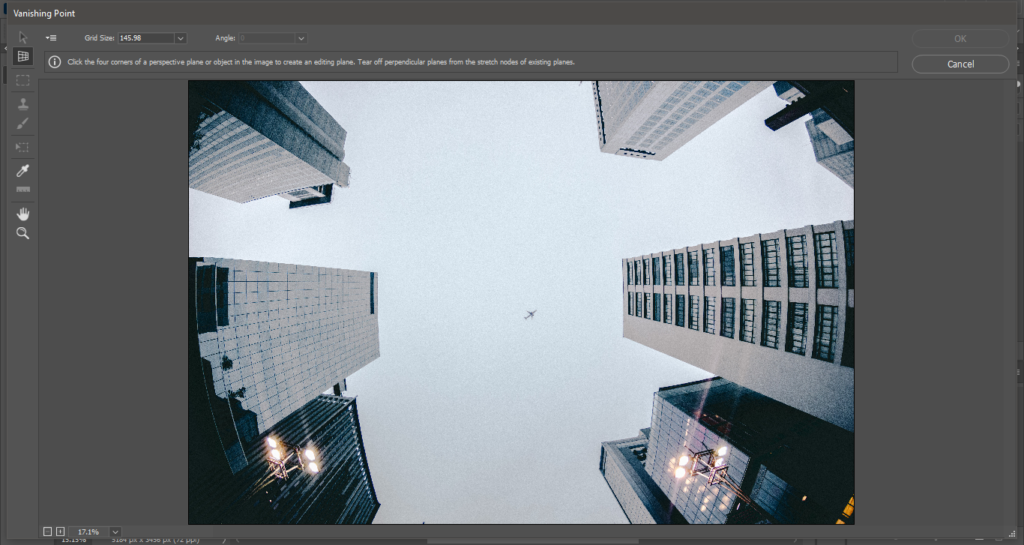
You'll see that by default, the selected tool of the filter will be ‘Create Plane Tool.' Through this tool, we can add the perspective plane to the image. To add the plane, simply add the four points as the four corners of the plane. In the image below, I have added a plane to a building.
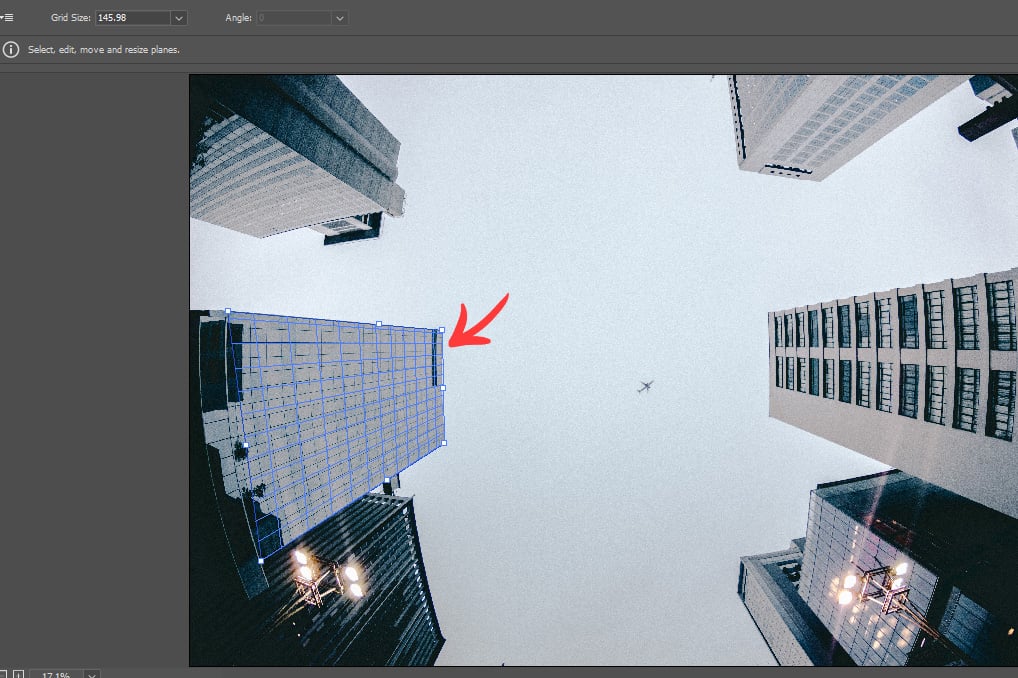
Note: Make sure that the color of the plane's grid is blue. If the grid color is yellow or red, it means that Photoshop does not accept the grid or plane you have just applied.
Similarly, you can add the planes to other buildings using the same Create Plane Tool.
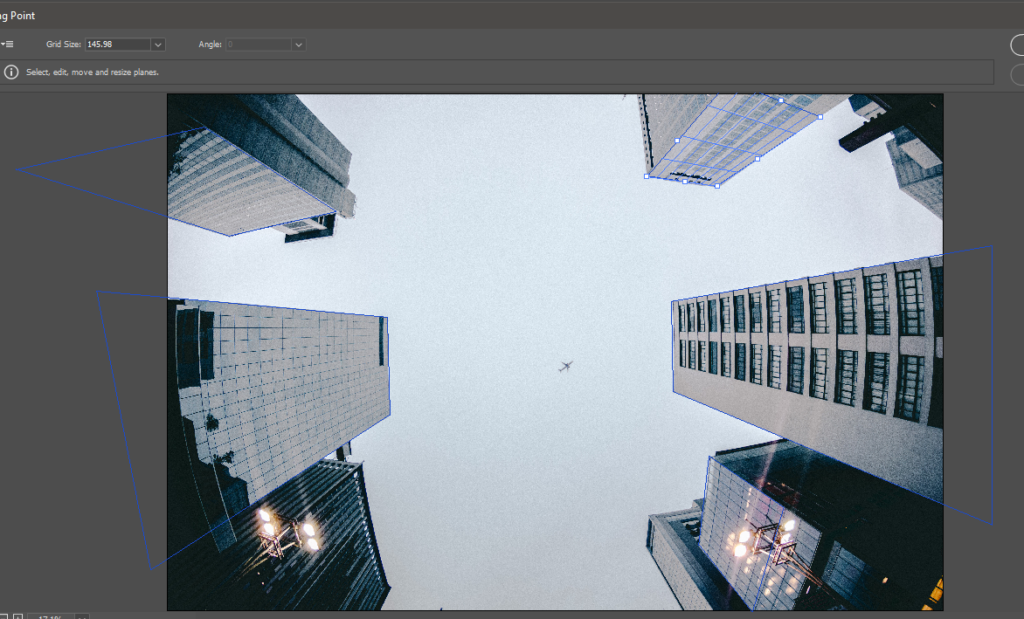
Now, simply click OK.
As you click OK, you'll be returned to the initial Photoshop window. The perspective planes have been applied to your buildings, and you can access them or edit them simply by going again to the Vanishing Point Filter. You can save this picture as it seems now. When you open the saved image again, the Vanishing Point Filter will still be there as you saved it before.
Now, let's consider that we want to add the text on these planes. First, add text normally, as you add on any picture in Photoshop. It is good to add it on a new document, otherwise, you can also add it to the image you are working on. Here, I have added the text on a new document.
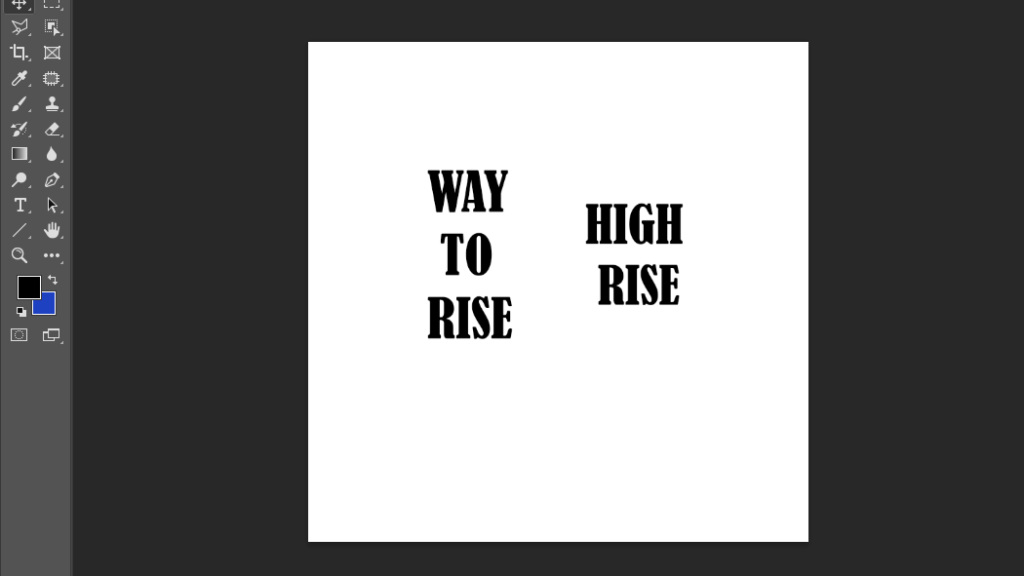
We can simply copy and paste these texts on our plane in the Vanishing Point Filter to add perspective. But before doing this, first, we need to know that Vanishing Point Filter works with the pixels/rasters only, and our text is vector here. So, to select the pixels of the text, go to the Layer Panel and right-click on the T-icon of the text layer that you want to copy. From the shown panel, select “Select Pixels.”
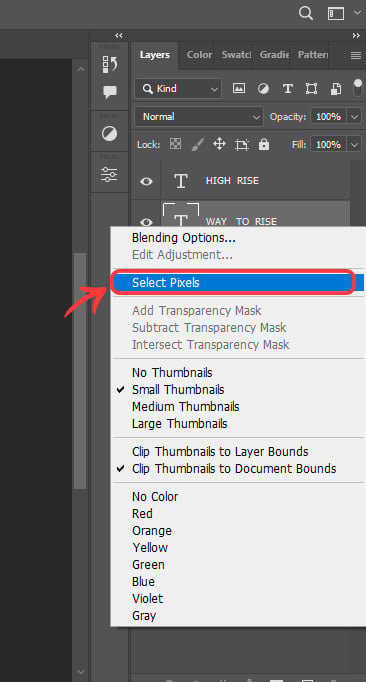
After your pixels are selected, copy the text using the shortcut, Control+C (PC) or Command+C (Mac).
Now, go to the building image and open the Vanishing Point Filter and, paste the copied pixels of the text.
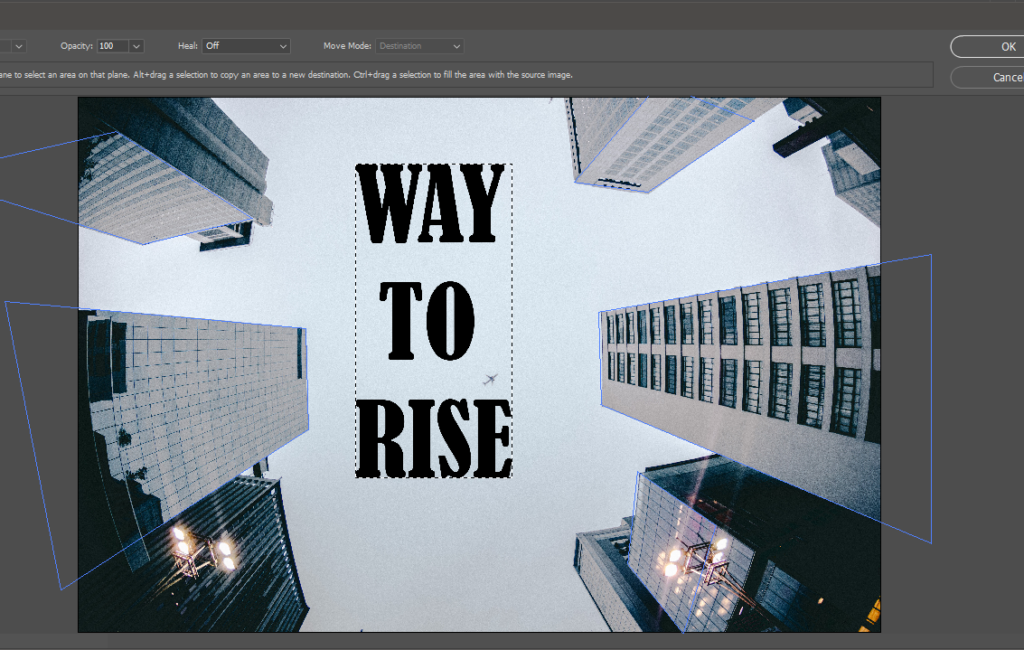
The text shown here is straight. You can resize or rotate this text as you like before moving it to the perspective planes. To do so, simply press the “T” to transform the pasted text on the photo. Here, I've resized and rotated it according to the building I'm applying it to, and then I brought it to the plane. On the plane, you see that the text attains the perspective of the plane.
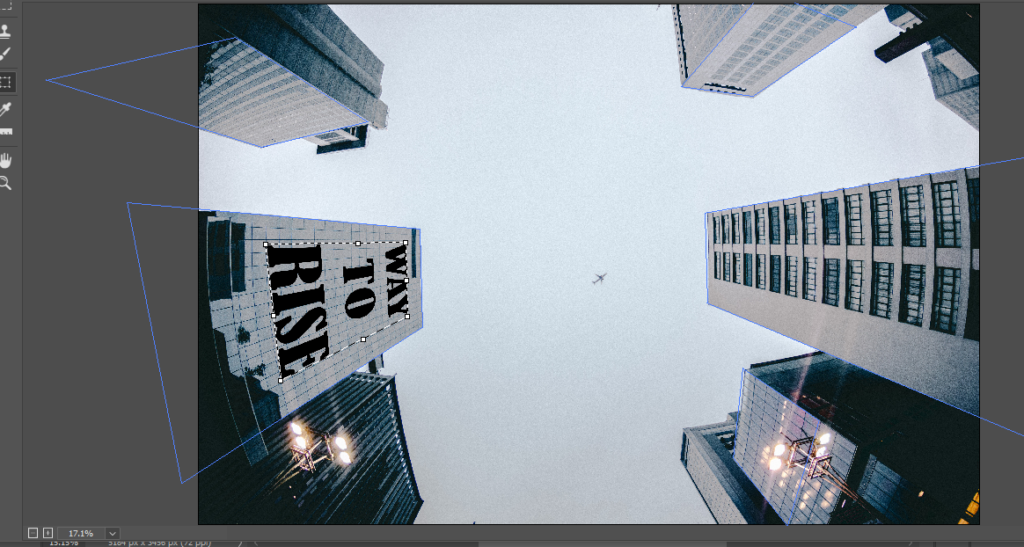
You can still adjust the size and rotation of the text while it's in the plane. After all the adjustments, simply click OK. You'll be returned to the main Photoshop window, and you will see that text is applied to the plane and it's on the new layer.
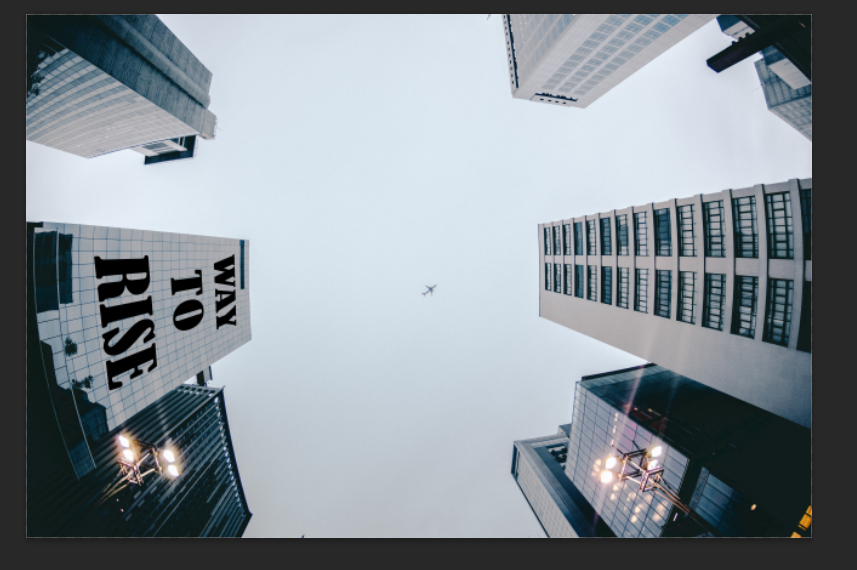
Similarly, you can add another text to another building simply by following the steps to copy the text pixels of the text you want to paste. And then, simply come back to the image of the building and activate the Vanishing Point Filter by going to the above Menu Bar. Paste the new text pixels on the canvas. Adjust them on another building as we did before. And click OK.
Note: Make sure to add a new layer before you select the Vanishing Point Filter again. It allows the added objects to remain on the different layers. That allows us to edit them separately.

You can change the blending modes of the newly added text layers to make the image more realistic.
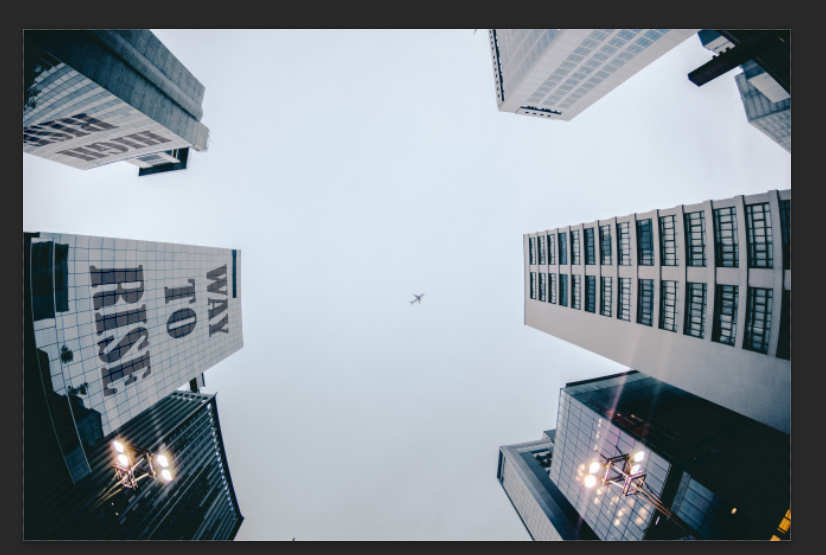
In this way, you can also add any graphic or raster image on any added perspective plane of the picture. Here, in the same way, I have added the text to the image of the road shown in the perspective section.

Using the Vanishing Point Filter in Packaging Design
The usage of perspective planes plays a crucial role in the packaging design. Graphic designers or packaging experts mostly use the vanishing point filter to add logos or graphics to the boxes or products to give them a realistic look. They use it to make custom mockups too.
To understand how they do it, let's take an example of the following image with the box, that was mentioned at the start of this tutorial.
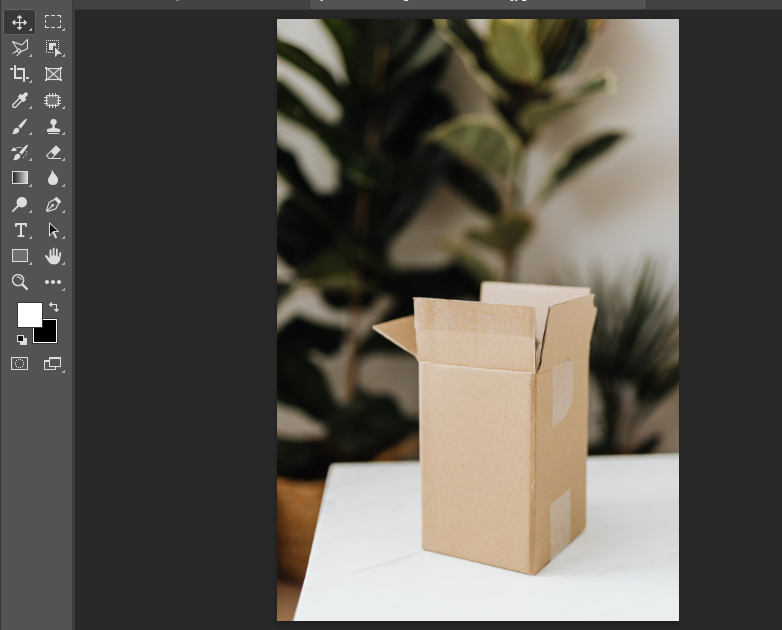
After opening the image in Photoshop, apply the Vanishing Point Filter on the image after adding a new layer above the main original layer, as we did in the previous example. And from the Vanishing Point Filter window, add the perspective planes to a side of the box.
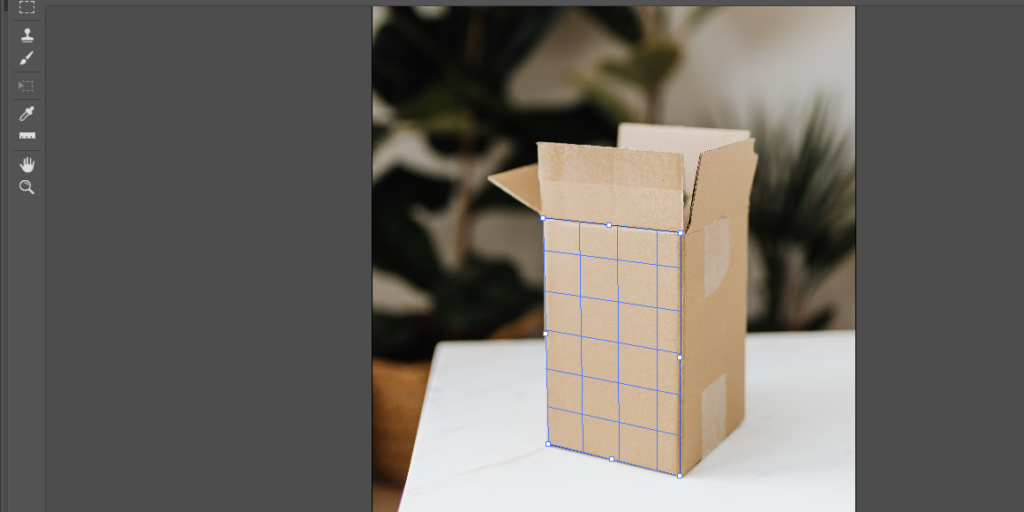
Here, as you add a plane to a side of the box, you can also add another plane to the other side too that will be connected to the first added plane. To do this, after adding the first plane to the side of the box, press the Control key (PC) or Command key (Mac) and drag that side of the plane where you want to add the other plane.
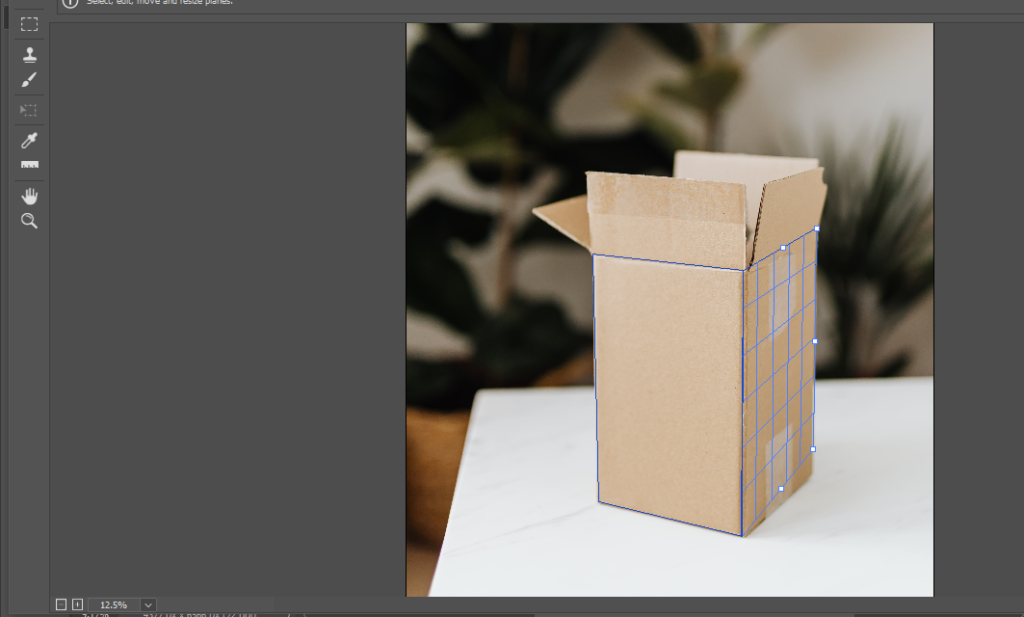
Adjust the sides of the newly added plane to make it meet the original box's perspective.
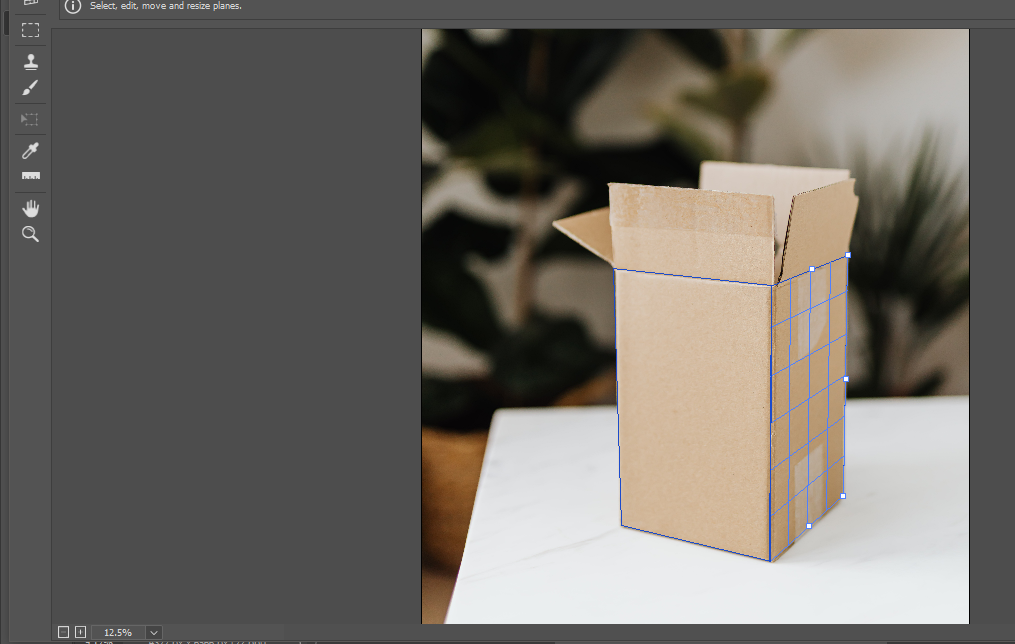
Simply click OK. The perspective planes will be added to the sides of the box.
Now, let's say we want to add any graphic or logo to the planes of the box. For that, the image of the graphic should be pixel-based. Here, I have taken the following logo. (If you want to follow along, download the following logo from Vecteezy).

We've added the two planes on the two sides of the box. Then using the same steps and method as used in the previous image with the buildings, I've added this logo to the sides of the box. The final look of the box with the logo is shown below.

And here we go, in just no time we successfully edited the images. Now we're familiar with one of the most in-demand skills of Photoshop.
Final Thoughts on the Vanishing Point Filter in Photoshop
What we've learned just now are the basics of using the perspective planes to edit images in Photoshop. You'll be amazed to use and practice the Vanishing Point Filter of Photoshop as you can achieve much more complex results.
Like other Photoshop tools, the use of the Vanishing Point Filter is not limited to only one thing or task. You can use it the way that seems the best for you. Keep practicing with it and you'll become a master in no time.
