How to Mirror an Image in Adobe Photoshop
This page may contain links from our sponsors. Here’s how we make money.
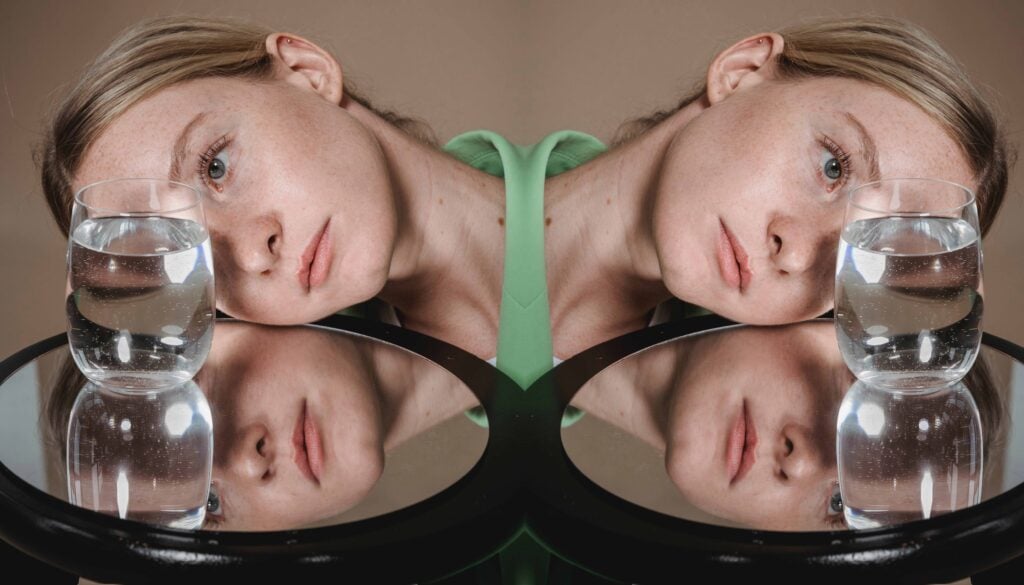
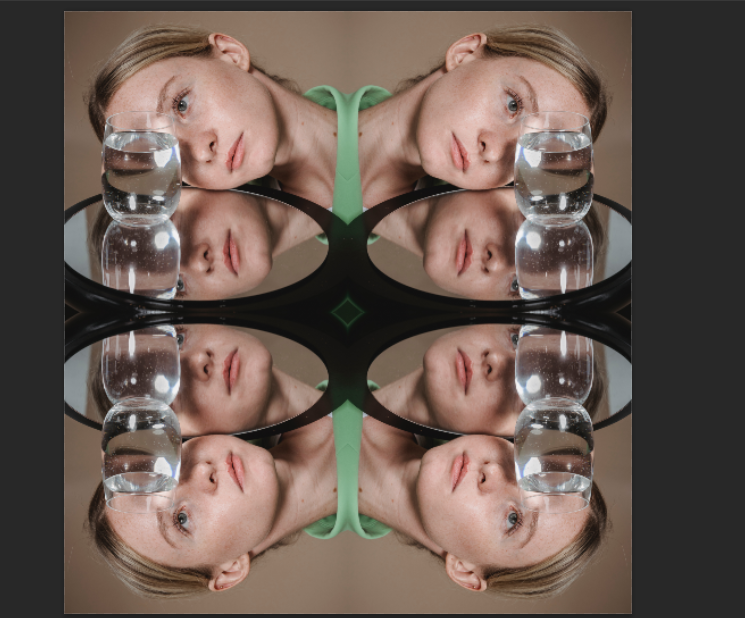
Have you ever seen those astonishing aesthetic mirror images on the internet or social media that grabbed your attention and made you think to create such imagery to implement in your design projects? Well, in the next 5-7 minutes of reading this Photoshop tutorial, you'll master this process.
Mirroring an image is used in symmetrical designs or where you want the viewers to have their attention. On the other hand, creating seamless patterns and images that repeat themselves to fill up a large area also includes this type of image creation. You might think it would be a difficult skill to attain such results, but it only takes a few minutes to get the result we want. So, let's look at the process.
How to Mirror an Image in Adobe Photoshop
Begin with the first basic step, which includes the opening of the image we want to create the image effect with. (You can download this photo from Pexels if you want to follow along.)

After that, you can crop the image from its sides to get the result you want. For this, select the Crop Tool from the Tool Bar. You'll see the cropping border around the image;

Next, drag the sides of the cropping border to the position where you would like the image to be cropped from. And, then press Enter. You will get a cropped image.

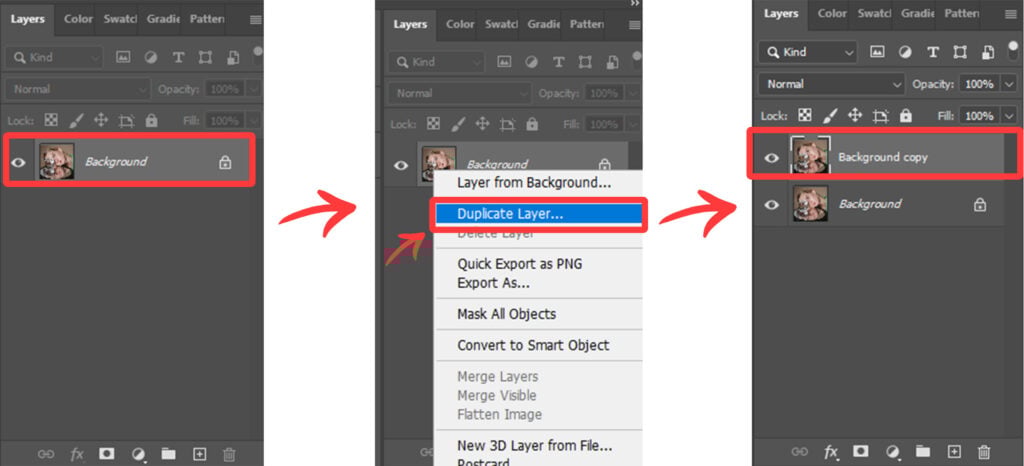
Now, as you go to the Layer Panel, you'll see only the ‘Background' layer. Right Click on that layer and select ‘Duplicate Layer.' You will see a newly created layer ‘Background Copy' in the Layer Panel. You can also use the shortcut, “Control + J” to duplicate the original background layer.
As the image with mirror effect consists of the two images side by side, we need to create a copy of the original one to put that on the other side.
Here, the newly created layer looked the same as the original one. It is placed on top of the original one, so the original layer hides under it. Now, we simply need to place the copied layer on the other side after flipping it. First, we need to expand the canvas size to place our image.
You'll need to think about where you would like the canvas to be expanded. It will depend on the image and how you want it to look. In this case, I would like my canvas to expand on the right side.
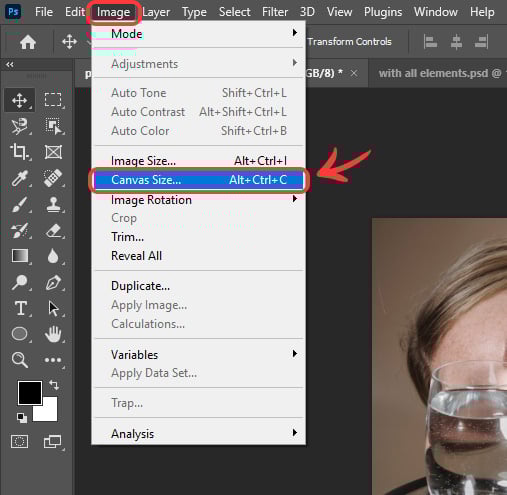
To do this, simply go to the ‘Image > Canvas Size' by going to the Menu Bar.
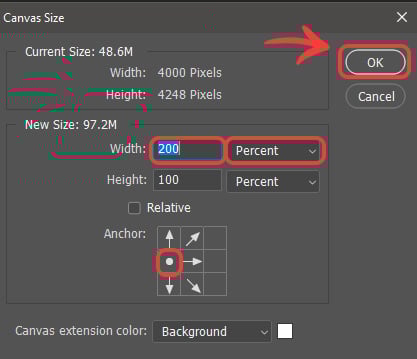
In the new window, select the unit as ‘Percent' in front of Width and put in the value of 200 on the side box. As, here I would like to expand the canvas to the right, so, in the bottom grid option, I would click on the middle left arrow. It will force the original image to move to the left and expand the canvas to the right. And finally, click on OK.
You will see that the canvas will be increased in size and will be expanded as we wanted it to be.

Now, select the top duplicated layer and go to ‘Edit > Transform > Flip Horizontal' by going to the Menu Bar.
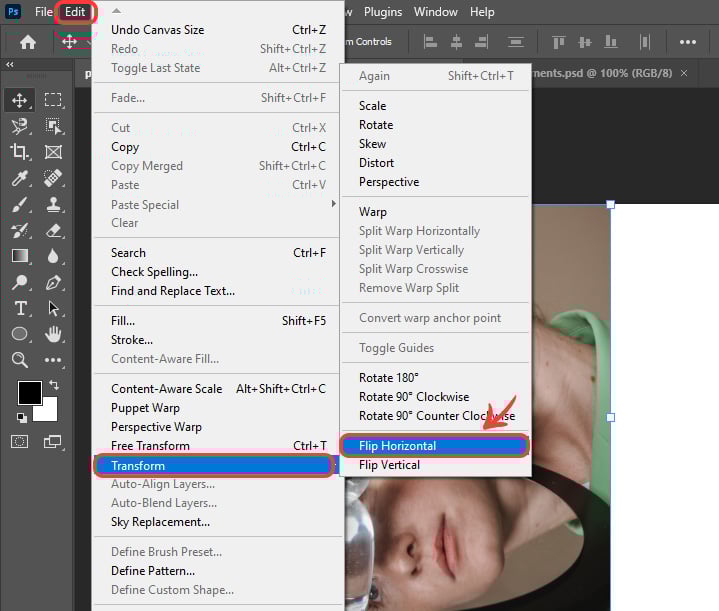
You'll see that image will be flipped but remains in the same position;

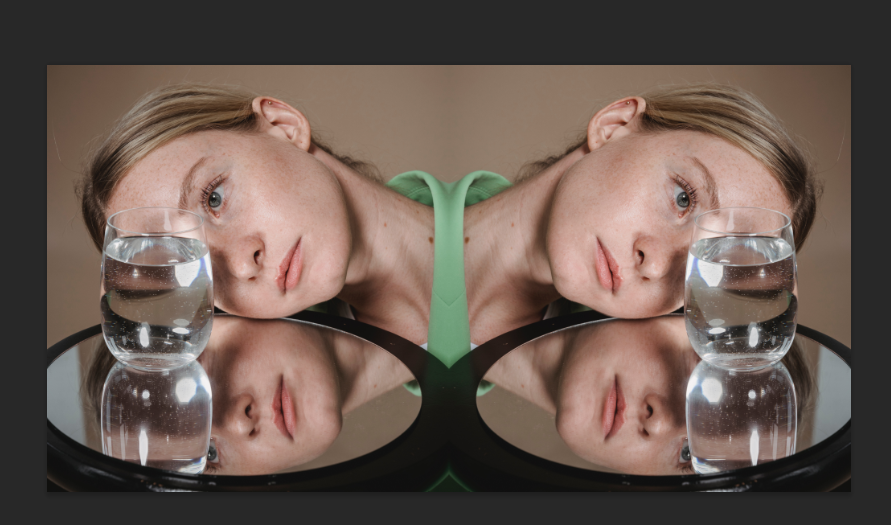
Now, you just need to place the top layer on the expanded canvas side. Click the Selection Tool in the toolbar, then click and drag the top image to the right while pressing and holding the Shift key. Place both images side by side.
There you go. You have successfully created the mirrored effect in the image!
NOTE: Make sure that snapping is active while you drag the image to the other side. It allows you to place the image in the right position. To turn on the snapping, simply go to the ‘View > Snap' by going to the above Menu Bar.
For further mirroring, maybe you would like to create and place the images vertically. For this, let's consider the same above example.
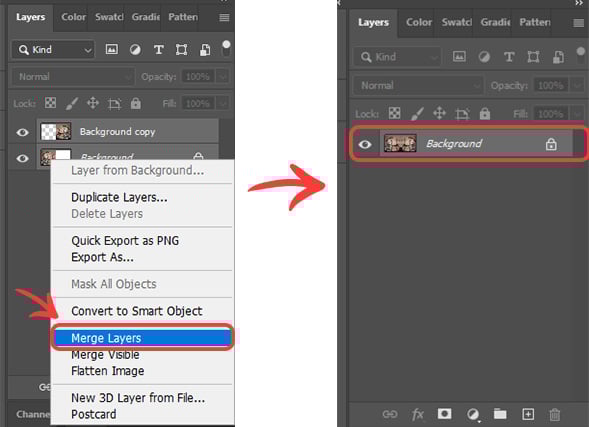
But before we move further, select both layers, the Background layer and duplicated layer and merge them to create a single unit. For this. select one layer and then click on the second one while holding the Shift key, both layers will be selected. Now, Right-click on either of the layer and click on the Merge Layers.
Next, duplicate the new layer that has been created through the merging of previous layers.
Now, expand the canvas to the side. Create the mirror as we did before. But this time, change the value of Height and on the canvas grid, click on the middle top arrow and OK.
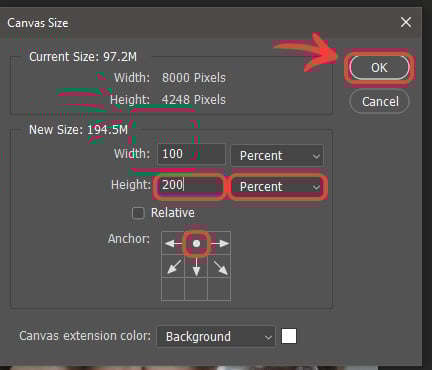
This will allow the canvas to expand to the downside;

Select the duplicated top layer and go to ‘Edit > Transform > Flip Vertical. You will get a vertically flipped top layered image as was done before.

Finally, place the top flipped layer on the expanded canvas part by using the Selection Tool through the click and drag method while pressing and holding Shift with Snapping turned on.
Congratulations!
You can create appealing visuals using these simple steps to create the mirror effect in your photos. Be creative while using the right images for this. You will get amazing results!
Different sizes will make a difference and allow you to expand your vision toward new imagination. Let's create a new creative world of imaginary mirrors.