How to Straighten a Crooked Image in Photoshop
This page may contain links from our sponsors. Here’s how we make money.
Have you ever seen a photo and gotten a feeling that something is wrong with the image, even though the photo is beautiful? Sometimes, small things can ruin a photo that has the potential to be perfect.
In this generation, where everyone can be a photographer with a smartphone, the chances of capturing crooked images have increased. So how can you fix these crooked images? Don't worry because Photoshop offers an easy way to fix crooked images.
In this article, we'll learn how to straighten a crooked image in Photoshop in the simplest way possible.
Before starting our tutorial, let's see when we should straighten a crooked image and when not.
When Should We Straighten a Crooked Image?
Let's just admit what we feel about a crooked image. For one thing, a crooked image is not pleasant to look at. Even if you're not a professional photographer, you'll something is off in that photo. Remember, even a little crooked line can ruin a perfect photo. Hence, if you notice any crookedness in your photo, whether it's a crooked horizon grass line or the tip of a building, go ahead and fix it.
When We Shouldn't Straighten a Crooked Image?
Well, these crooked images need to be fixed unless they are crooked on purpose. Some photographs are taken from an angle to make them crooked intentionally. This is done through perspective distortion, not because someone is holding the camera tilted by accident.
If any image is taken this way to give an artistic effect to it, it's you better leave it that way. Street photographers take photos of roads, bridges, or buildings with their cameras slightly tilted to bring an aesthetic vibe to them.
Let's get started with the tutorial!
Straighten a Crooked Photo Using the Crop Tool
Step 1
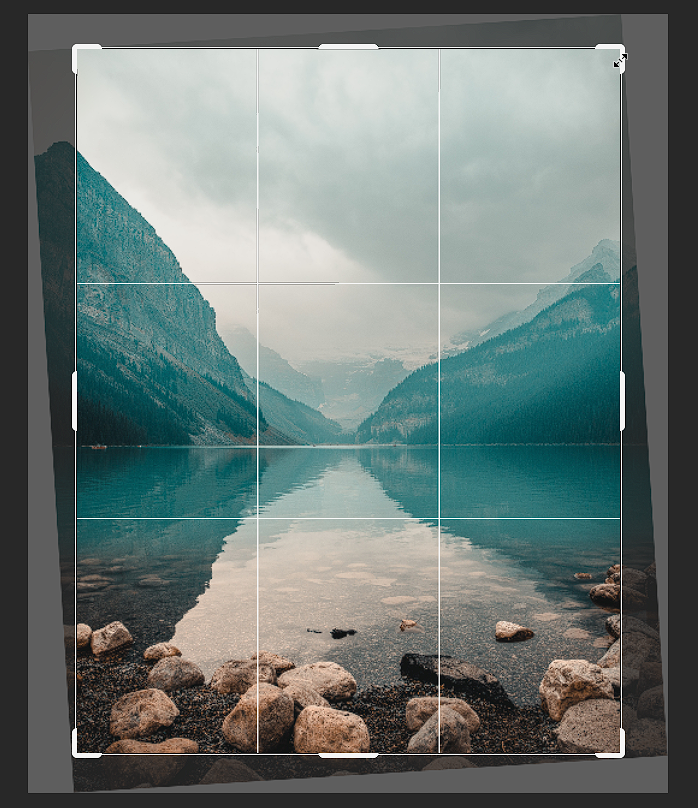
Fixing a crooked image requires identifying a line that you'll straighten. So, the first step here is to identify which line should be straightened. For reference, I am providing a list showing the probable horizontal lines you may get in an image.
- Straight horizon between the ground and sky
- Horizontal line along a water body (lake, ocean, etc.)
- Horizontal line on buildings (siding, bricks, etc.)
- Flat rooflines of buildings
- Side of a building (vertical)
- Street signs/ poles (vertical)
Step 2
After you identify and choose the line you want to fix, select the Crop Tool from the toolbar you see on the left side of the interface. The shortcut key for this tool is (C).
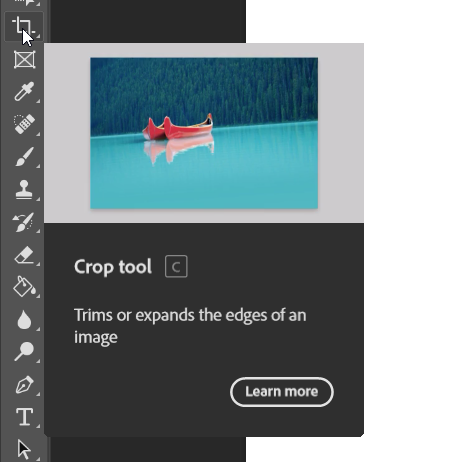
Step 3
When you select the crop tool, you'll see a toolbar associated with the crop tool appear at the top of the interface. Here, along with Ratio, Swap Height and Width, and other crop options, you'll get a Straighten Tool. This tool looks like a tiny level. Select the straighten tool.


Step 4
Once you activate the Straighten Tool, all you need to do is draw across the line you want to straighten up. Your work is pretty much done here because Photoshop will take care of the rest. Photoshop makes it super easy to straighten a crooked line in a photo through the Straighten Tool. Draw and identify the line, and the rest will be done automatically.

Step 5
After you draw the line, click on the checkmark on the crop toolbar to confirm your action. And your crooked image is fixed.
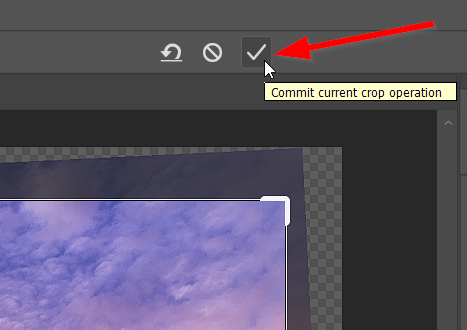
Note: Now, you might need to crop your image a little bit if you find any white space around the outside of the photo after straightening it. Just grab those handles that appear around the edges and drag them to crop the image.
Straighten a Crooked Photo Using the Ruler Tool
Step 1
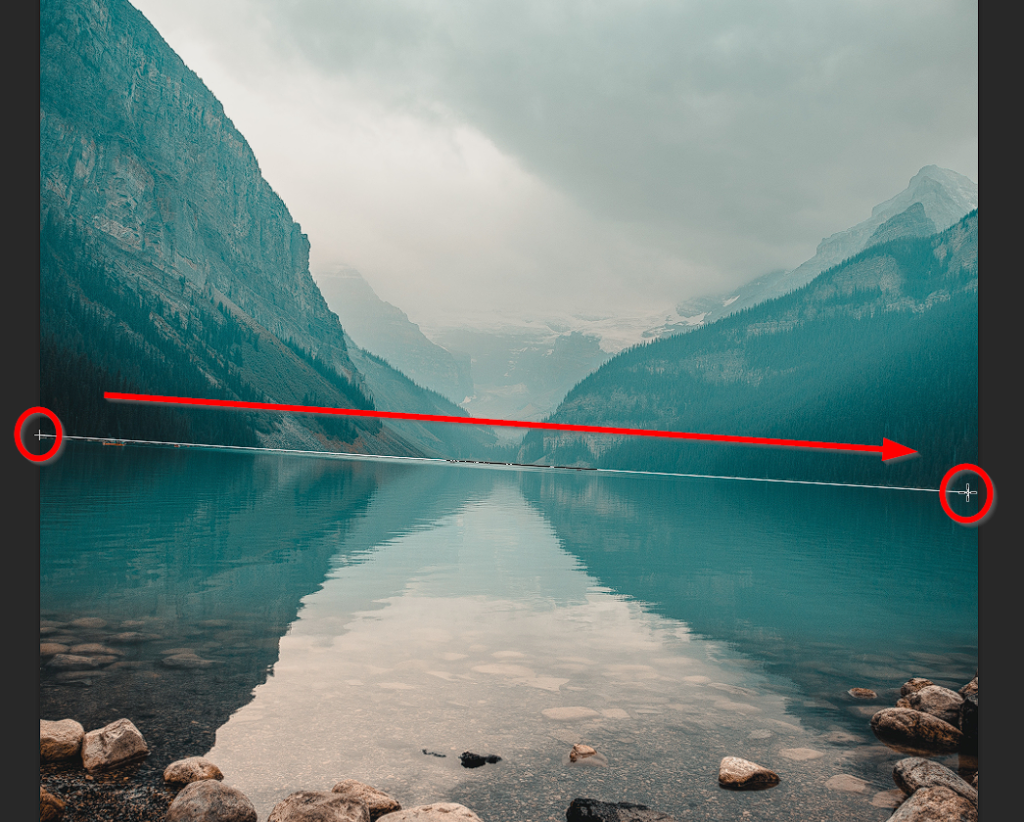
Open the crooked image and identify the line you want to fix.
Step 2
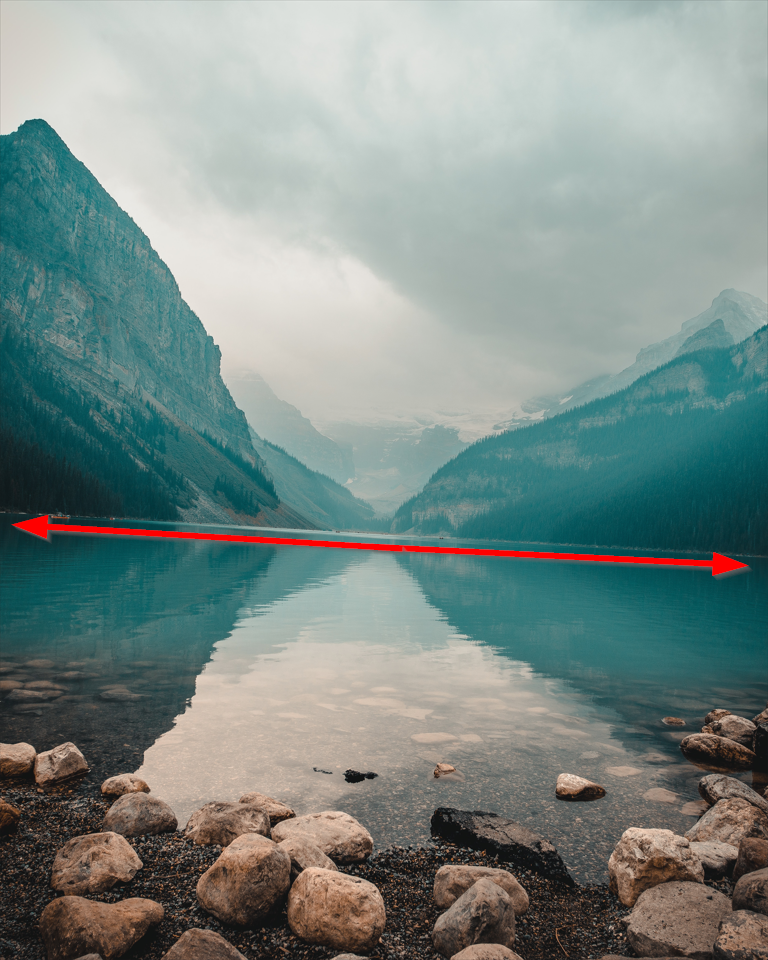
Select the Ruler Tool from the toolbar. The ruler tool is located inside the Eyedropper Tool. Right-click on the eyedropper tool and you'll see the ruler tool in the drop-down menu.

Step 3
With the Ruler Tool activated, click and drag along the line that is supposed to be straight. Photoshop will work based on the line you just drew along the edge of the line you want to straighten up.
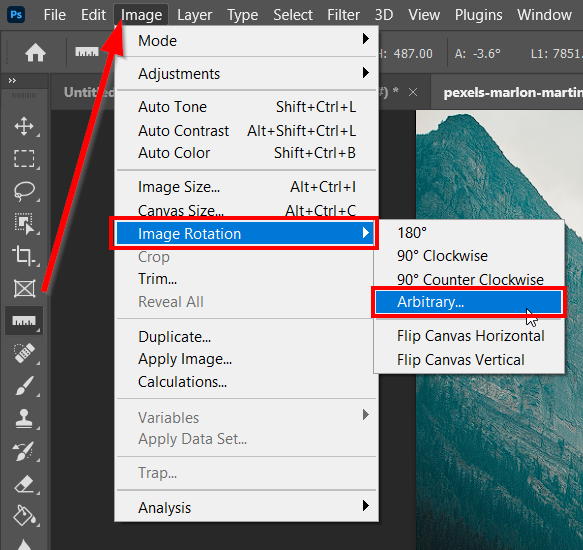
Step 4
Go to the overhead menu, and select Image> Image Rotation> Arbitrary. This will rotate your image based on the line you drew with the ruler tool.
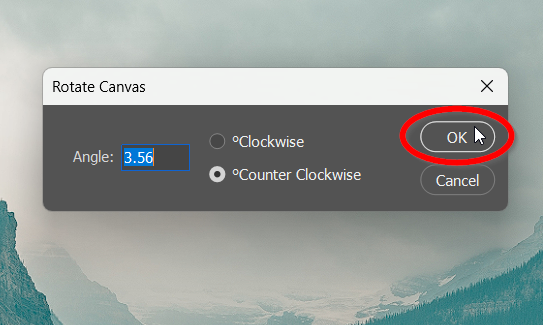
Step 5
Once you choose Arbitrary, a dialog box will pop up mentioning the value of the angle Photoshop chose for your image rotation. Click Ok to finalize your action.
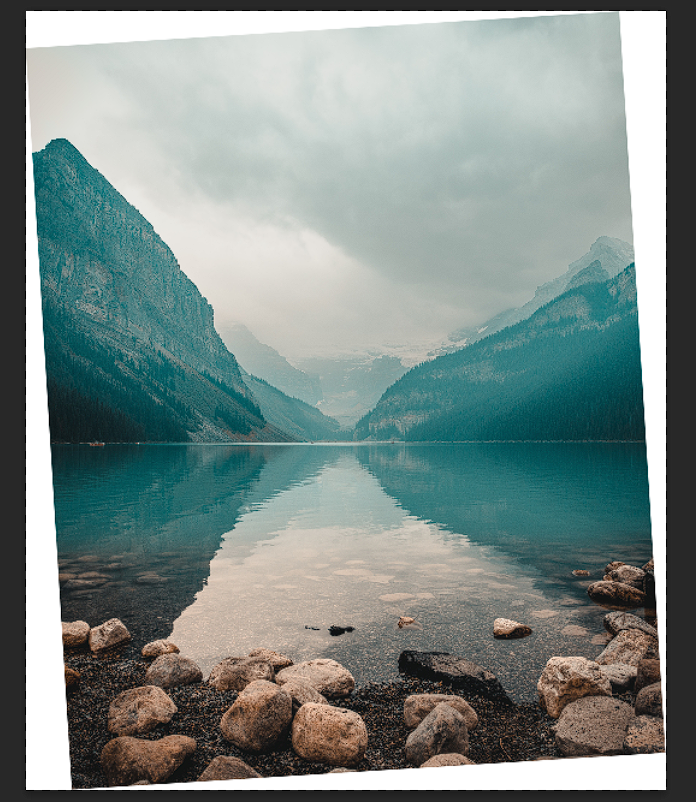
Step 6
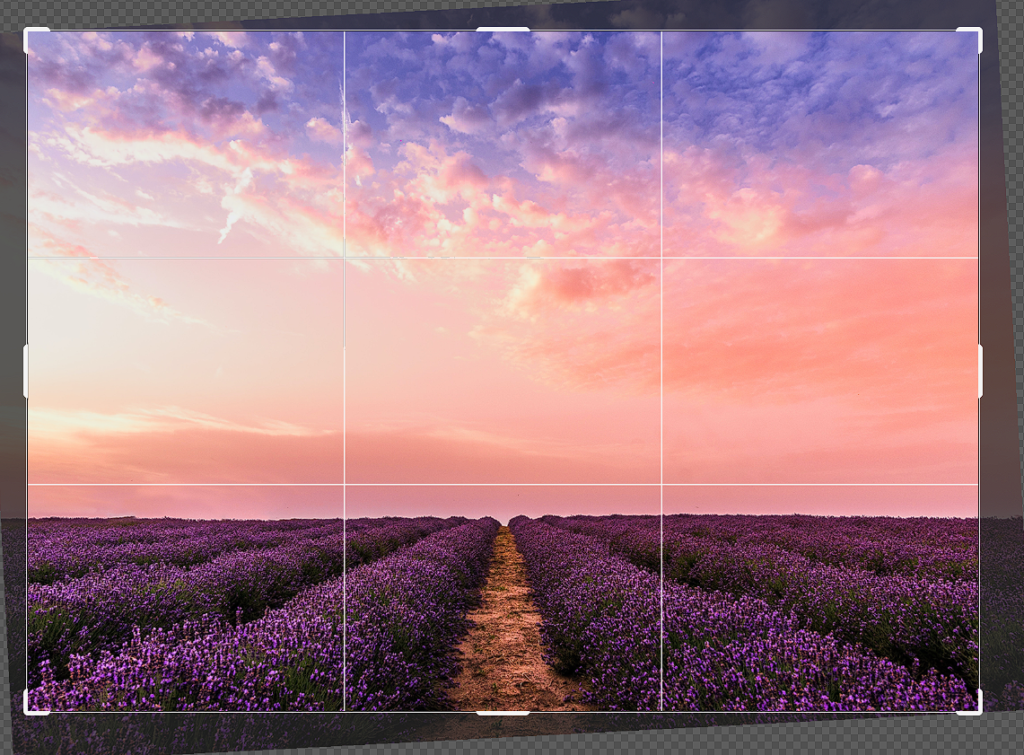
As we just rotated an image inside the document file, there's a chance it will leave some white areas around the photo. So, we need to crop those white areas away. For cropping, select the Crop Tool (C) from the toolbar. Selecting the crop tool will provide a bounding box and handles around the photo. Click and drag those handles to crop the photo.
The chances of capturing crooked photos are always there. Fortunately, Photoshop has made it incredibly easy for us to straighten them. I hope you find this article helpful.
The following images were used in this article:
Please note: These images feature a straight horizon. We edited them to make the horizon crooked so we could demonstrate the steps in this article.