Tutorial: Web 2.0 Logo Reflection in Vector format with Illustrator
This page may contain links from our sponsors. Here’s how we make money.
You will probably find dozens, if not hundreds of tutorials on how to do this in Photoshop, but I'm going to show you how to do it in Illustrator (vector). The advantage? You can scale it up for a roadside billboard if you like. That's the power of vector graphics. All you have to do is make it once and you can change the size as many times as you like, without losing quality. I'm tempted to say that this (logo reflection) effect might actually be easier to do in Illustrator in the first place. Man, the web is definitely a creature that likes to follow trends. Let's break one shall we? . . .

This tutorial was actually requested by a BittBox reader, Mr.Byte, and his idea instantly caught my attention. Thanks Mr.Byte. Another thing to note: I included a lot of screenshots for clarity purposes, but this process is actually very simple. In this tutorial, you will learn how to align different shapes automatically without stressing about exact figures and numbers. You will also learn to invert particular set of text or numbers. This tutorial is going to be very interesting as the result is pretty amazing and you will be delighted to see the end result of your own hard work. It is a lengthy process but each step is so interesting and common techniques are used in combination one after the other to achieve final results. You will learn more about the transparency effect of illustrator and how it affects the particular geometric shape.
To get started, Open your vector logo in Illustrator. I'm using the BittBox logo as an example, which has a dark background, but using the method I'm about to show you, background color isn't a factor. Here is what my Illustrator file looks like when I start: (vector logo on a flat color background)

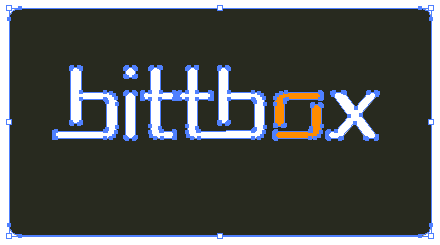
This is what it looks like selected:
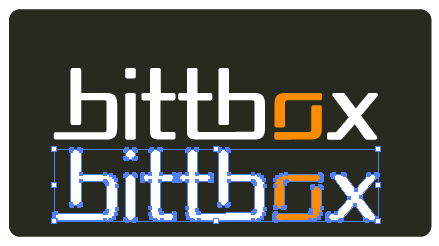
First, make a duplicate of your logo by holding the “option/alt” AND “shift” keys, drag down, and release. Using this method allows you to keep your duplicate aligned exactly to the original. If you simply copy and paste, you will have to re-align the two logos.
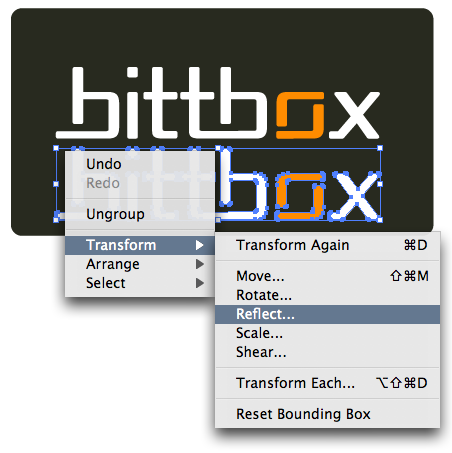
Reflect the duplicated logo by right clicking (control + click: Mac) and selecting Transform > Reflect.
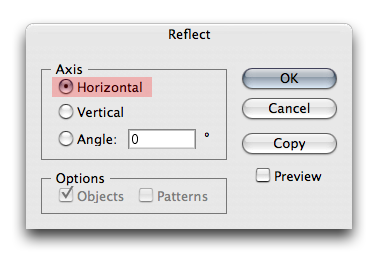
When reflecting, choose the “Horizontal” axis.
You should see your reflected logo similar to this:

Now move your reflected logo up to meet the bottom of the original. I like to leave a very small gap in between the two. It's just my preference, but I think it adds a little extra dimension.

Select your original logo and “lock” it. This is setting up for a step to follow.
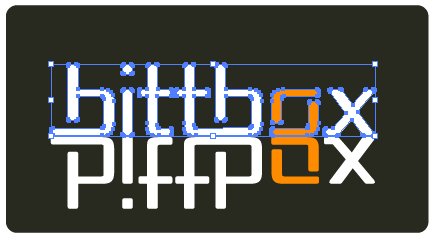

Now that your original logo is locked, create a rectangle on top that covers the entire path of your reflected logo. We are going to create an “Opacity Mask” out of this shape to control the appearance of the reflected logo. Opacity masks are similar to clipping masks in Illustrator, except they control transparency instead of visibility.

Fill that rectangle with a White-to-Black Gradient, and set the angle to -90. Opacity masks are always made using a White-to-Black or Black-to-White gradient, White being visible, and Black invisible.

This next part is up to you, but I usually make some adjustments to the gradient itself, to get my desired effect out of the Opacity Mask.


Now select both the reflected logo, and the gradient rectangle. (You can do this by hitting Control + A: PC, or Command + A: Mac, if everything else is locked like I mentioned above)

Apply your transparency mask by clicking on the arrow in the upper right of the Transparency Palette. Note: There is no right click for this, it must be accessed through the Transparency palette.

Now your gradient filled rectangle is controlling the opacity of the reflected logo!. You should see something similar to this, but it isn't quite right yet, one more tweak, and your done.

Now to make the reflection a little more realistic, select your reflected logo, and take the transparency down. ( I took mine to 40%, but it's up to you to get your desired effect)

And here is the final result:

You will have probably seen this transparency effects in different movies and posters. Now, you will be wondering how easy it is to create such beautiful effects on illustrator.
Now you have a 100% vector logo with a spiffy Web 2.0 Reflection that is more versatile than any Photoshop tutorial can offer you. It can be scaled and manipulated to any size, for any purpose. You can import it into Photoshop and create raster images of any proportion. A great thing to have hanging around on your hard drive when you need a resize.
