How to Use the Slice Tool in Adobe Illustrator
This page may contain links from our sponsors. Here’s how we make money.
The Slice Tool in Illustrator is an excellent tool for dividing artwork into smaller pieces for various purposes, like web design, logo creation, creating interactive elements, and more. It separates parts of an element that can be saved as individual images.
In this tutorial, we'll discuss the concept of the Slice Tool and provide a step-by-step guide on how to effectively use it in Illustrator.
What is the Slice Tool in Illustrator?
The Slice Tool enables us to create sections within our artwork, a process called slicing. With the slice tool, you can segregate objects and save these slices individually as images. Additionally, you can export and customize these individual slices.
Why Do We Use the Slice Tool?
The Slice Tool is an essential asset in the realm of graphic design. It has various uses for designers working with Illustrator.
- The Slice Tool enables us to divide our artwork into individual sections, allowing us to create web layouts and interfaces.
- It also enables designers to adjust specific portions of artwork without changing the entire piece.
- As mentioned earlier, the Slice Tool can divide artwork into smaller sections, each of which can be saved as an individual image. These saved slices can be exported afterward.
- The slices created using the Slice Tool help us create interactive elements for web design.
How to Access the Slice Tool
In Illustrator, the Slice Tool is located in the left toolbar of the interface. The shortcut key for accessing this tool is Shift + K. Alternatively, you can access this tool from the overhead toolbar. Navigate to the overhead toolbar, open the Object menu, and select Slice from the dropdown menu.

How to Use the Slice Tool?
Step 1
Select the Slice Tool (Shift + K) from the left toolbar.
Step 2
Move the cursor over the object or image. Click and drag to select the area you want to create a slice.

Step 3
To select a slice, click on the Slice Selection Tool from the left toolbar. It's located under the Slice Tool section of the toolbar. Right-click on the Slice Tool to open the extended menu and select the Slice Selection Tool. It looks like the Slice Tool but has an additional tiny cursor icon.

If you want to select more than one slice, hold down the Shift key and select the slices one by one.
Step 4
With the slice selected, you can resize or reposition the slice as you desire.
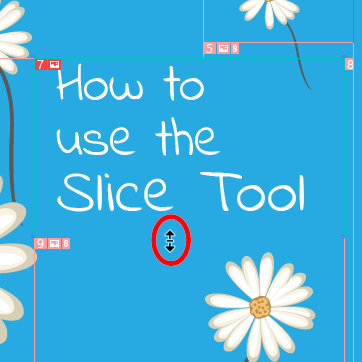
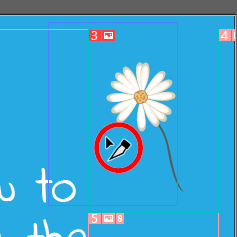
- Resizing Slices: Hover around the edges of a slice while the Slice Selection Tool is activated until you see a double-sided arrow icon. Click and drag the arrow to resize the slice.
- Repositioning Slices: To relocate or reposition a slice, click and drag the slice to your desired place and release the mouse button.
- Delete a Slice: Select the slice you want to delete using the Slice Selection Tool and press the Delete button on the keyboard.
How to Lock Slices in Illustrator?
When you're done positioning and resizing the slices, you lock them. There are two ways to lock the slices in Illustrator:
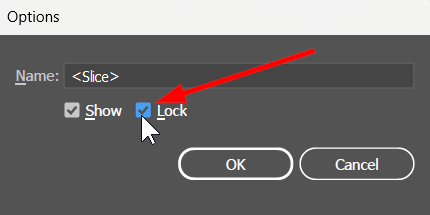
Layers Panel: Open the Layers Panel and double-click on the slice layer. A new window will open. Click on the checkbox next to the “Lock” to lock the slice.
View Menu: Navigate to the View menu located in the overhead toolbar. Select Lock Slices from the drop-down menu to lock all the slices.

Note: Using the same method, you can also hide the slices by selecting Hide Slices from the drop-down menu.
How to Export or Save Slices
After we prepare the slices, it's time to save them. Remember, the slices we create are for the web, so when we save them, we must select Save for Web (legacy). Follow the step-by-step instructions for saving slices in Illustrator:
Step 1
Go to the overhead toolbar, select File, and choose Export. From the extended menu, choose Save for Web (legacy).

Step 2
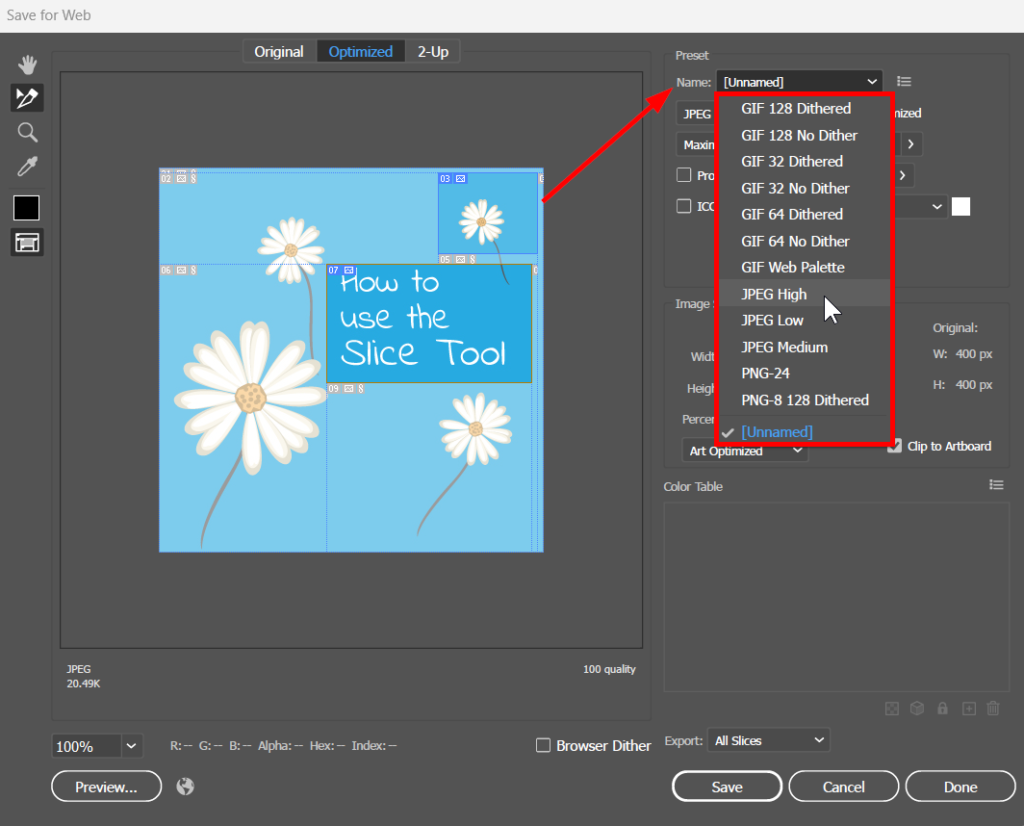
When you choose Save for Web (legacy), a new window will open. Choose the format for the slices you are saving in the Name box.
Step 3
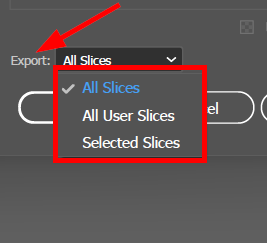
In the Export section, choose how many slices you want to save. Choose from the three options given in the drop-down menu.
Step 4
Click Save to save your slices.

Step 5
Select a location where you want to save the slices as images. You'll find the saved slices in an image folder.

Note: Make sure you give proper names to the slices you save and organize them effectively to avoid confusion in your work.
The Slice Tool is great for designers, providing the ability to create interactive elements, divide artwork, optimize exports, and more. Understanding this tool will be a great help in your design career.
