Illustrator Tutorial: How to make a Vector Glass Button
This page may contain links from our sponsors. Here’s how we make money.
If you are a regular BittBox reader, this is the post you've been waiting for! Not only will this tutorial help you make your own vector glass buttons, bars and who knows what else; it will help you to understand the structure of my free files a little better, and how to customize them easier. This tutorial covers how to create a basic vector glass style button in illustrator CS. Basic knowledge of Illustrator is required, but I tried to make it as strait-forward as possible.

Make a new (blank) Illustrator file, name it, and save it to your desktop. Select the “Rounded Rectangle” tool.

Click once on the artboard, without dragging, to bring up the Rounded Rectangle tool options dialogue box. From here you can set the exact width, height, and corner radius of your button.

Click “OK” or hit enter to create your basic button shape.

Next, apply a drop shadow, by going to the “Effect” menu and select > Stylize > Drop Shadow.
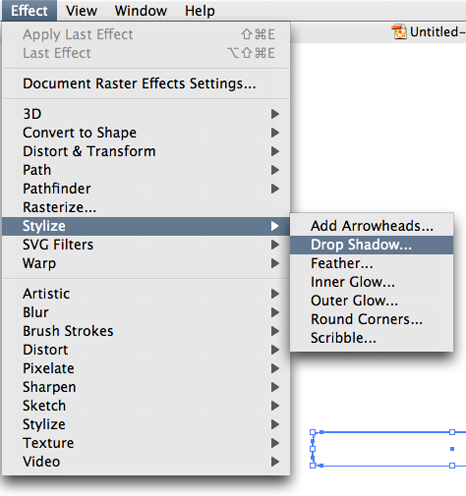
Choose your drop shadow settings. Note: Click “Preview” to see the settings live.

Now we have our basic button shape with a drop shadow.

Select your fill and apply the default black-to-white gradient from your swatches palette. In the Gradient palette, with your fill selected, click on the left white box to select the left gradient color. Now in your color palette, use the sliders to change that left color to a gray, instead of white. (or you can enter the values in the text fields, but they all need to be the same value to be a gray in RGB. i.e. 210, 210, 210, or 190, 190, 190. Also, in the gradient palette, change the angle to 90.

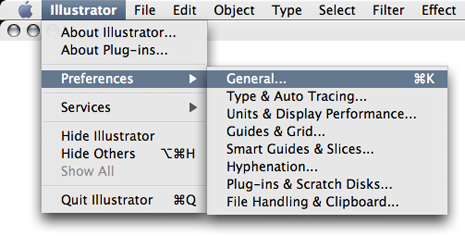
Next, open your Illustrator “Preferences > General” and make sure your keyboard (Nudge) increment is set to 1 px (1 pixel).

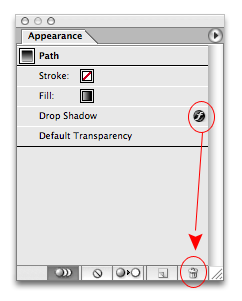
Now, using the Select Tool (black arrow), select your button shape, and copy and paste it. Then you need to get rid of the effects that it copied, so in the Appearance palette, drag the drop shadow of the newly pasted shape to the trash. Also, fill the newly pasted shape with white.
Use the Direct select tool (white arrow) to make your 2nd shape smaller than your original by selecting the points and moving them with your keyboard arrows. (Nudging) I usually do this in 3 steps as follows:


Now use the Delete Point tool and get rid of the bottom 2 points in your 2nd shape.

Use the Convert Anchor Point tool to get rid of the curves on the bottom 2 remaining points. Then select those same 2 points and Nudge them up 4 pixels.

Your second shape should now look like this:

Select both shapes like this:

We are going to align these shapes together, but first make sure your align palette is not set to align to the artboard.
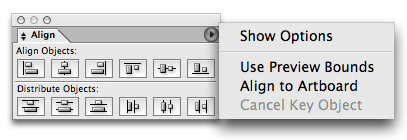
Align your 2 shapes to each other horizontally and vertically by hitting these 2 buttons in the Align palette. (doesn't matter what order)
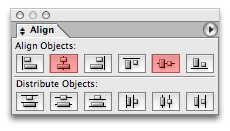
Now both shapes should be aligned like below. Select the original shape and lock it's position by hitting “Command + 2” Mac, or “Ctrl + 2” PC.

Use the Rectangle tool to make a rectangle that completely covers your second shape. (the reflection shape)


Fill that shape with the default white-to-black gradient with an angle of -90

Select the top rectangle with the gradient and the reflection shape at the same time. Once selected, in the Transparency palette, click on the little arrow in the upper right. Select “Make Opacity Mask.” This creates a mask out of the top shape. White being visible, and black being invisible. Play around with the color values of your gradient to get your desired effect. It works kind of like a clipping mask, but you have to apply it through the transparency palette. There is no right click for this.

And presto! A glassy – completely vector image using only 3 shapes in illustrator. You can play with transparencies and all kinds of other options. I'm not going to give away ALL of my secrets, but I think this is a pretty generous post none-the-less. NOW! Go out there and make the UglyNet a little easier on the ol' eye-socket, will ya?

Download the file I used for this tutorial:

Includes: – AI (1) EPS (1) SVG (1) PNG (1)
