Illustrator 101: One Gradient Across Multiple Paths
This page may contain links from our sponsors. Here’s how we make money.
Again, this is a rather trivial Illustrator skill, but with a program as robust and sometimes mystical as Illustrator, you can often get something to work and never know why. Other times you can't get something to work, something that seems like it makes a lot of sense, and all you are missing is a simple bit of knowledge to rid you of your frustrations. In this quick tip, we will touch on the importance of compound paths, as opposed to groups, when applying a single gradient across multiple shapes in Illustrator.
This is a really simple technique that is worth sharing to all the audience whoever are using the illustrator software. You may select a desired pattern to be applied across multiple geometric figures in a specific order. You may practice this less common technique across multiple geometric figures to achieve desired results. When it comes to adobe illustrator software, this comes with wide range of advantages and features that are designed to achieve all kind of results. Single feature cannot be designed to perform multiple complex functions therefore one must be aware of all the alternate and additional features before practicing their skill on adobe illustrator.
Gradient: refers to the magnitude of colors changing across different points or contrast observed over different points. It is a really important feature as it enhances the contrast and introduces a unique pattern of colors. Dozens of adobe illustrator features have been designed in regards to application of gradients. You must practicing using all of those tools before practicing gradients on your art pieces.

In a Nutshell:
It may make sense to make a group when you want to apply a gradient across more than one shape, but Illustrator disagrees. In order to make a gradient stretch across more than one individual shape in Illustrator, you have to make a “compound path.”
A gradient applied to a “group” of shapes will apply the gradient to each shape individually, like this:

A gradient applied to a “compound path” will achieve the desired result, like this:

Do It Yourself:
1. Lets say that you have a few individual shapes/paths that you would like to apply a single gradient to, like below: (very simplified example)

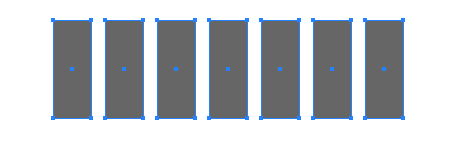
2. Make sure that they are ungrouped, and that you can select them individually like this:

3. Now, select all of your shapes, and Control + Click (right click) on them somewhere to bring up your Options. Select “Make Compound Path.”

4. Now apply your gradient, and it will stretch across all of your shapes! Simple as that.

While applying a gradient across multiple paths, you have an option to choose among variety of settings and customization so that you may design a perfect drawing of your own choice. Apply the gradients in order of your own choice so that the results never appear to be boring to the viewers.
