How to Fill a Shape or Object in Adobe Illustrator
This page may contain links from our sponsors. Here’s how we make money.
You may have finished your design, but it still feels incomplete. Filling objects or shapes will help to complete the design. In Adobe Illustrator, you can fill objects or shapes with patterns, images, and colors or gradient colors. In this article, we'll learn how to fill a shape or an object in various ways.

These resources from Vecteezy are used in the tutorial:
Method 1: Filling an Object with Color Using the Eyedropper
This is a basic and easy way to fill an object with color. Let's see how you can use an eyedropper to fill color in a step-by-step process.
Step 1
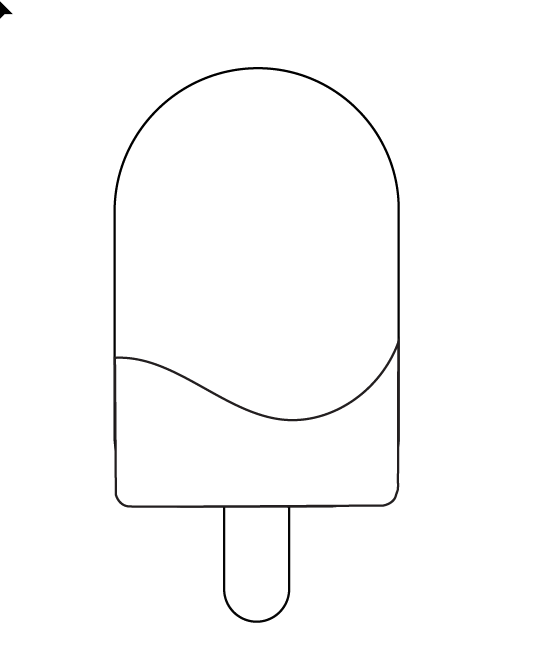
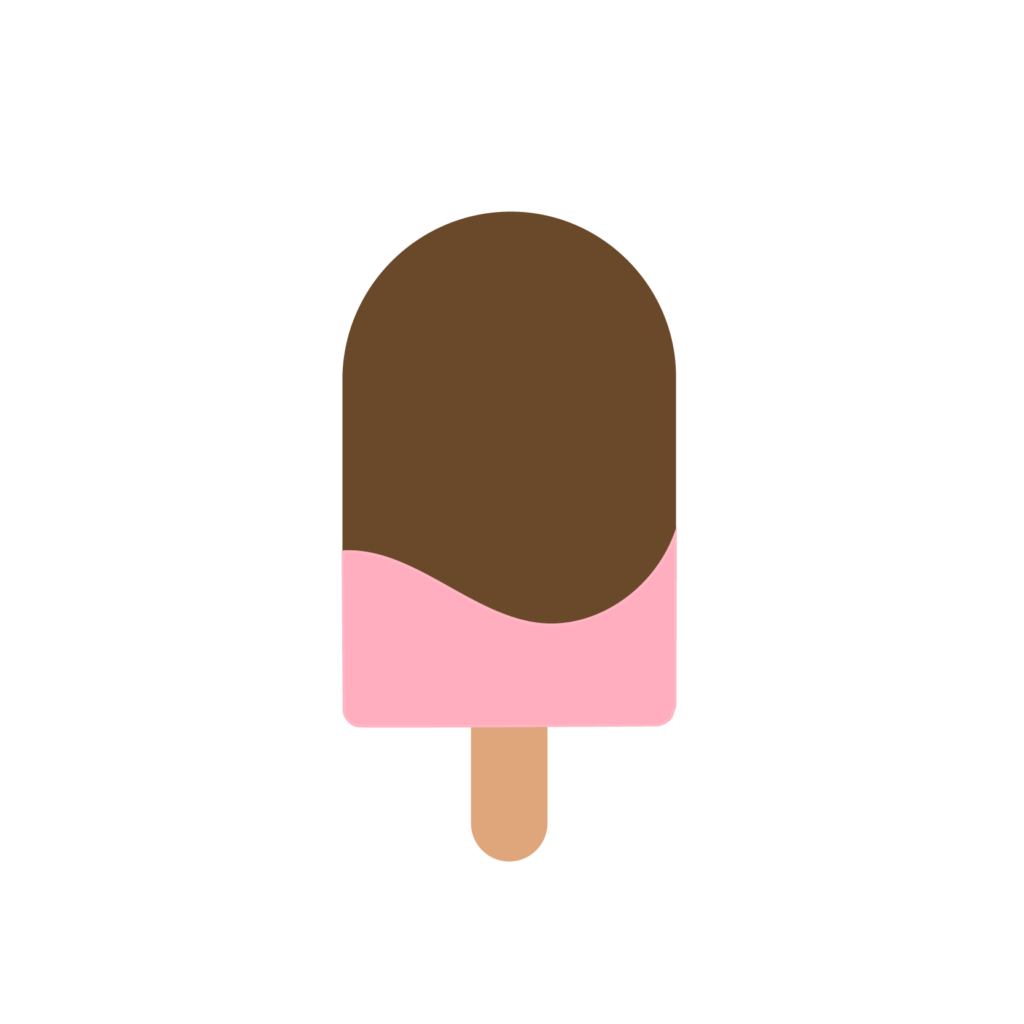
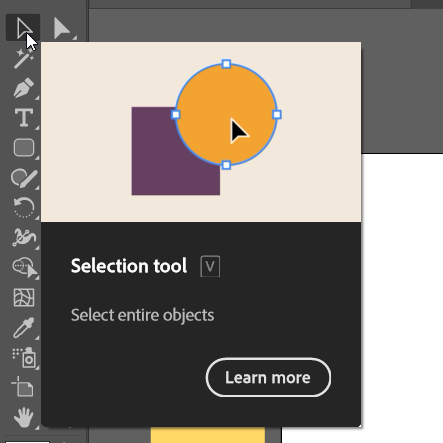
If your object is ready, select the object or the part of your object you want to fill in using the Selection Tool (keyboard shortcut V).
Step 2
Select the Eyedropper Tool from the left-side toolbar. The shortcut key for this tool is (I).
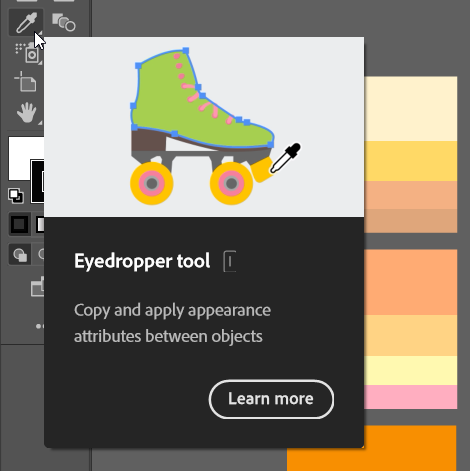
Note: You need to have your color palettes ready for use beforehand. You may have your own customized palettes.
Step 3
Click on the color you want to fill in with from the palette. Clicking on the color will fill the portion of the object you selected.


Method 2: Filling Objects with Swatches Using Swatch Panel
Filling objects or shapes with swatches may sound complicated, but all you need to do is select the object and then select the swatch you want to fill the object with. In this method, you can fill your object with various types of patterns.
Step 1
Select the object or the shape you want to fill in with swatches.
Step 2
Go to the Swatches Panel. You will find the Swatches Panel around the other panels on the right side of the Illustrator. If you can't find it then you need to enable it. Go to the Window, located at the top toolbar, and select Swatches from the drop-down menu.
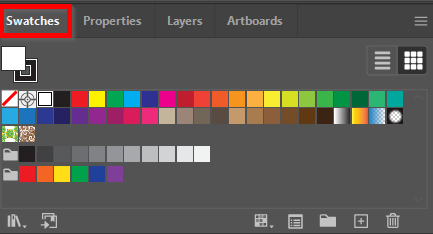
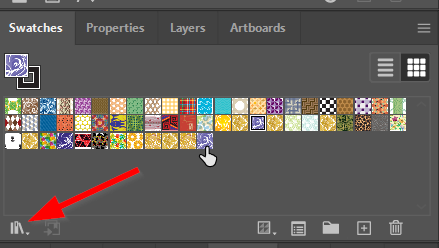
Note: Click on the Library button located on the bottom left of the panel to explore more options for swatches.
Step 3
Select the swatch you want your object to be filled in with. Clicking on a swatch will fill in the object with the swatch.


Note: Alternatively, select the swatch first and then draw an object. Your object will be filled in with the swatch as you draw it.
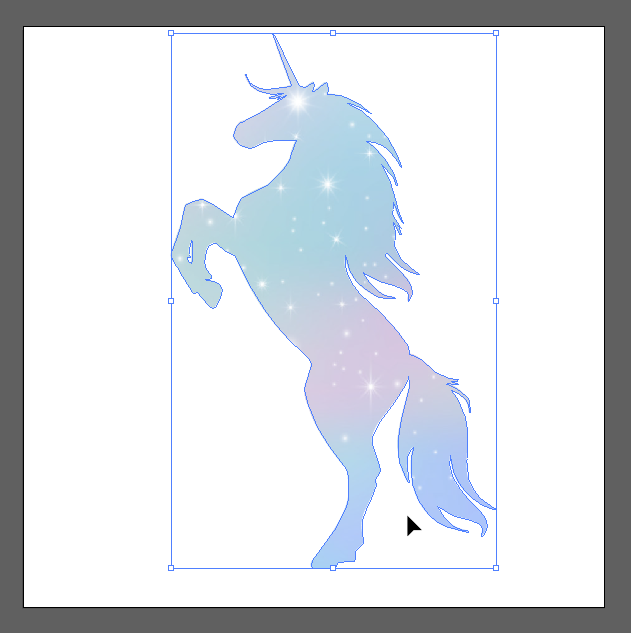
Method 3: Filling Objects with Images Using the Clipping Mask
This method allows you to fill your objects or shapes with any image. It adds more details and visual aids to your design than a standard fill with color.
Step 1
Place the image you want your object to be filled in with. Make sure you embed the image after placing it.

Step 2
Bring your object on top of the image. Place the image just the way you want to reflect it on the object because the object will be filled with the exact area of the image that's under the object.


Step 3
When you're done with placing the image, select both your object and the image and select Make Clipping Mask from the right-click menu. Your object is now filled with the image using a clipping mask.

Method 4: Filling Object with Gradient
This is almost like using the swatches but a little more complicated. For this method, we're using text for demonstration.
Step 1
Type your text using the Type Tool (T).

Step 2
Select your text using the Selection Tool (V).

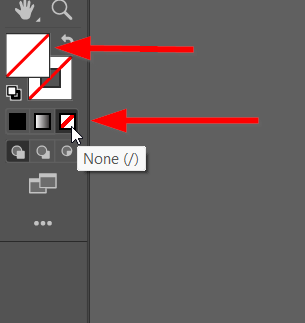
Step 3
While your text is selected, go to the Fill option from the left toolbar and select No Fill. Your text seems to disappear on the white background, but don't worry about that.

Step 4
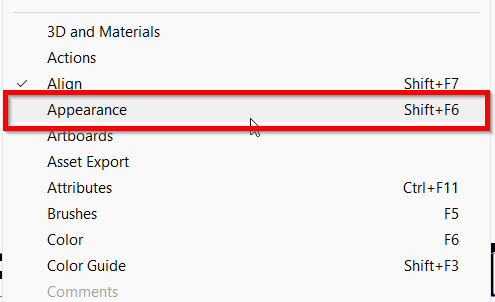
Go to the Appearance Panel. You can find it in the Window from the overhead toolbar.
Step 5
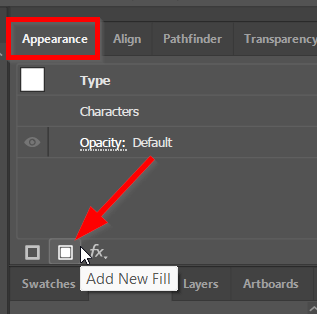
In the appearance panel, click on the Add New Fill option. This is a small box you will find at the bottom of the panel. Right after you click the Add New Fill option, a Fill option will appear in the panel.
Step 6
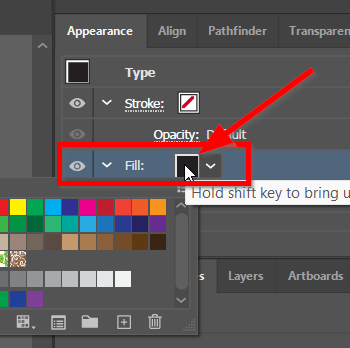
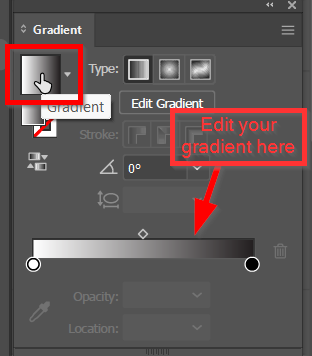
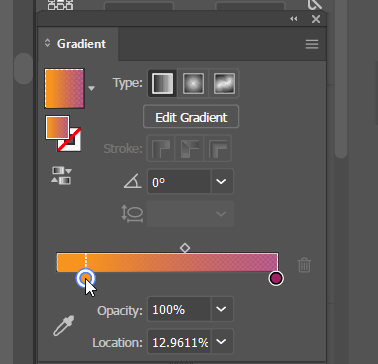
Select the Fill option, and the swatches of colors will pop up. While the Fill option is selected, go to the Gradients panel and select your gradient color.

Filling objects or shapes is a fun way to be creative with your design. You can choose from the various filling methods mentioned in this article and get unique results from each of them.