Photoshop Tutorial: Make a Cool 3D Room from Scratch
This page may contain links from our sponsors. Here’s how we make money.
Time for a little Photoshopping today! I want to share a very easy way to create a cool 3D room using only 2 images. We are going to start with 2 textures, and end up with a 3D room with some cool lighting effects in only a few steps. Let's get started.

Step 1: The Images
In order to pull this off, we need to start with some cool textures. One should be a wood floor, or wooden plank texture, and the other can be brick, or any kind of wall/concrete texture you want to use. I used these 2 images (below) provided by Shutterstock.com.


Step 2: Overlap the Images
To make this work, open your brick or wall texture first, then put the wood texture on top. The wood texture needs to be much wider than the artboard. (like below)
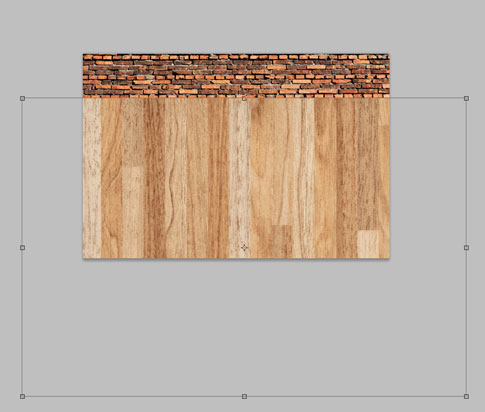
Step 3: Transform the Wood Texture
First, hit Command/Control + T to start the transform, then right click and select “Perspective.”

Bring the perspective in at the top.

Then, right click again and go back to “Free Transform.”

Now bring the top down. You might have to back and forth between free transform and perspective to get it to look the way you want.

Step 4: Adjust your layers
Now that you have taken your wood texture from a texture to more of a floor-like shape, we need to put the brick layer on top. So, move the brick layer above the wood layer and move it up until you like what you see. You should have something like this:

Step 5: Covert to Black and White (Optional)
We are going to now convert each layer to black and white individually. Select the brick layer and go to Image > Adjustments > Black and White.
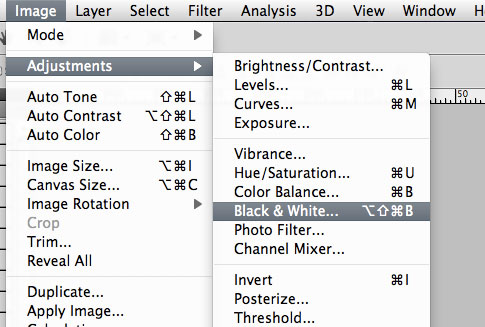
You can play around with it at this point, but I like to make the “Red” values darker, so I move the slider to the left.
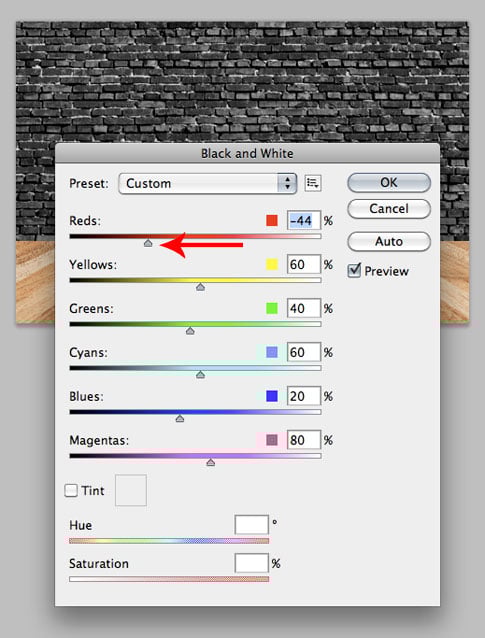
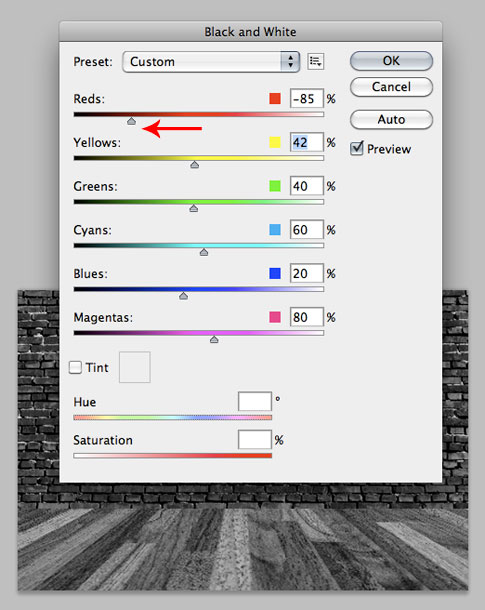
Do the same for the wood layer until you get it the way you like it. Again, I made the “Reds” darker.
Step 6: Gradient Overlays
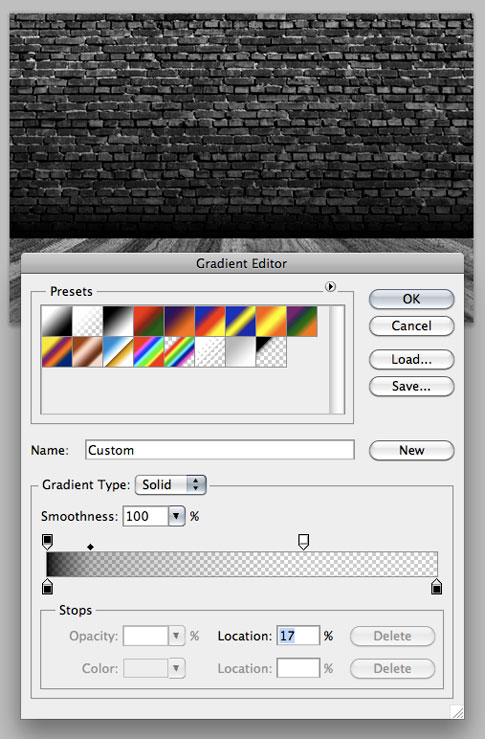
Next, let's put a gradient overlay on the brick layer. Here, we are going from black to transparent, from the bottom up. You also need to adjust the sliders a bit to make the gradient mostly transparent with a smaller black part at the bottom.
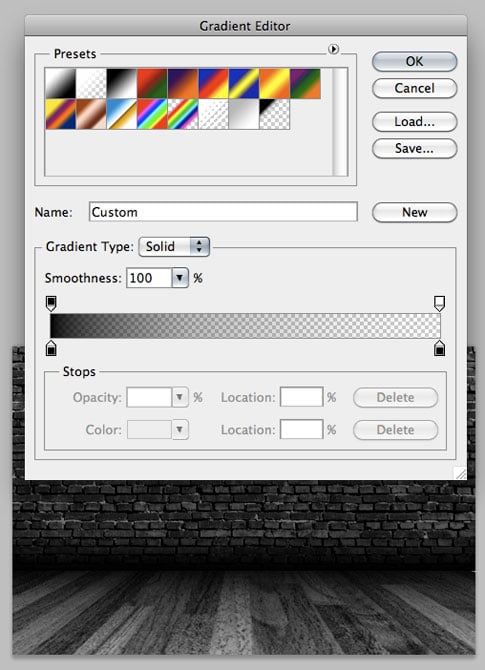
Do the same for the wood layer, but this time we're going from top to bottom.
Step 7: Flatten
The reason we are flattening the image is so we can apply a lighting effect, and we want the lights to be applied to the entire image, not just one layer. At this point, you should have something like this:

Step 8: Lighting Effects
Now, go to Filter > Render > Lighting Effects. Again, you can play around with these settings, but I like the Omni light for this particular effect. Depending on the size of your document, you can make the proper adjustments here to get a result you're happy with. Unfortunately, it's pretty much trial and error, because Photoshop's preview for this effect kinda sucks.

Step 9: Done!
We just took 2 texture images and made a cool 3d room in about 10 mins, and we never used more than 2 layers. Not bad. Your final result should look something like this:

Here is a poster I designed using this technique: (click for a closer look on Flickr)
